
Материнские платы MSI B550-A PRO - инструкция пользователя по применению, эксплуатации и установке на русском языке. Мы надеемся, она поможет вам решить возникшие у вас вопросы при эксплуатации техники.
Если остались вопросы, задайте их в комментариях после инструкции.
"Загружаем инструкцию", означает, что нужно подождать пока файл загрузится и можно будет его читать онлайн. Некоторые инструкции очень большие и время их появления зависит от вашей скорости интернета.


3
Safety Information
Safety Information
∙
The components included in this package are prone to damage from electrostatic
discharge (ESD). Please adhere to the following instructions to ensure successful
computer assembly.
∙
Ensure that all components are securely connected. Loose connections may cause
the computer to not recognize a component or fail to start.
∙
Hold the motherboard by the edges to avoid touching sensitive components.
∙
It is recommended to wear an electrostatic discharge (ESD) wrist strap when
handling the motherboard to prevent electrostatic damage. If an ESD wrist strap is
not available, discharge yourself of static electricity by touching another metal object
before handling the motherboard.
∙
Store the motherboard in an electrostatic shielding container or on an anti-static
pad whenever the motherboard is not installed.
∙
Before turning on the computer, ensure that there are no loose screws or metal
components on the motherboard or anywhere within the computer case.
∙
Do not boot the computer before installation is completed. This could cause
permanent damage to the components as well as injury to the user.
∙
If you need help during any installation step, please consult a certified computer
technician.
∙
Always turn off the power supply and unplug the power cord from the power outlet
before installing or removing any computer component.
∙
Keep this user guide for future reference.
∙
Keep this motherboard away from humidity.
∙
Make sure that your electrical outlet provides the same voltage as is indicated on
the PSU, before connecting the PSU to the electrical outlet.
∙
Place the power cord such a way that people can not step on it. Do not place
anything over the power cord.
∙
All cautions and warnings on the motherboard should be noted.
∙
If any of the following situations arises, get the motherboard checked by service
personnel:
▪
Liquid has penetrated into the computer.
▪
The motherboard has been exposed to moisture.
▪
The motherboard does not work well or you can not get it work according to user
guide.
▪
The motherboard has been dropped and damaged.
▪
The motherboard has obvious sign of breakage.
∙
Do not leave this motherboard in an environment above 60°C (140°F), it may damage
the motherboard.
Содержание
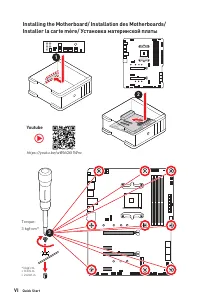
- 6 Installing the Motherboard/ Installation des Motherboards/
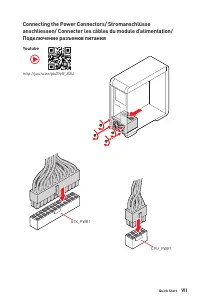
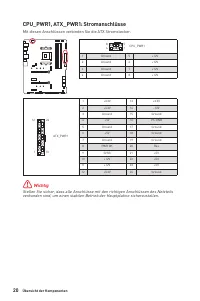
- 7 VII; Connecting the Power Connectors/ Stromanschlüsse
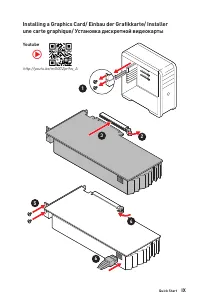
- 9 IX; Installing a Graphics Card/ Einbau der Grafikkarte/ Installer
- 133 Содержание; Безопасное использование продукции
- 134 Установка ОС, драйверов и утилит
- 136 Технические характеристики; GPU
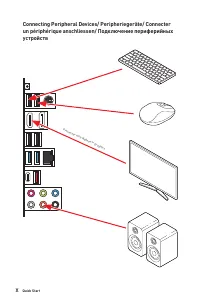
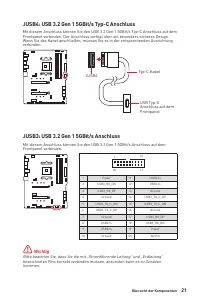
- 137 Подключение; USB
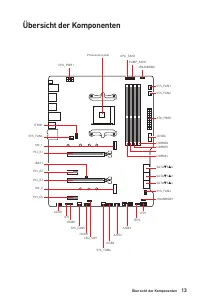
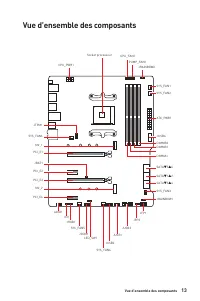
- 138 Разъемы на плате
- 139 Center
- 140 Эксклюзивные
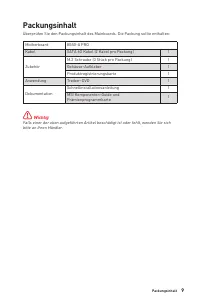
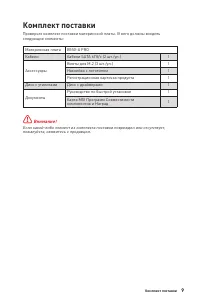
- 141 Комплект поставки
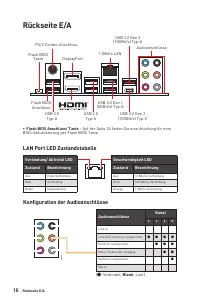
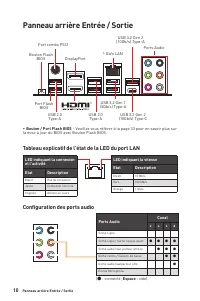
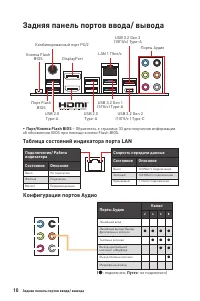
- 142 ∙ Порт/Кнопка Flash BIOS; Таблица состояний индикатора порта LAN; Порты Аудио
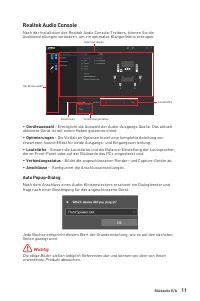
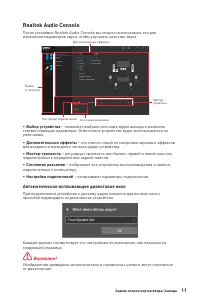
- 143 ∙ Выбор устройства; Автоматическое всплывающее диалоговое окно
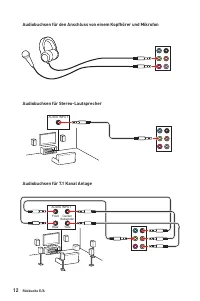
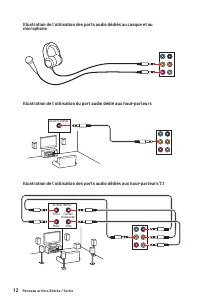
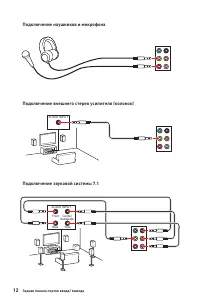
- 144 Подключение наушников и микрофона
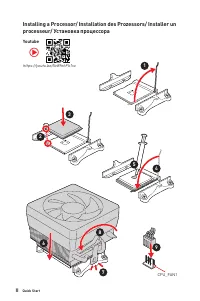
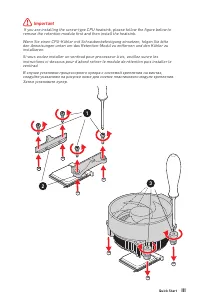
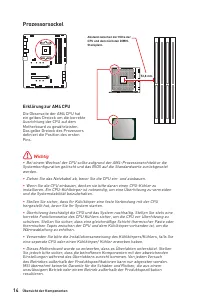
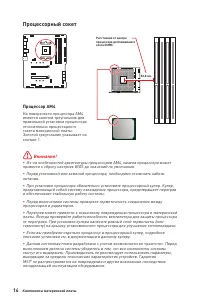
- 146 Процессор AM4
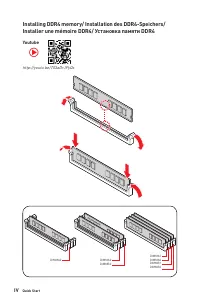
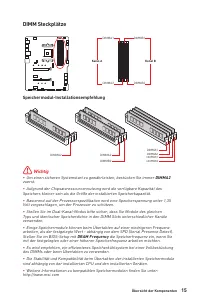
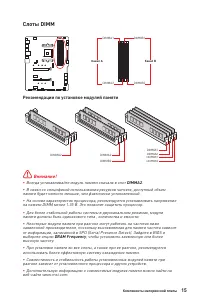
- 147 Слоты DIMM; Рекомендации по установке модулей памяти
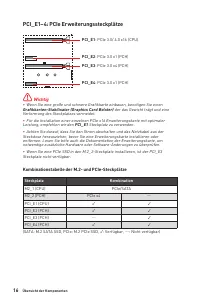
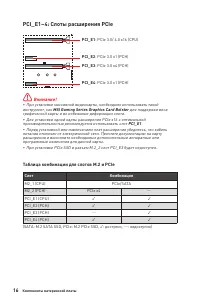
- 148 MSI Gaming Series Graphics Card Bolster; Таблица комбинации для слотов M.2 и PCIe; Слот
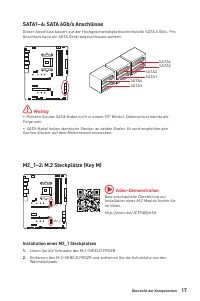
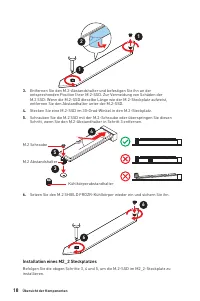
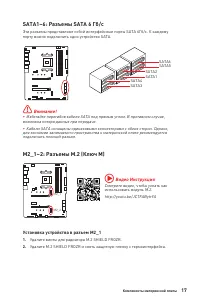
- 149 Установка устройства в разъем M2_1; Видео Инструкция
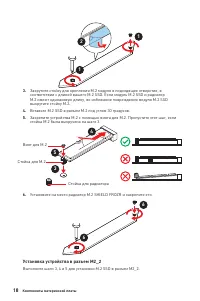
- 150 Установка устройства в разъем M2_2
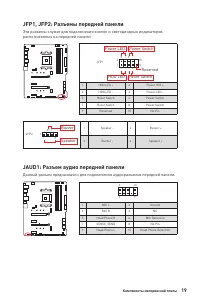
- 151 JAUD1: Разъем аудио передней панели
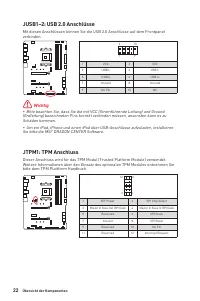
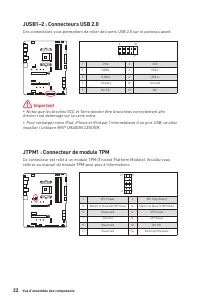
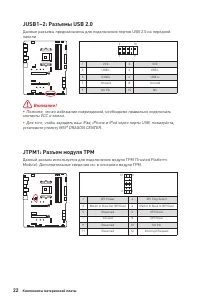
- 154 JTPM1: Разъем модуля ТРМ
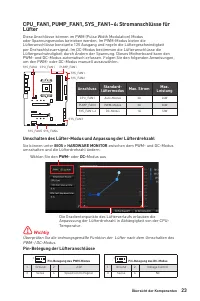
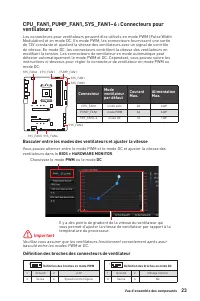
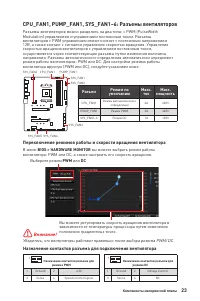
- 155 Переключение режимов работы и скорости вращения вентилятора; Назначение контактов разъема для подключения вентилятора; Разъем
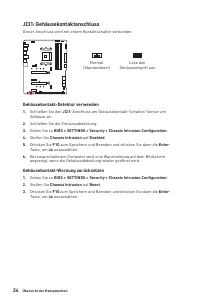
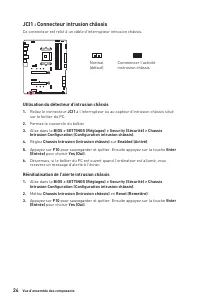
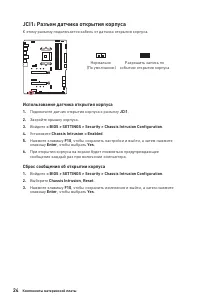
- 156 JCI1: Разъем датчика открытия корпуса; Использование датчика открытия корпуса
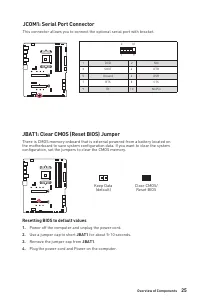
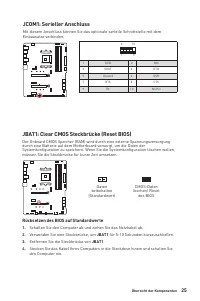
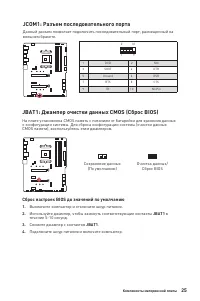
- 157 Сброс настроек BIOS до значений по умолчанию; JCOM1: Разъем последовательного порта
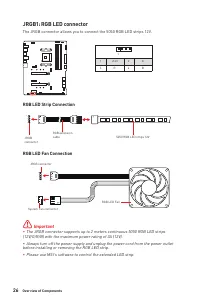
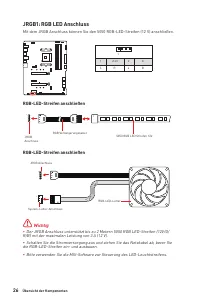
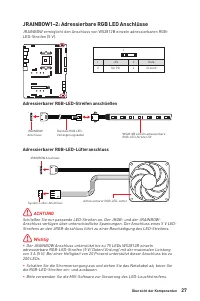
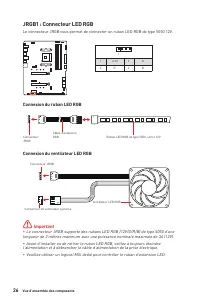
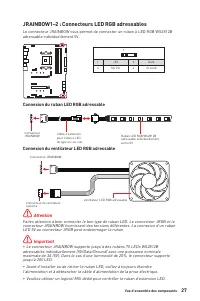
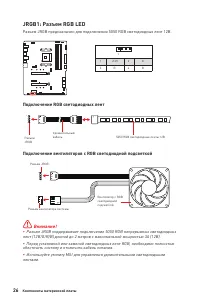
- 158 JRGB1: Разъем RGB LED; Подключение RGB светодиодных лент
- 159 Подключение адресных RGB светодиодных лент
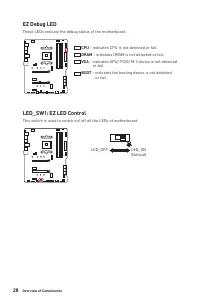
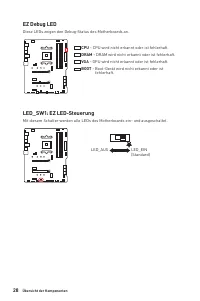
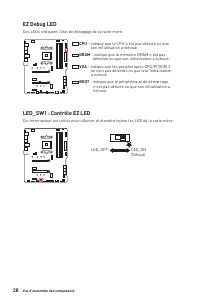
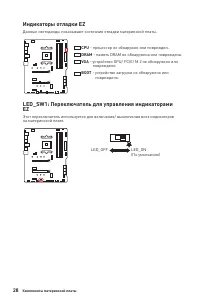
- 160 Индикаторы отладки EZ; LED_SW1: Переключатель для управления индикаторами
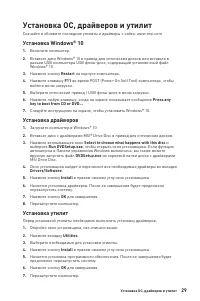
- 161 Установка Windows® 10
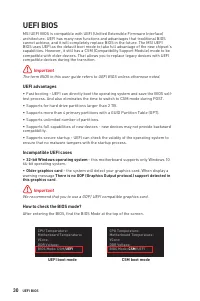
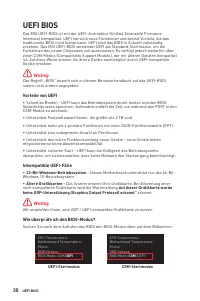
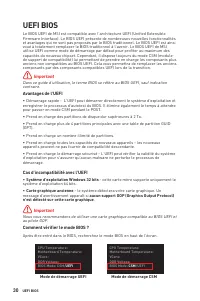
- 162 Преимущества UEFI; ∙ 32-битная ОС Windows; Как проверить режим BIOS?; Режим загрузки UEFI
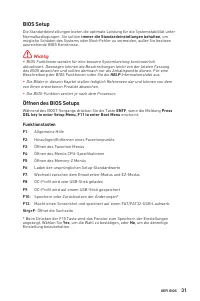
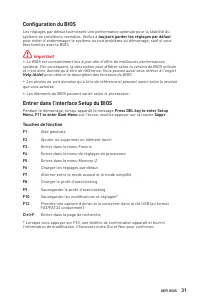
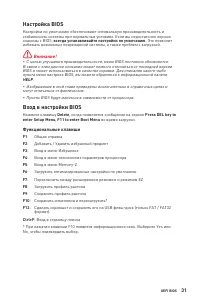
- 163 Настройка BIOS; всегда устанавливайте настройки по умолчанию; Вход в настройки BIOS; Функциональные клавиши
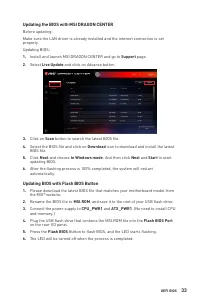
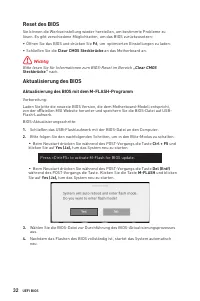
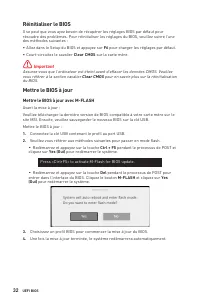
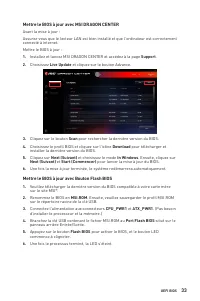
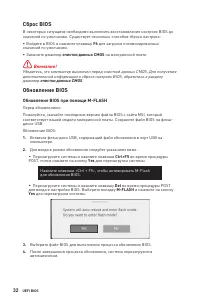
- 164 Сброс BIOS; очистки данных CMOS; Обновление BIOS; Обновление BIOS при помощи M-FLASH; Yes
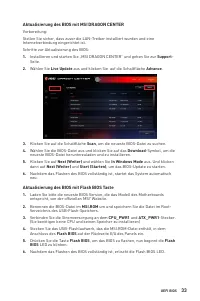
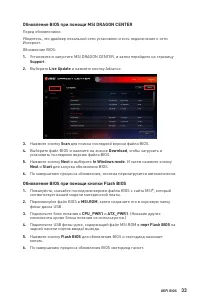
- 165 Обновление BIOS при помощи MSI DRAGON CENTER; порт Flash BIOS
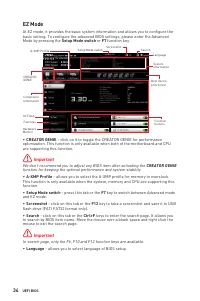
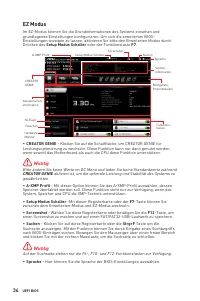
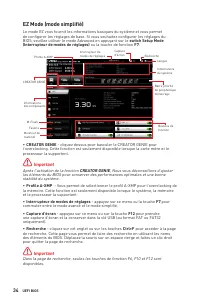
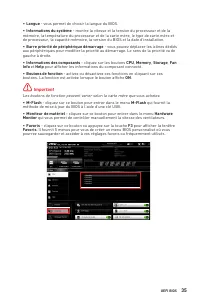
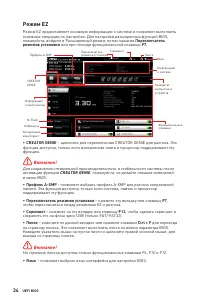
- 166 Режим EZ
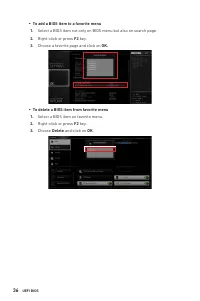
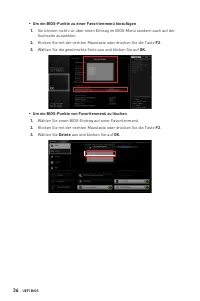
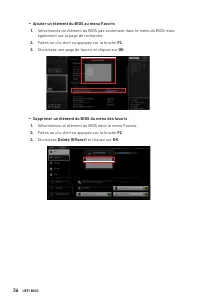
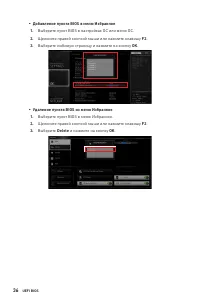
- 168 ▪ Добавление пункта BIOS в меню Избранное
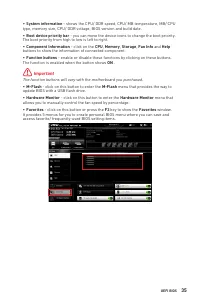
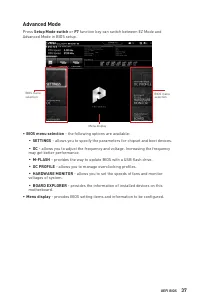
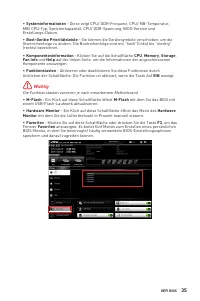
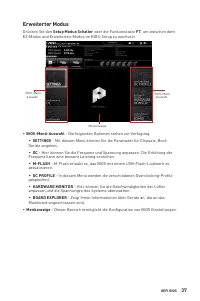
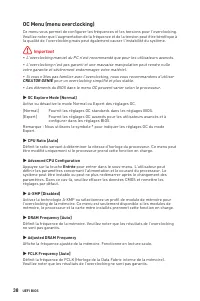
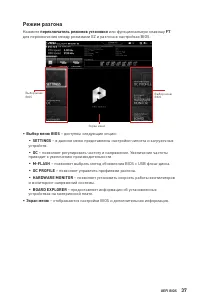
- 169 Режим разгона; переключатель режимов установки; ∙ Выбор меню BIOS
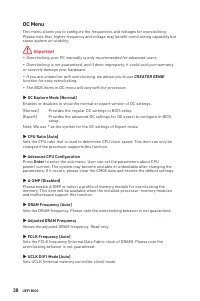
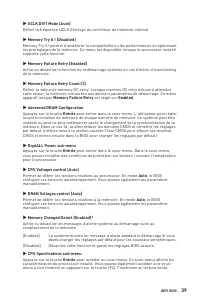
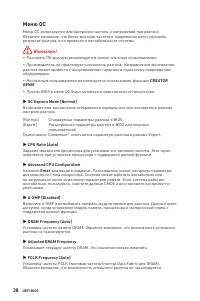
- 170 Меню OC
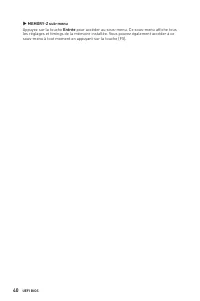
- 172 Enter
- 174 ii
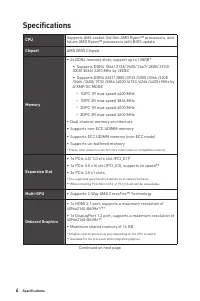
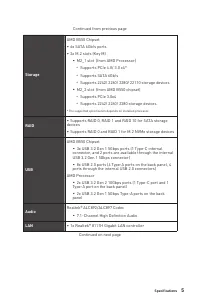
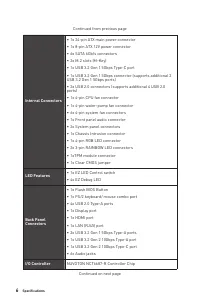
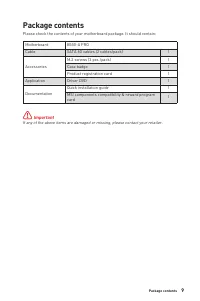
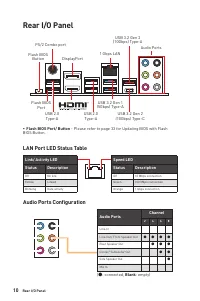
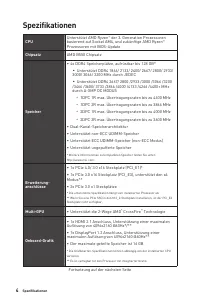
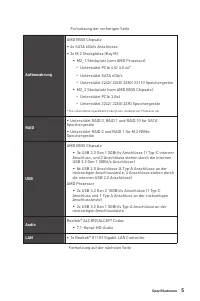
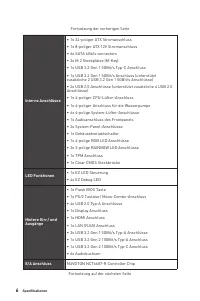
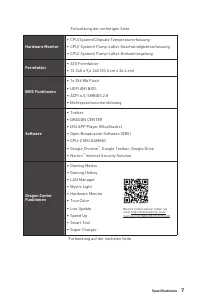
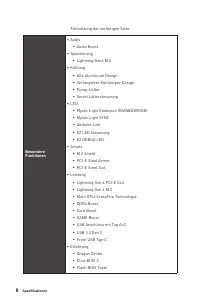
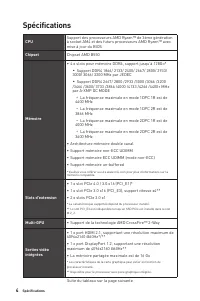
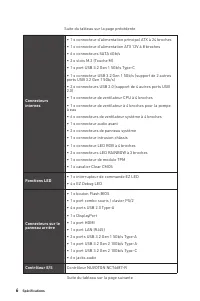
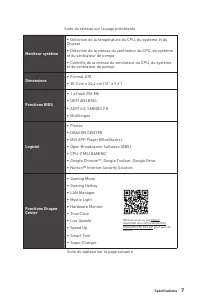
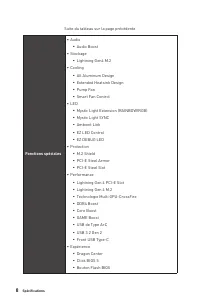
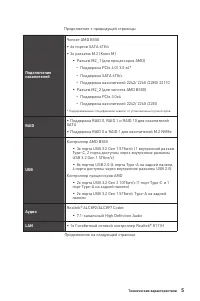
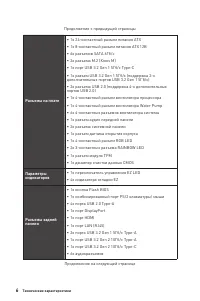
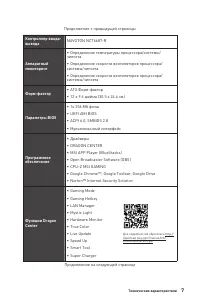
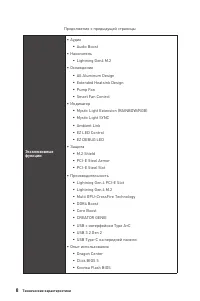
Характеристики

Остались вопросы?Не нашли свой ответ в руководстве или возникли другие проблемы? Задайте свой вопрос в форме ниже с подробным описанием вашей ситуации, чтобы другие люди и специалисты смогли дать на него ответ. Если вы знаете как решить проблему другого человека, пожалуйста, подскажите ему :)


