Материнские платы GIGABYTE GA 8IP775 - инструкция пользователя по применению, эксплуатации и установке на русском языке. Мы надеемся, она поможет вам решить возникшие у вас вопросы при эксплуатации техники.
Если остались вопросы, задайте их в комментариях после инструкции.
"Загружаем инструкцию", означает, что нужно подождать пока файл загрузится и можно будет его читать онлайн. Некоторые инструкции очень большие и время их появления зависит от вашей скорости интернета.

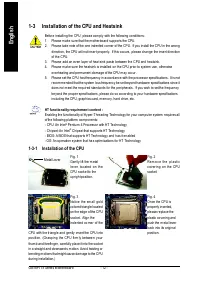


Hard ware In stalla tion
- 13 -
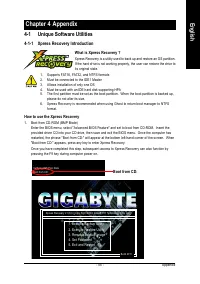
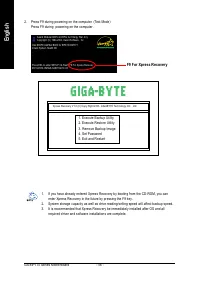
English
1-3-2 Installation of the Heatsink
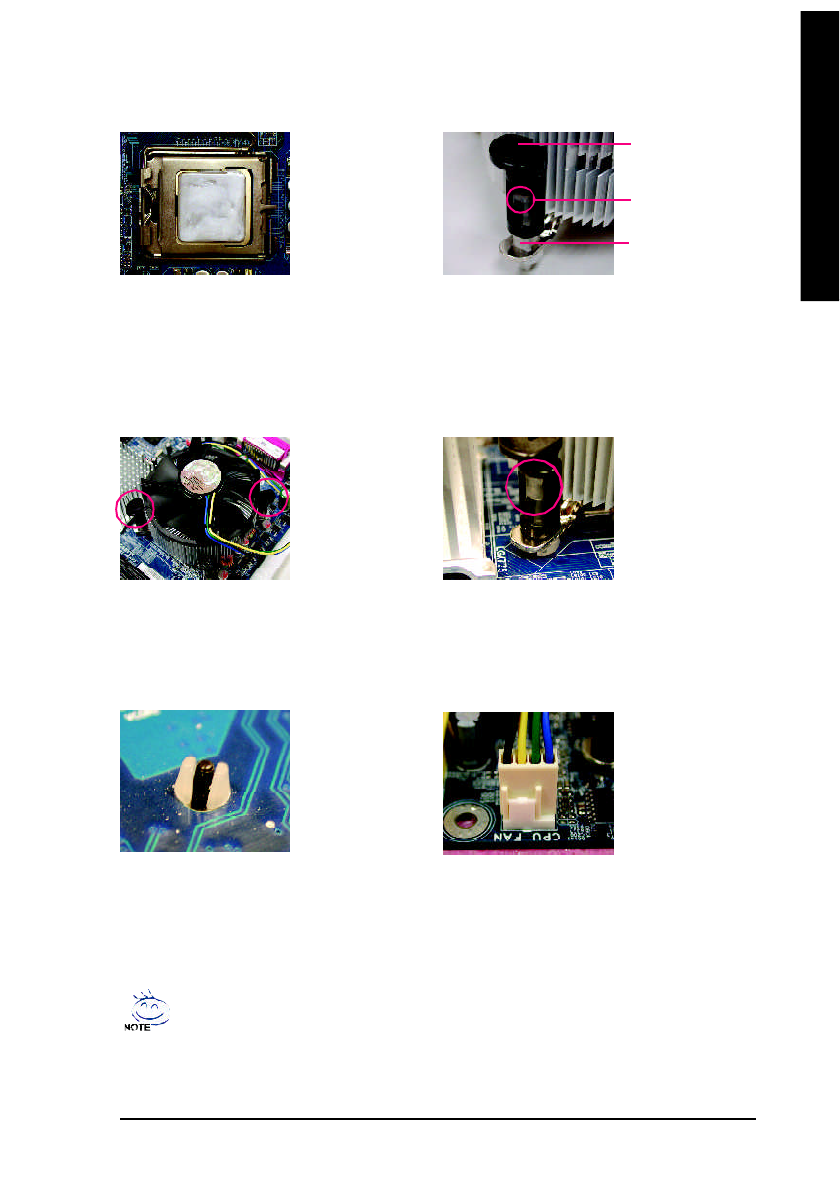
The heats ink m a y adh ere to the CPU as a res ult of harde ning of the heats ink p aste.To prev ent
such an occurrence, it is suggested that either therm al tape rather than heat sink paste be used for
heat dissipation or using extrem e care when rem ov ing the heatsink.
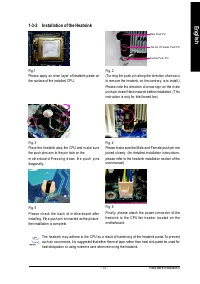
Fig. 6
Fina lly, plea se atta ch th e po we r c on ne cto r of the
h ea ts in k to th e CPU fan h ea d er loc a te d o n th e
m otherboard.
Fig. 3
Pla ce th e hea tsink atop the CPU and m ake s ure
the pus h pins aim to the pin hole on the
m o th e r b o a r d . Pr e s s in g d o wn th e p u s h p in s
diagonally.
Fig. 4
Please m ake sure the M ale and Fem ale push pin are
joined closely . (fo r detailed installa tion instr uctio ns,
please refer to the heatsink installation section of the
user manual)
Fig. 5
Plea s e c h e ck the b ac k of m oth e rb o a rd a fte r
installing. If th e push pin is inserte d as the picture,
the installatio n is com p lete.
Fig.1
Ple ase apply an e ven layer of heats ink p aste on
the surfac e of th e installed CPU.
Fig. 2
(Tur ning the push p in along the direction of arro w is
to rem ove the heatsink, on the contrary, is to install.)
Ple ase no te th e dire ction of ar row sign on the m ale
push pin doesn't face inwards before installation. (This
instruction is only for Inte l boxed fan)
M ale Pus h P in
Female Push P in
The top of F em ale P ush P in


