Магнитолы Pioneer DEH-3910MP - инструкция пользователя по применению, эксплуатации и установке на русском языке. Мы надеемся, она поможет вам решить возникшие у вас вопросы при эксплуатации техники.
Если остались вопросы, задайте их в комментариях после инструкции.
"Загружаем инструкцию", означает, что нужно подождать пока файл загрузится и можно будет его читать онлайн. Некоторые инструкции очень большие и время их появления зависит от вашей скорости интернета.
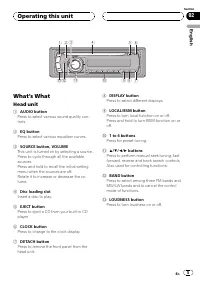
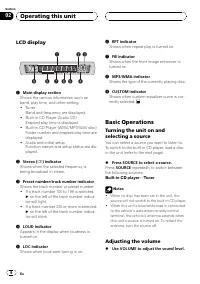

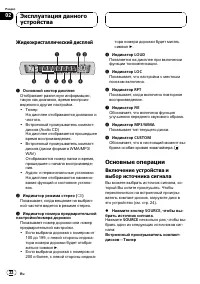


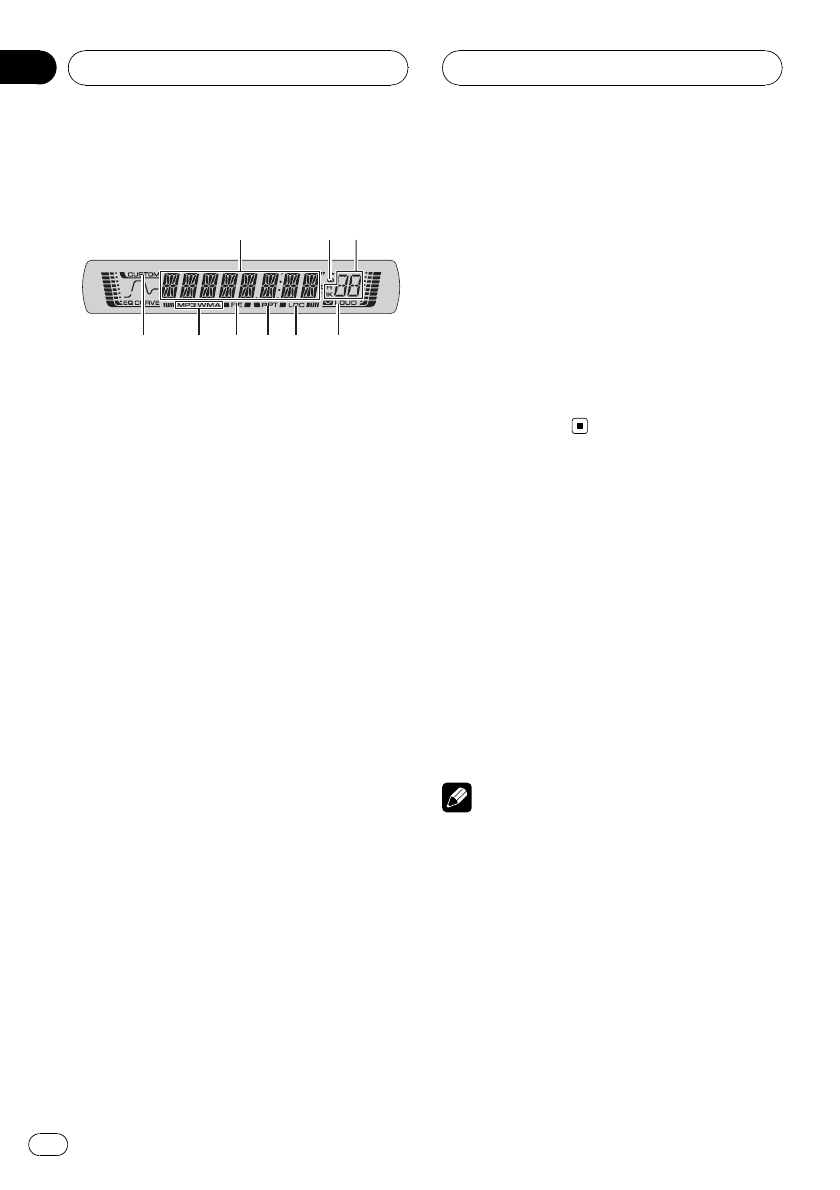
LCD display
1
9
2
4
5
6
7
8
3
1
Main display section
Shows the various information such as
band, play time, and other setting.
!
Tuner
Band and frequency are displayed.
!
Built-in CD Player (Audio CD)
Erapsed play time is displayed.
!
Built-in CD Player (WMA/MP3/WAV disc)
Folder number and erapsed play time are
displayed.
!
Audio and initial setup
Function names and setup status are dis-
played.
2
Stereo (
5
) indicator
Shows when the selected frequency is
being broadcast in stereo.
3
Preset number/track number indicator
Shows the track number or preset number.
!
If a track number 100 to 199 is selected,
d
on the left of the track number indica-
tor will light.
!
If a track number 200 or more is selected,
d
on the left of the track number indica-
tor will blink.
4
LOUD indicator
Appears in the display when loudness is
turned on.
5
LOC indicator
Shows when local seek tuning is on.
6
RPT indicator
Shows when repeat play is turned on.
7
FIE indicator
Shows when the front image enhancer is
turned on.
8
MP3/WMA indicator
Shows the type of the currently playing disc.
9
CUSTOM indicator
Shows when custom equalizer curve is cur-
rently selected.
Basic Operations
Turning the unit on and
selecting a source
You can select a source you want to listen to.
To switch to the built-in CD player, load a disc
in the unit (refer to the next page).
%
Press SOURCE to select a source.
Press
SOURCE
repeatedly to switch between
the following sources:
Built-in CD player
—
Tuner
Notes
!
When no disc has been set in the unit, the
source will not switch to the built-in CD player.
!
When this unit
’
s blue/white lead is connected
to the vehicle
’
s auto-antenna relay control
terminal, the vehicle
’
s antenna extends when
this unit
’
s source is turned on. To retract the
antenna, turn the source off.
Adjusting the volume
%
Use VOLUME to adjust the sound level.
Operating this unit
En
6
Section
02
Содержание
- 19 Сведения об этом устройстве; ВНИМАНИЕ; О формате; Перед началом; Ру
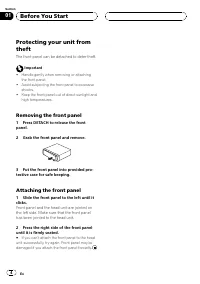
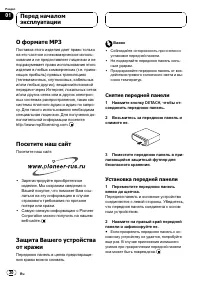
- 20 Снятие передней панели; DETACH; Установка передней панели
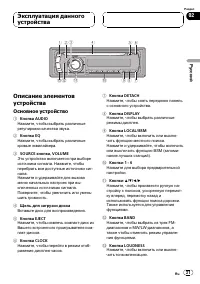
- 21 Основное устройство; Эксплуатация данного
- 22 Жидкокристаллический дисплей; Основные операции; Включение устройства и
- 23 VOLUME; Тюнер; SOURCE
- 24 BSM; Встроенный проигрыватель; Воспроизведение диска
- 25 Воспроизведение дорожек в; Повторное воспроизведение; RDM
- 26 BMX
- 27 Регулировки; Знакомство с регулировками
- 28 Использование эквалайзера; Вызов кривых эквалайзера из памяти; Регулировка кривых эквалайзера
- 29 Регулировка тонкомпенсации; Функция улучшения переднего
- 30 Регулировка уровней входных; AUDIO; Другие функции; Установка часов
- 31 Нажмите кнопку; Приглушение звука; MUTE
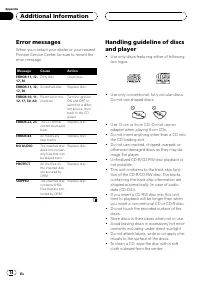
- 32 Сообщения об ошибках; Рекомендации по обращению
- 34 Дополнительная
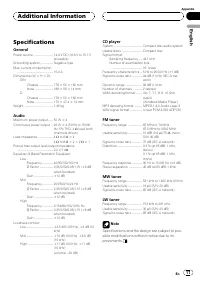
- 35 Технические характеристики; Общие; Аудио; тюнер


