Магнитолы Pioneer DEH-2400UB - инструкция пользователя по применению, эксплуатации и установке на русском языке. Мы надеемся, она поможет вам решить возникшие у вас вопросы при эксплуатации техники.
Если остались вопросы, задайте их в комментариях после инструкции.
"Загружаем инструкцию", означает, что нужно подождать пока файл загрузится и можно будет его читать онлайн. Некоторые инструкции очень большие и время их появления зависит от вашей скорости интернета.


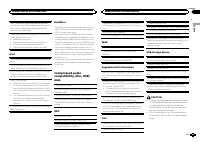

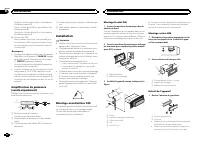
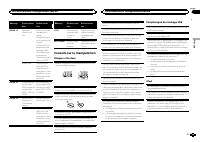
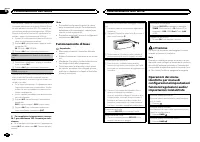
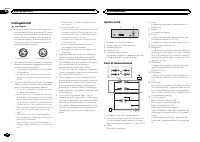
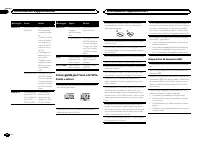

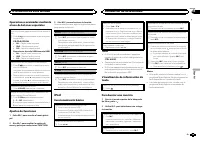


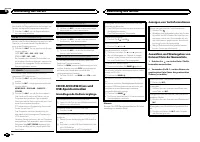

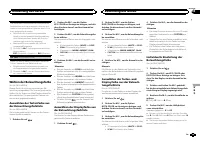

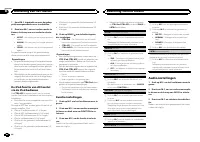
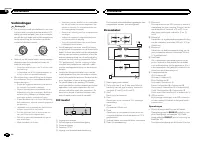
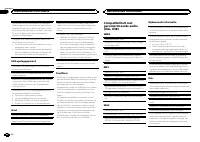


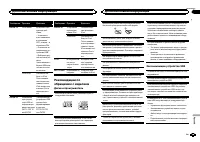
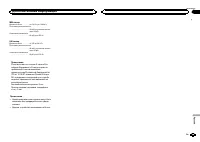
Power amp (sold separately)
Perform these connections when using the op-
tional amplifier.
1
3
2
4
5
5
1
System remote control
Connect to Blue/white cable.
2
Power amp (sold separately)
3
Connect with RCA cables (sold separately)
4
To Rear output or subwoofer output
5
Rear speaker or subwoofer
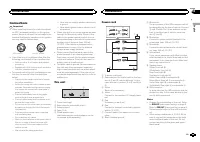
Installation
Important
!
Check all connections and systems before
final installation.
!
Do not use unauthorized parts as this may
cause malfunctions.
!
Consult your dealer if installation requires
drilling of holes or other modifications to the
vehicle.
!
Do not install this unit where:
—
it may interfere with operation of the vehicle.
—
it may cause injury to a passenger as a result
of a sudden stop.
!
The semiconductor laser will be damaged if
it overheats. Install this unit away from hot
places such as near the heater outlet.
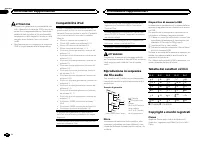
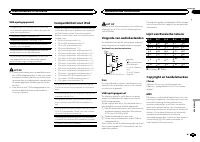
!
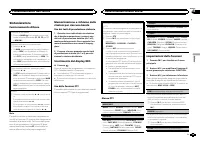
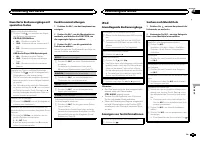
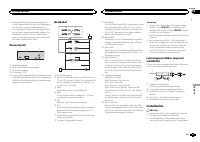
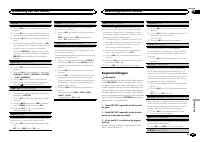
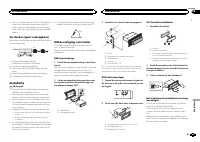
Optimum performance is obtained when the
unit is installed at an angle of less than 60°.
60°
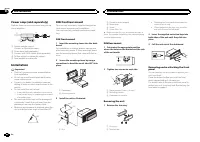
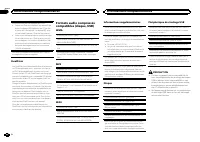
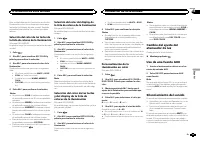
DIN front/rear mount
This unit can be properly installed using either
front-mount or rear-mount installation.
Use commercially available parts when instal-
ling.
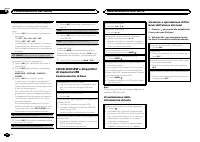
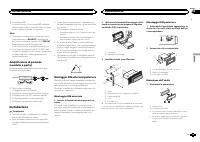
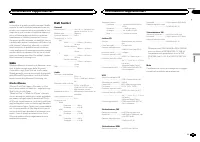
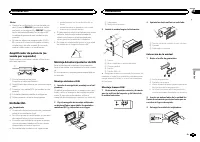
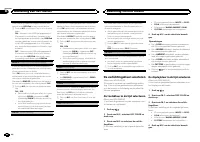
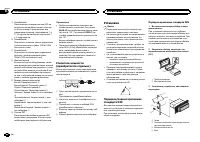
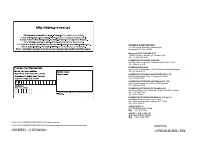
DIN Front-mount
1
Insert the mounting sleeve into the dash-
board.
For installation in shallow spaces, use the sup-
plied mounting sleeve. If there is enough space,
use the mounting sleeve that came with the ve-
hicle.
2
Secure the mounting sleeve by using a
screwdriver to bend the metal tabs (90°) into
place.
1
2
1
Dashboard
2
Mounting sleeve
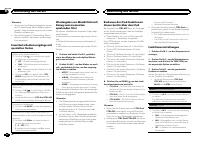
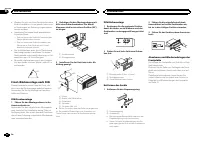
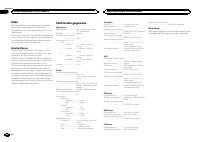
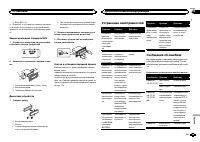
3
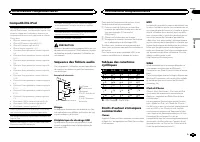
Install the unit as illustrated.
1
2
3
4
5
1
Nut
2
Firewall or metal support
3
Metal strap
4
Screw
5
Screw (M4 × 8)
#
Make sure that the unit is installed securely in
place. An unstable installation may cause skipping
or other malfunctions.
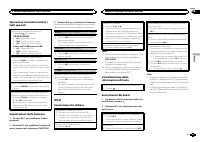
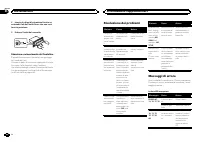
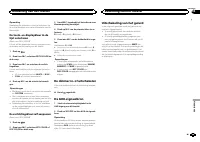
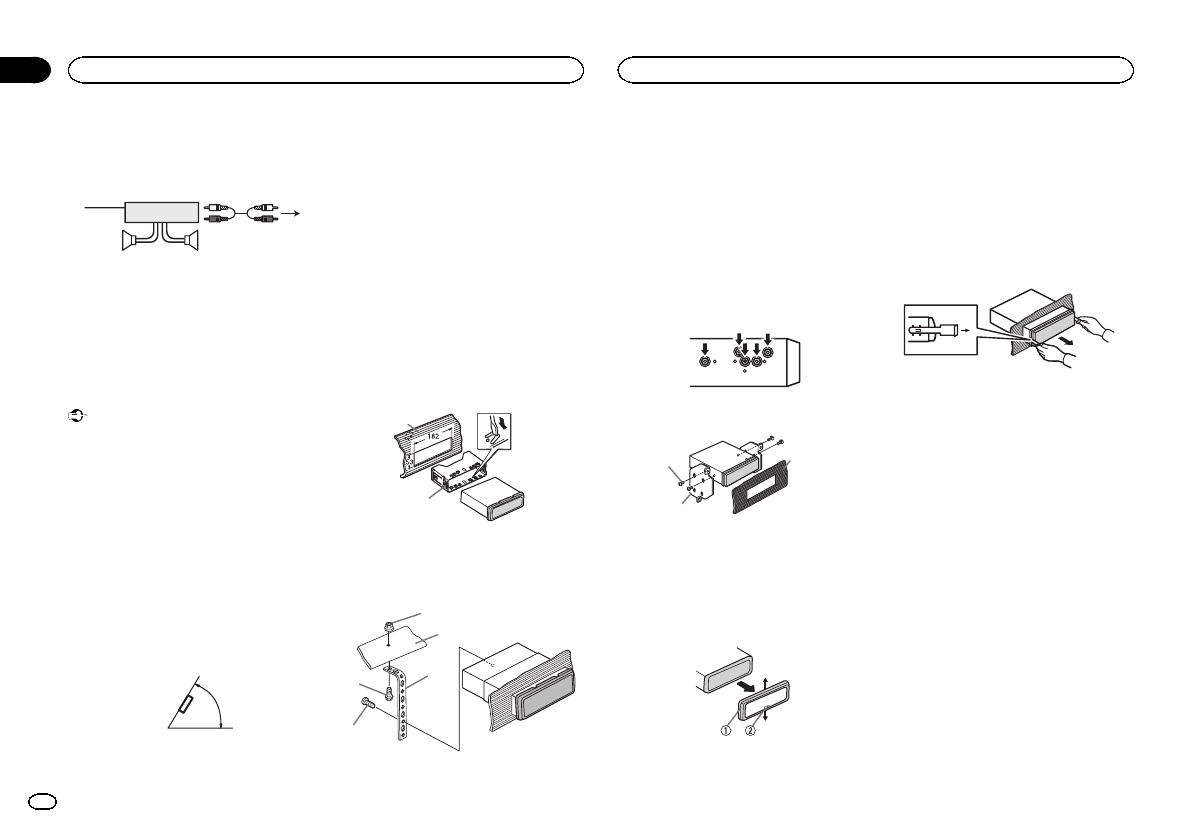
DIN Rear-mount
1
Determine the appropriate position
where the holes on the bracket and the side
of the unit match.
2
Tighten two screws on each side.
1
2
3
1
Tapping screw (5 mm × 8 mm)
2
Mounting bracket
3
Dashboard or console
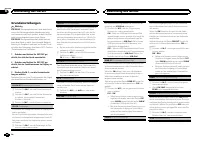
Removing the unit
1
Remove the trim ring.
1
Trim ring
2
Notched tab
!
Releasing the front panel allows easier ac-
cess to the trim ring.
!
When reattaching the trim ring, point the
side with the notched tab down.
2
Insert the supplied extraction keys into
both sides of the unit until they click into
place.
3
Pull the unit out of the dashboard.
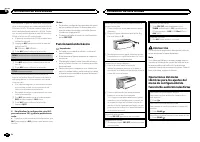
Removing and re-attaching the front
panel
You can remove the front panel to protect your
unit from theft.
Press the detach button and push the front
panel upward and pull it toward you.
For details, refer to
and
Installation
12
Section
Installation
En
03
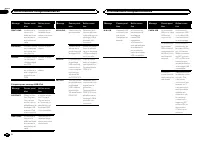
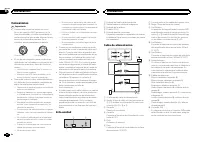
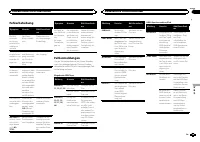
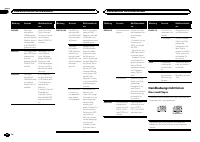
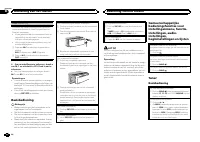
Содержание
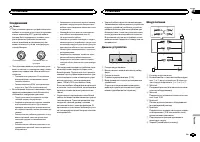
- 112 Благодарим Вас; PIONEER; Держите данное; Сведения об этом устройстве; ЛАЗЕРНЫЙ ПРОДУКТ КЛАСС 1; ВНИМАНИЕ; Сведения об этом руководстве; Перед началом эксплуатации
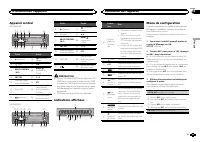
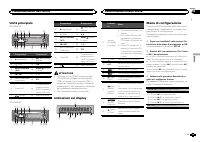
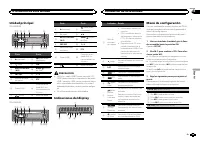
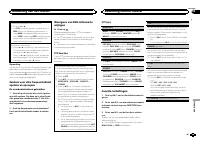
- 113 Основное устройство; USB; Индикация на дисплее; Установочное меню; ON; Управление устройством
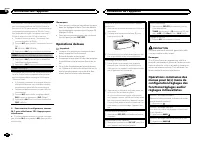
- 114 YES; На; SRC
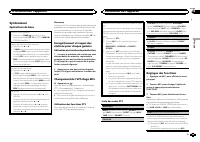
- 115 Тюнер; Основные операции; SEEK; AF; Переключение режима; Использование функций; Список; Настройка функций; FUNCTION
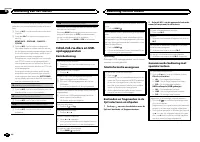
- 116 Примечание
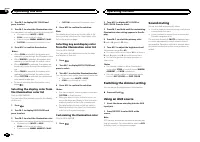
- 117 дорожек из списка
- 118 Поиск композиции
- 119 Регулировки параметров звука
- 120 Начальные настройки
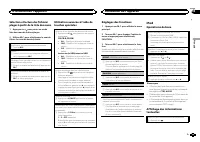
- 121 Выбор цвета подсветки; Только для; Нажмите
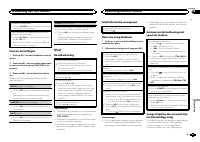
- 122 Настройка цвета подсветки; AUX; Приглушение звука
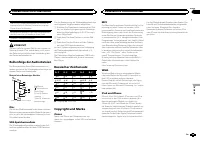
- 123 Соединения; Важно; Данное устройство; Установка
- 124 настройка выхода заднего кана; Усилитель мощности; Переднее; Переднее крепление стандарта
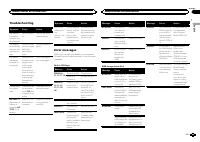
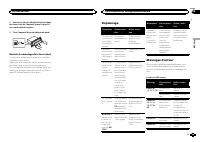
- 125 Устранение неисправностей; Сообщения об ошибках; Pioneer; Дополнительная информация
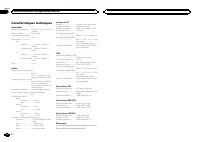
- 127 Диски и проигрыватель
- 128 компакт
- 129 Поддержка; Диск
- 130 Технические характеристики; Общие


