Магнитолы Hyundai Electronics H-CCR8099 - инструкция пользователя по применению, эксплуатации и установке на русском языке. Мы надеемся, она поможет вам решить возникшие у вас вопросы при эксплуатации техники.
Если остались вопросы, задайте их в комментариях после инструкции.
"Загружаем инструкцию", означает, что нужно подождать пока файл загрузится и можно будет его читать онлайн. Некоторые инструкции очень большие и время их появления зависит от вашей скорости интернета.
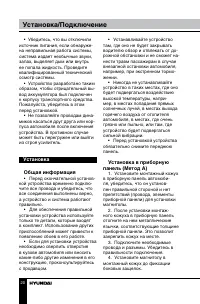

Installation/Connection
5
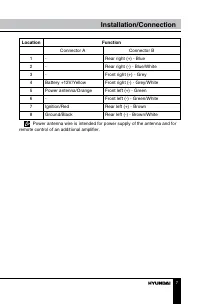
2
2
5
5
4
3
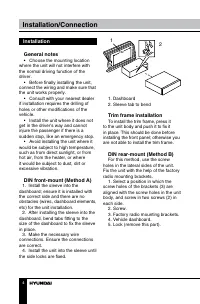
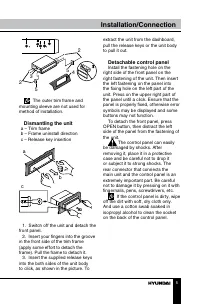
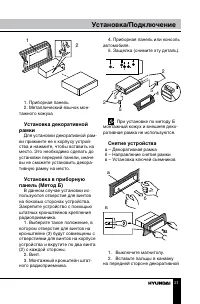
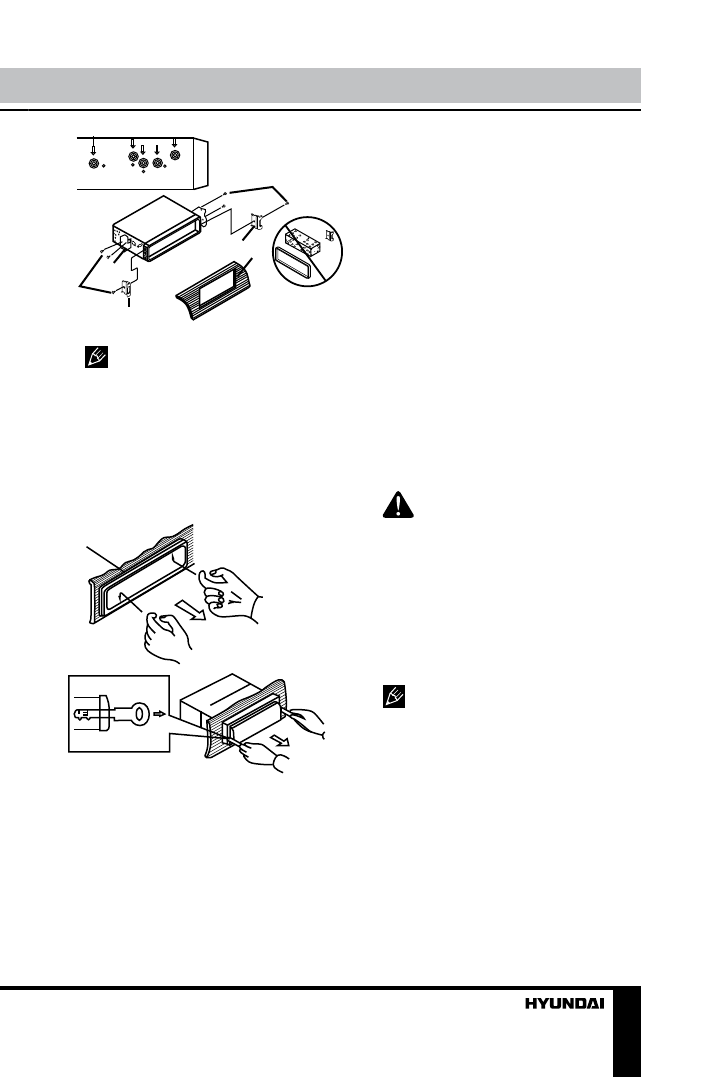
The outer trim frame and
mounting sleeve are not used for
method of installation.
Dismantling the unit
a – Trim frame
b – Frame uninstall direction
c – Release key insertion
c
b
a
1. Switch off the unit and detach the
front panel.
2. Insert your fingers into the groove
in the front side of the trim frame
(apply some effort to detach the
frame). Pull the frame to detach it.
3. Insert the supplied release keys
into the both sides of the unit body
to click, as shown in the picture. To
extract the unit from the dashboard,
pull the release keys or the unit body
to pull it out.
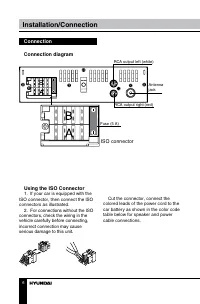
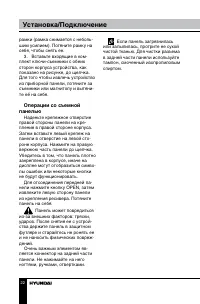
Detachable control panel
Install the fastening hole on the
right side of the front panel on the
right fastening of the unit. Then insert
the left fastening on the panel into
the fixing hole on the left part of the
unit. Press on the upper right part of
the panel until a click. Ensure that the
panel is properly fixed, otherwise error
symbols may be displayed and some
buttons may not function.
To detach the front panel, press
OPEN button, then distract the left
side of the panel from the fastening of
the unit.
The control panel can easily
be damaged by shocks. After
removing it, place it in a protective
case and be careful not to drop it
or subject it to strong shocks. The
rear connector that connects the
main unit and the control panel is an
extremely important part. Be careful
not to damage it by pressing on it with
fingernails, pens, screwdrivers, etc.
If the control panel is dirty, wipe
off the dirt with soft, dry cloth only.
And use a cotton swab soaked in
isopropyl alcohol to clean the socket
on the back of the control panel.
Содержание
- 19 Перед началом эксплуатации; Если вы желаете утилизировать данное изделие, не выбрасывайте; Утилизация изделия
- 20 Установка/Подключение; Установка
- 21 Установка декоративной
- 22 Операции со съемной; Наденьте крепежное отверстие
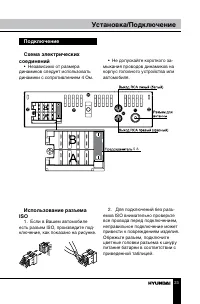
- 23 Подключение; • Независимо от размера; Использование разъема; Если в Вашем автомобиле
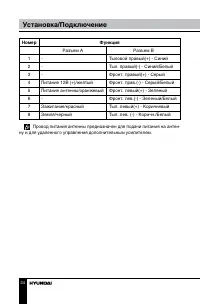
- 24 Номер; Разъем A
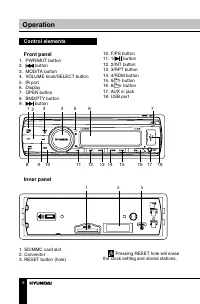
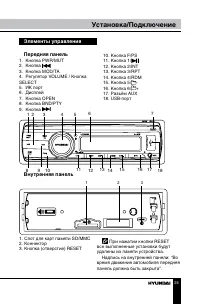
- 25 Элементы управления; При нажатии кнопки RESET
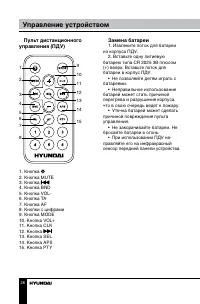
- 26 Управление устройством; Пульт дистанционного
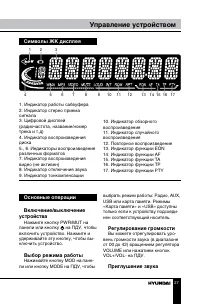
- 27 Основные операции; Нажмите кнопку PWR/MUT на; Выбор режима работы; Нажимайте кнопку MOD на пане-; Регулирование громкости; Вы можете отрегулировать уро-; Приглушение звука
- 29 Операции с радио
- 30 Функция TA (программы о
- 31 При включенной функции PTY; Дополнительные функции; Для выбора нужной функции
- 32 накопителя/карты памяти
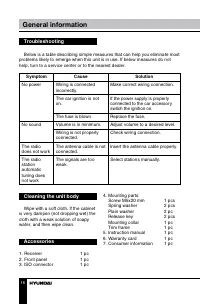
- 34 Причина; Чистка корпуса устройства
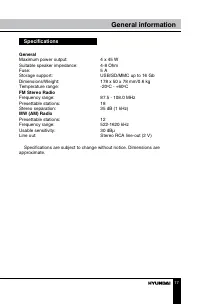
- 35 Общая информация; Комплект поставки; Технические характеристики; Общие

