Лобзики Graphite 58G011 - инструкция пользователя по применению, эксплуатации и установке на русском языке. Мы надеемся, она поможет вам решить возникшие у вас вопросы при эксплуатации техники.
Если остались вопросы, задайте их в комментариях после инструкции.
"Загружаем инструкцию", означает, что нужно подождать пока файл загрузится и можно будет его читать онлайн. Некоторые инструкции очень большие и время их появления зависит от вашей скорости интернета.


13
CHARGER REPAIRS
• Do not repair damaged charger.
The charger can be repaired only
by the manufacturer or in an authorised workshop.
• When disposing of the worn out charger, take it to a service
point where you can utilize such wastes.
CAUTION! This device is designed to operate indoors.
The design is assumed to be safe, protection measures and
additional safety systems are used, nevertheless there is always a
small risk of injuries at work.
Li-Ion batteries may leak, set on fire or explode when heated to
high temperature or short-circuited. Do not store the batteries
in a car in hot and sunny days. Do not open the battery. Li-Ion
batteries contain electronic protection devices that, if damaged,
may cause fire or explosion of the battery.
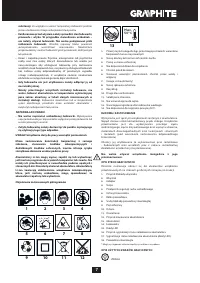
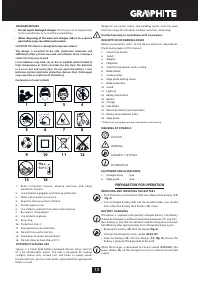
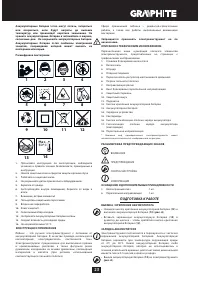
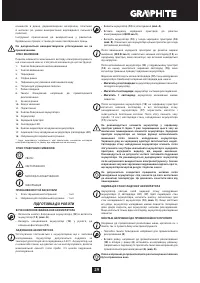
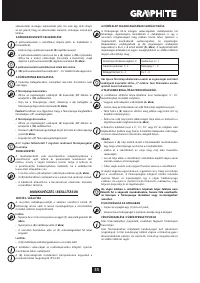
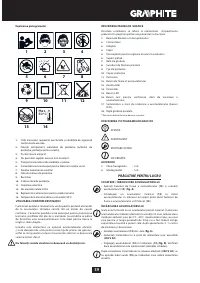
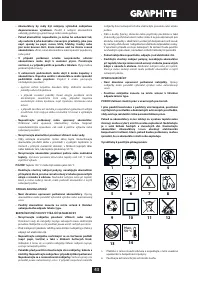
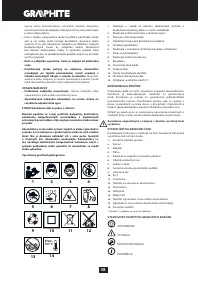
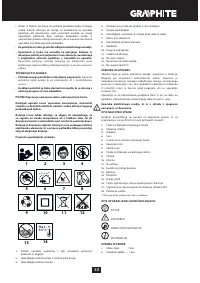
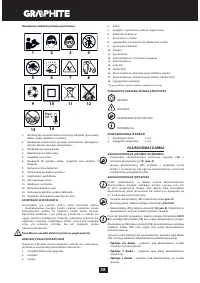
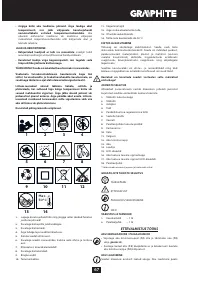
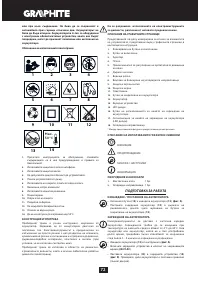
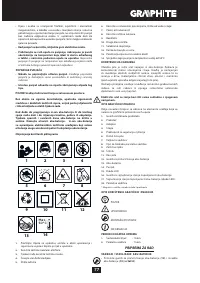
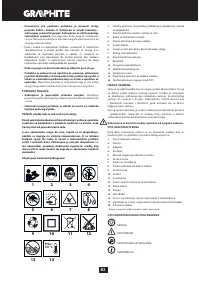
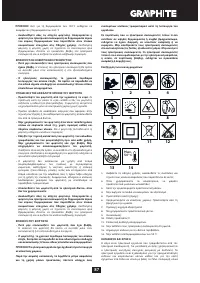
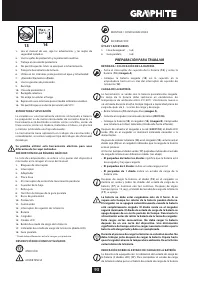
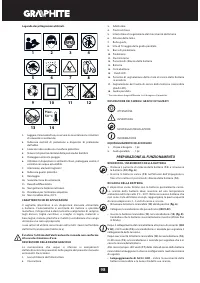
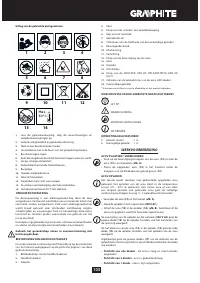
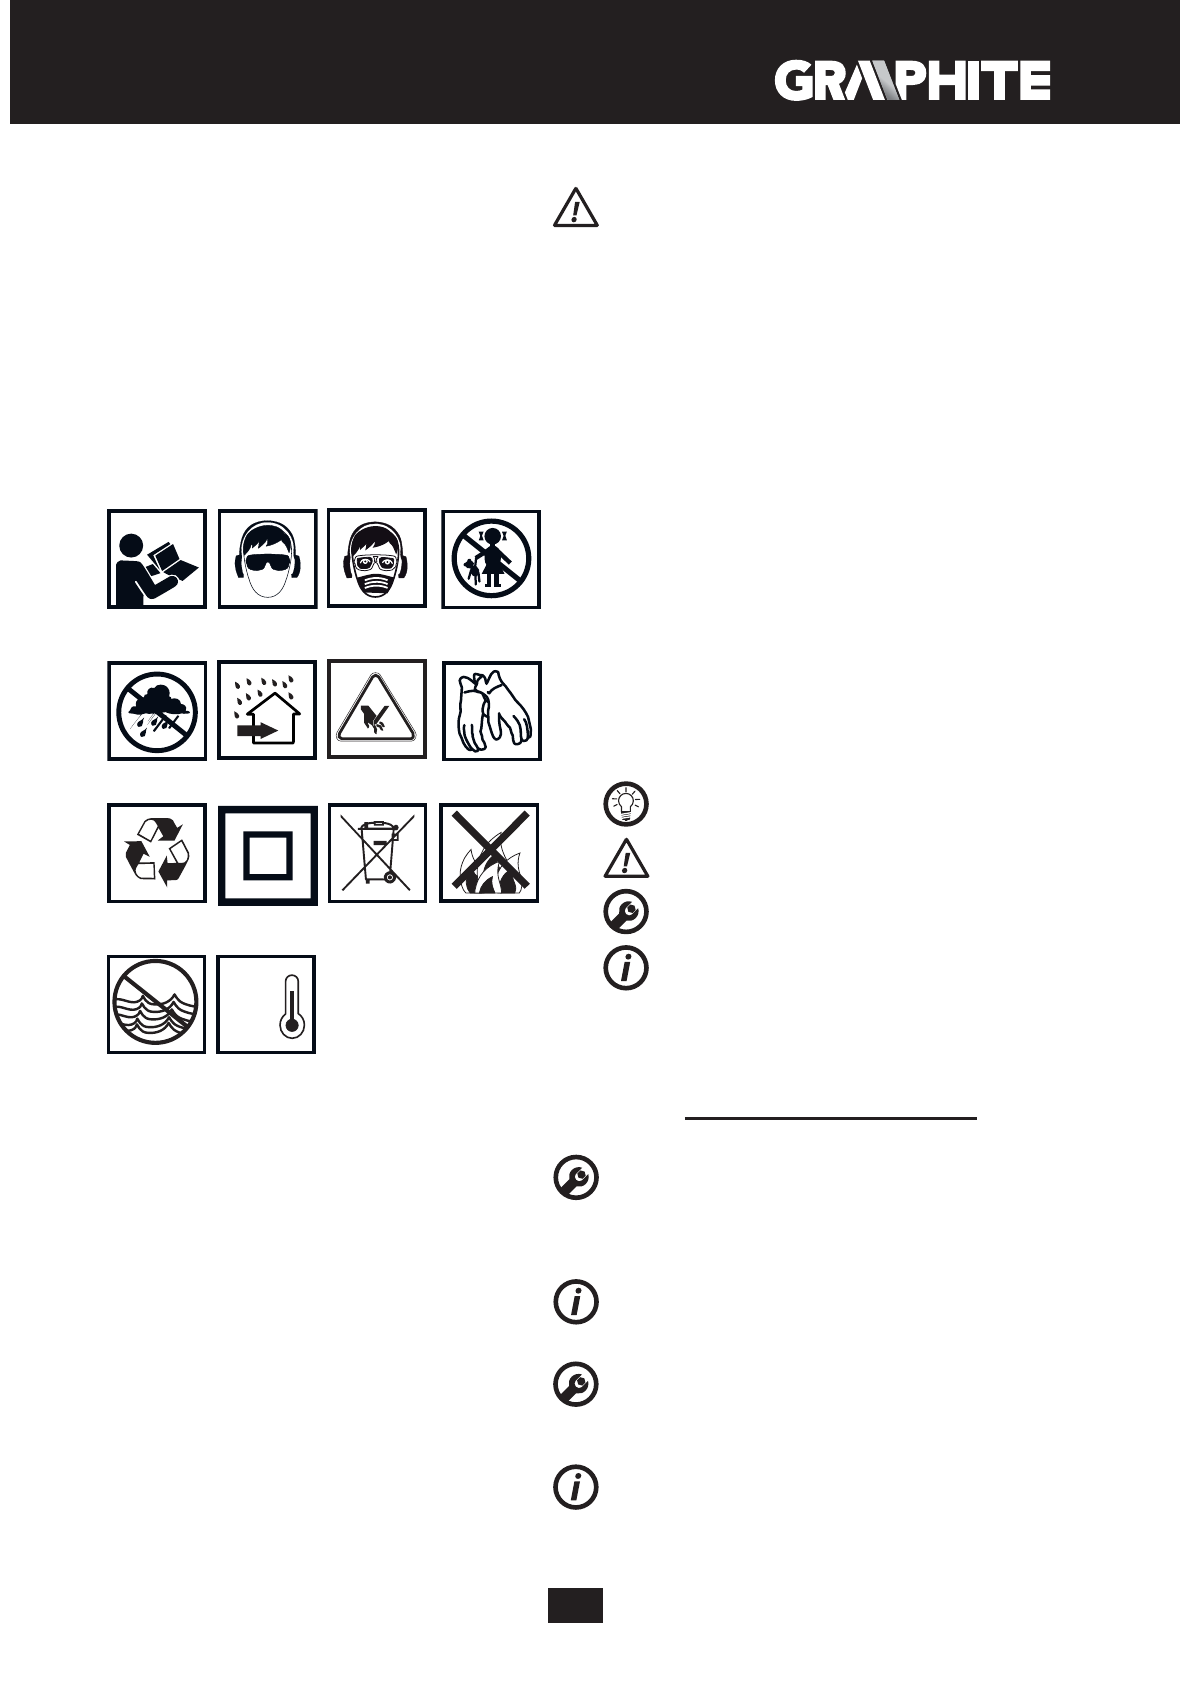
Explanation of used symbols
1
2
3
4
7
5
Max.
50°C
6
8
9
10
11
12
13
14
1.
Read instruction manual, obser ve warnings and safety
conditions therein.
2.
Use protective goggles and hearing protectors.
3.
Work with protective mask on.
4.
Keep the tool away from children.
5.
Protect against rain.
6.
Use indoors, protect from water and moisture.
7.
Be careful, sharp edges!
8.
Use protective gloves
9.
Recycling.
10.
Protection class 2.
11.
Segregated waste collection.
12.
Do not throw cells into fire.
13.
Hazardous to water environment.
14.
Do not allow to heat above 50°C.
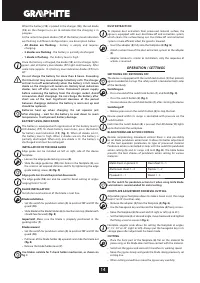
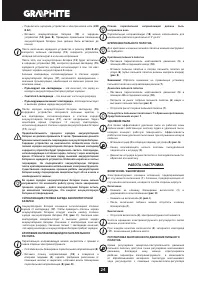
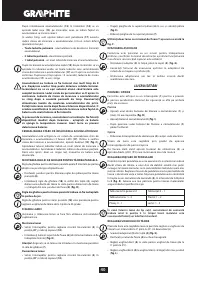
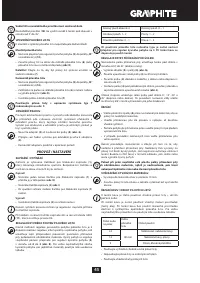
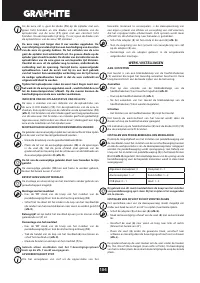
CONSTRUC TION AND USE
Jigsaw is a hand held batter y-powered device. Drive consists
of a DC commutator motor. The tool is designed for making
straight, coarse cuts, cur ved cuts and holes in wood, wood-
based materials, plastics and metals (provided that appropriate
blade is used).
Range of use covers repair and building works, and any work
from the range of individual, amateur activities (tinkering).
Use the tool only in accordance with its purpose.
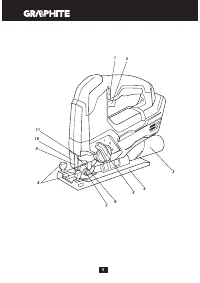
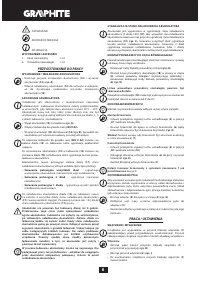
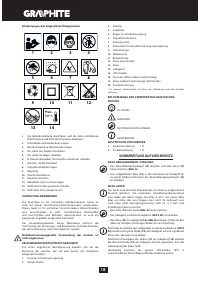
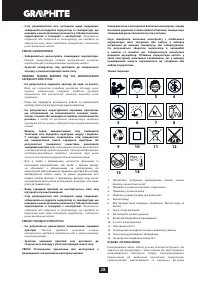
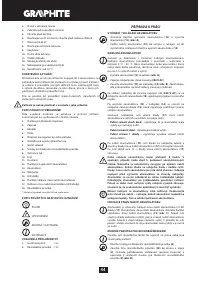
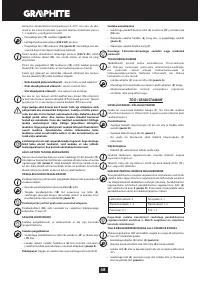
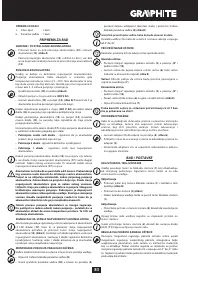
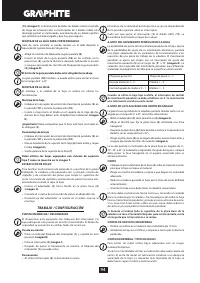
DESCRIPTION OF DRAWING PAGES
Below enumeration refers to the device elements depicted on
the drawing pages of this manual.
1.
Switch lock button
2.
Switch
3.
Adapter
4.
Footplate
5.
Switch for pendulum action setting
6.
Blade holder
7.
Guiding roller
8.
Edge guide locking screws
9.
Blade protection
10.
Guard
11.
Lighting
12.
Battery lock button
13.
Battery
14.
Charger
15.
LED diodes
16.
Button for battery level indication
17.
Battery level indicator (LED)
18.
Edge guide
* Differences may appear between the product and drawing.
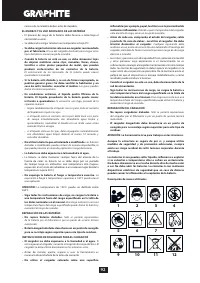
M E A N I N G O F S YM B O L S
CAUTION
WARNING
ASSEMBLY / SET TINGS
INFORMATION
EQUIPMENT AND ACCESSORIES
1.
Hexagonal key
- 1 pce
2.
Edge guide
- 1 pce
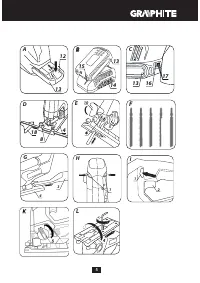
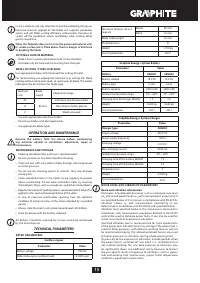
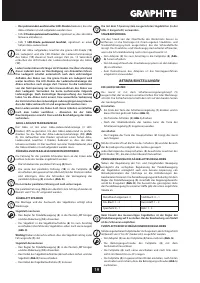
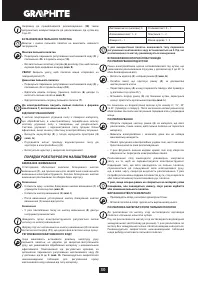
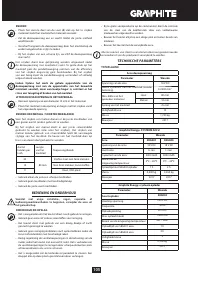
PREPARATION FOR OPERATION
REMOVING AND INSERTING THE BAT TERY
•
Push the batter y lock button (
12
) and slide out the batter y (
13
)
(
fig. A
).
•
Inser t charged batter y (
13
) into the handle holder, you should
hear when the batter y lock button (
12
) snaps.
BAT TERY CHARGING
The device is supplied with partially charged battery. The battery
should be charged in ambient temperature between 4°C and 40°C.
New battery, or one that has not been used for a long time, will reach
full efficiency after approximately 3 to 5 charge/discharge cycles.
•
Remove the battery (
13
) from the device (
fig. A
).
•
Connect the charger to mains socket (
230 V AC
).
•
Slide the battery (
13
) into the charger (
14
) (
fig. B
). Ensure the
battery is properly fitted (pushed to the end).
When the charger is connected to a mains socket (
230 V AC
), the
green diode (
15
) on the charger turns on to indicate connected
supply.
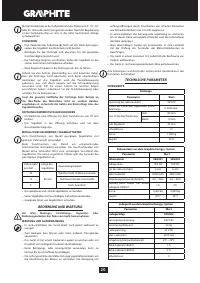
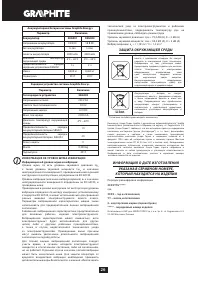
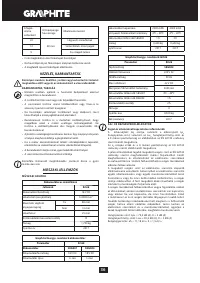
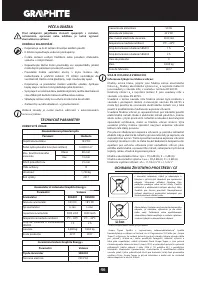
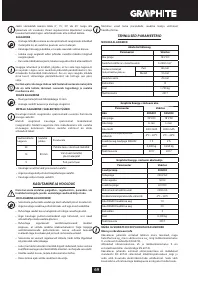
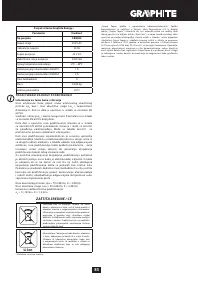
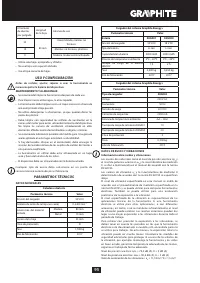
Характеристики

Остались вопросы?Не нашли свой ответ в руководстве или возникли другие проблемы? Задайте свой вопрос в форме ниже с подробным описанием вашей ситуации, чтобы другие люди и специалисты смогли дать на него ответ. Если вы знаете как решить проблему другого человека, пожалуйста, подскажите ему :)


