
Кусторезы Makita UH004G - инструкция пользователя по применению, эксплуатации и установке на русском языке. Мы надеемся, она поможет вам решить возникшие у вас вопросы при эксплуатации техники.
Если остались вопросы, задайте их в комментариях после инструкции.
"Загружаем инструкцию", означает, что нужно подождать пока файл загрузится и можно будет его читать онлайн. Некоторые инструкции очень большие и время их появления зависит от вашей скорости интернета.


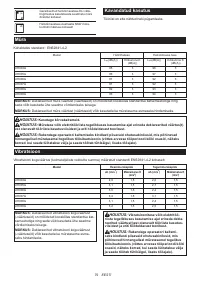


15 ENGLISH
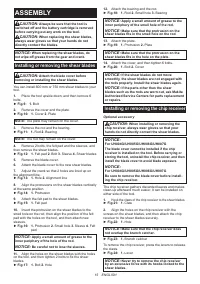
ASSEMBLY
CAUTION:
Always be sure that the tool is
switched off and the battery cartridge is removed
before carrying out any work on the tool.
CAUTION:
When replacing the shear blades,
always wear gloves so that your hands do not
directly contact the blades.
NOTICE:
When replacing the shear blades, do
not wipe off grease from the gear and crank.
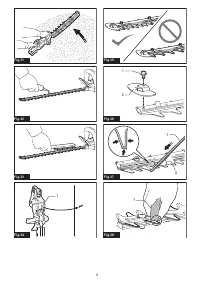
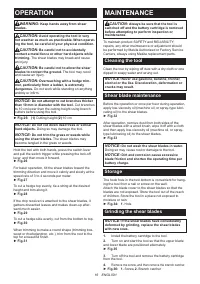
Installing or removing the shear blades
CAUTION:
Attach the blade cover before
removing or installing the shear blades.
You can install 600 mm or 750 mm shear blades to your
tool.
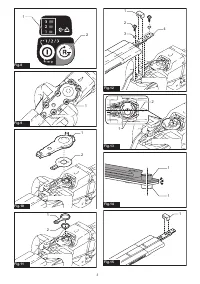
1.
Place the tool upside down, and then remove 6
bolts.
►
Fig.9:
1.
Bolt
2.
Remove the cover and the plate.
►
Fig.10:
1.
Cover
2.
Plate
NOTE:
The plate may remain on the cover.
3.
Remove the rod and the bearing.
►
Fig.11:
1.
Rod
2.
Bearing
NOTE:
The rod may remain on the cover.
4.
Remove 2 bolts, the felt pad and the sleeves, and
then remove the shear blades.
►
Fig.12:
1.
Felt pad
2.
Bolt
3.
Sleeve
4.
Shear blades
5.
Remove the blade cover.
6.
Attach the blade cover to the new shear blades.
7.
Adjust the crank so that 2 holes are lined up on
the alignment line.
►
Fig.13:
1.
Hole
2.
Alignment line
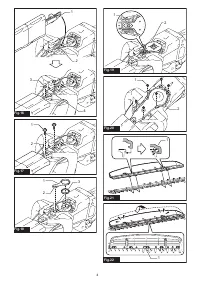
8.
Align the protrusions on the shear blades vertically
at the same position.
►
Fig.14:
1.
Protrusion
9.
Attach the felt pad to the shear blades.
►
Fig.15:
1.
Felt pad
10.
Insert the protrusion on the shear blades to the
small hole on the rod, then align the position of the felt
pad with the holes on the tool, and then attach new
sleeves.
►
Fig.16:
1.
Protrusion
2.
Small hole
3.
Sleeve
4.
Felt
pad
NOTICE:
Apply a small amount of grease to the
inner periphery of the hole of the rod.
NOTICE:
Be careful not to lose the sleeves.
11.
Align the holes on the shear blades with the holes
on the tool, and then tighten 2 bolts to fix the shear
blades.
►
Fig.17:
1.
Bolt
2.
Hole
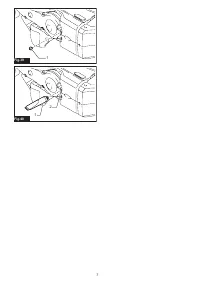
12.
Attach the bearing and the rod.
►
Fig.18:
1.
Rod
2.
Small hole
3.
Bearing
NOTICE:
Apply a small amount of grease to the
inner periphery of the small hole of the rod.
NOTICE:
Make sure that the protrusion on the
shear blades fits in the small hole on the rod.
13.
Attach the plate.
►
Fig.19:
1.
Protrusion
2.
Plate
NOTICE:
Make sure that the protrusion on the
shear blades fits in the hole on the plate.
14.
Attach the cover, and then tighten 6 bolts.
►
Fig.20:
1.
Bolt
2.
Cover
NOTICE:
If the shear blades do not move
smoothly, the shear blades are not engaged with
the rods properly. Install the shear blades again.
NOTICE:
If the parts other than the shear
blades such as the rods are worn out, ask Makita
Authorized Service Centers for parts replacement
or repairs.
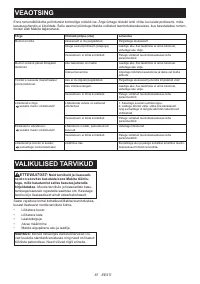
Installing or removing the chip receiver
Optional accessory
CAUTION:
When installing or removing the
chip receiver, always wear gloves so that your
hands do not directly contact the shear blades.
NOTICE:
For UH004G/UH005G/UH006G/UH007G
The blade cover cannot be installed if the chip
receiver is installed on the tool. Before carrying or
storing the tool, uninstall the chip receiver, and then
install the blade cover to avoid blade exposure.
NOTICE:
For UH004G/UH005G/UH006G/UH007G
Be sure to remove the blade cover before install-
ing the chip receiver.
The chip receiver gathers discarded leaves and makes
clean-up afterward much easier. It can be installed on
either side of the tool.
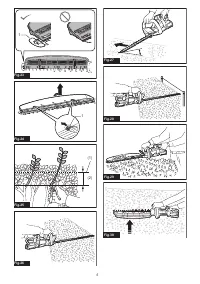
1.
Hook the claws of the chip receiver to the shear blades.
►
Fig.21:
1.
Claw
2.
Align the holes on the chip receiver with the
screws on the shear blades, and then attach the chip
receiver to the shear blades securely.
►
Fig.22:
1.
Hole
NOTICE:
Make sure that the chip receiver does
not overlap the branch catcher.
►
Fig.23:
1.
Branch catcher
To remove the chip receiver, press the levers to release
the claws.
►
Fig.24:
1.
Lever
NOTICE:
Never try to remove the chip receiver
by an excessive force with its hooks locked to the
shear blades.
Содержание
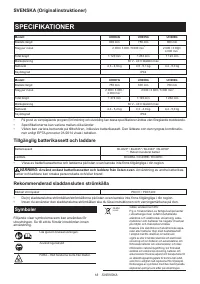
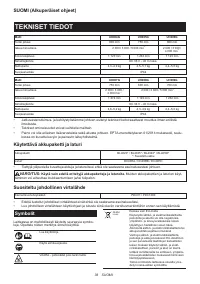
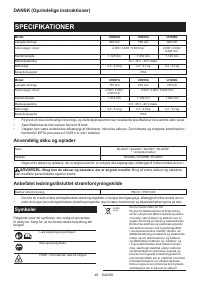
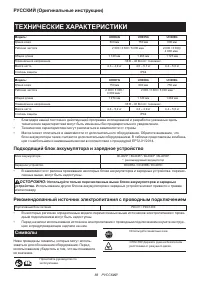
- 88 ТЕХНИЧЕСКИЕ ХАРАКТЕРИСТИКИ; Подходящий блок аккумулятора и зарядное устройство; Символы
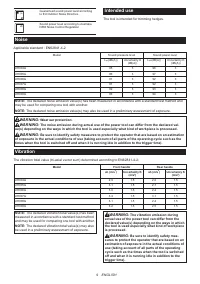
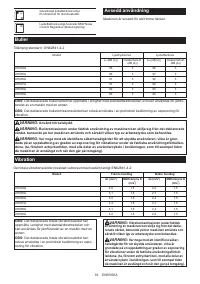
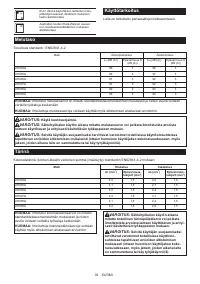
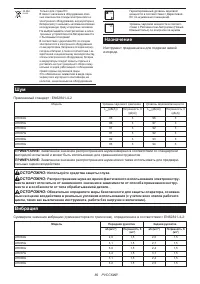
- 89 Назначение; Шум; Вибрация
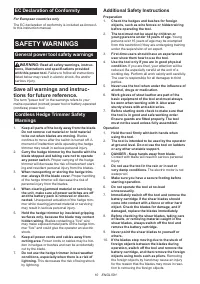
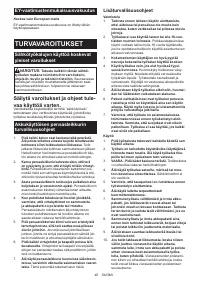
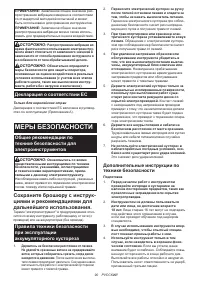
- 90 МЕРЫ БЕЗОПАСНОСТИ; Сохраните брошюру с инструк; Дополнительные инструкции по
- 91 Электробезопасность
- 92 СОХРАНИТЕ ДАННЫЕ; Важные правила техники
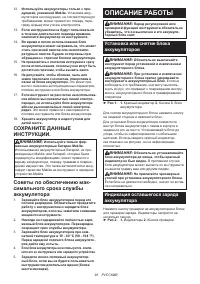
- 93 ОПИСАНИЕ РАБОТЫ; Установка или снятие блока
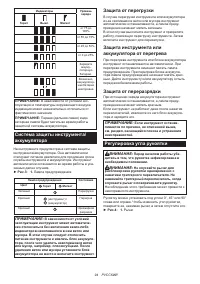
- 94 Система защиты инструмента/
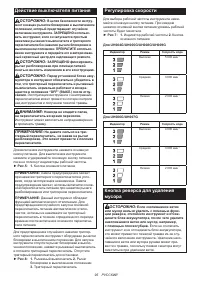
- 95 Действие выключателя питания
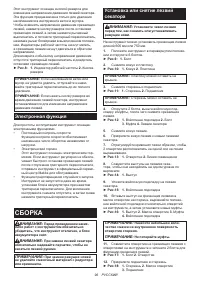
- 96 Электронная функция; СБОРКА; Установка или снятие лезвий
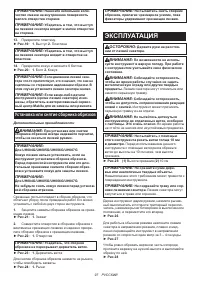
- 97 Установка или снятие сборника обрезков; ЭКСПЛУАТАЦИЯ
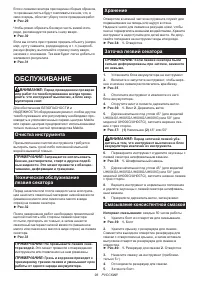
- 98 ОБСЛУЖИВАНИЕ
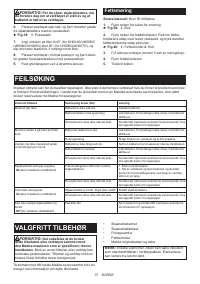
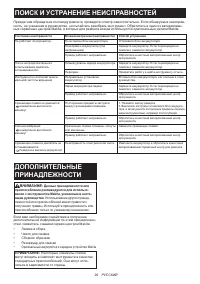
- 99 ПОИСК И УСТРАНЕНИЕ НЕИСПРАВНОСТЕЙ; ДОПОЛНИТЕЛЬНЫЕ
Характеристики

Остались вопросы?Не нашли свой ответ в руководстве или возникли другие проблемы? Задайте свой вопрос в форме ниже с подробным описанием вашей ситуации, чтобы другие люди и специалисты смогли дать на него ответ. Если вы знаете как решить проблему другого человека, пожалуйста, подскажите ему :)


