
Кондиционеры Royal Clima RCI-RF40HN/IN/RCI-RF40HN/OUT - инструкция пользователя по применению, эксплуатации и установке на русском языке. Мы надеемся, она поможет вам решить возникшие у вас вопросы при эксплуатации техники.
Если остались вопросы, задайте их в комментариях после инструкции.
"Загружаем инструкцию", означает, что нужно подождать пока файл загрузится и можно будет его читать онлайн. Некоторые инструкции очень большие и время их появления зависит от вашей скорости интернета.


28
29
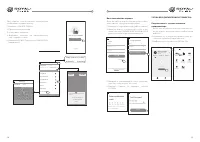
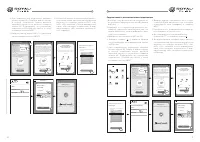
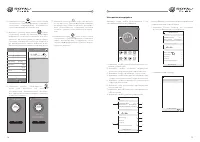
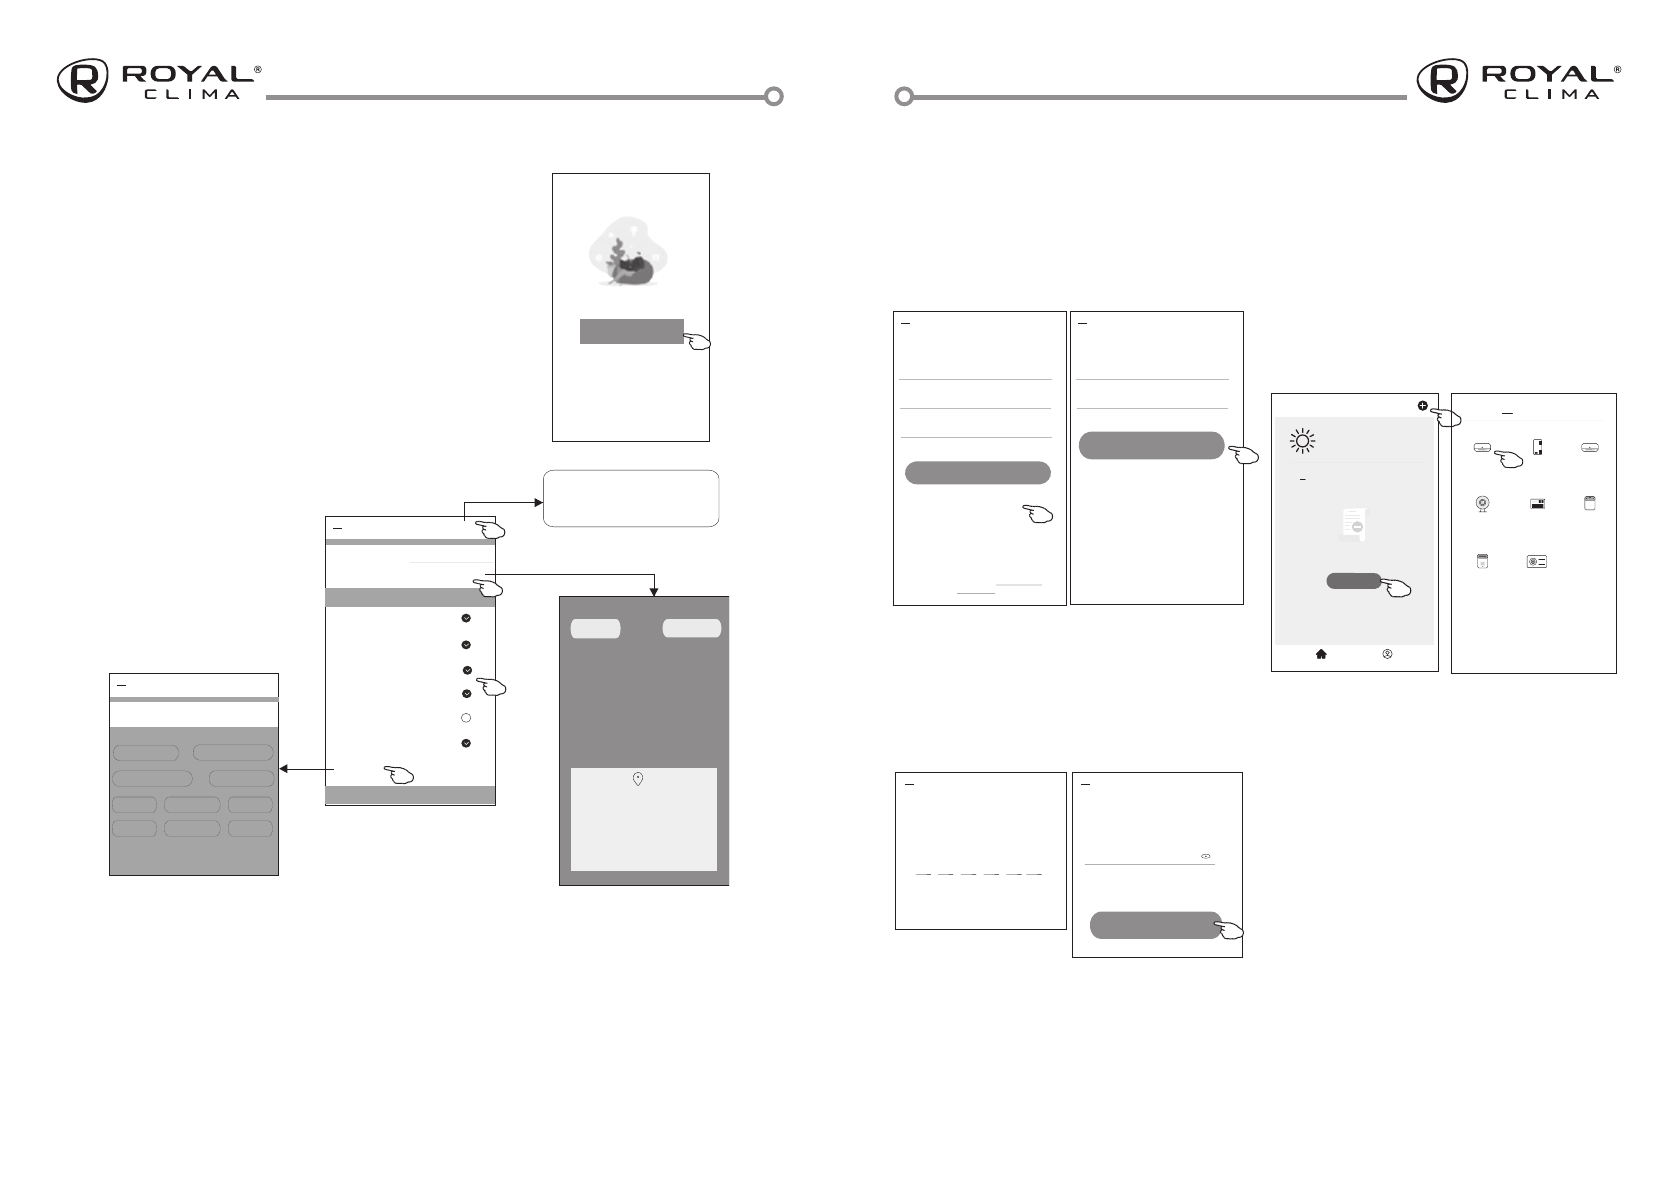
При первом использовании приложения
необходимо создать группу:
1 Нажмите «CREATE FAMILY»
2 Присвойте группе имя
3 Установите локацию
4
Выберите комнаты из предложенных
или создайте новые
5 Нажмите «DONE» (Сделано) и «COMPLETED»
(завершено)
Living Room
Master Bedroom
Second Bedroom
Dining Room
Kitchen
Study Room
Porch
Balcony
Kids Room
Closet
Turn on your smart life
Create family
Log out
#
A
B
C
D
E
F
G
H
I
J
K
L
M
N
O
P
Q
R
S
T
U
V
W
X
Y
Z
Family Name
<
Add family
Done
Family Location Set location >
Smart devices in rooms:
Living Room
Master Bedroom
Second Bedroom
Dining Room
Kitchen
Study Room
Add Room
You can change the room settings anytime
My home
Room Name
<
Add Room
Done
Recommended
*******
Allow Smart Life to access this device's
location?
ALLOW ONLY WHILE IN USE
ALLOW ALL THE TIME
DENY
CANCEL
CONFIRM
Family created successfully
View family Completed
#
A
B
C
D
E
F
G
H
I
J
K
L
M
N
O
P
Q
R
S
T
U
V
W
X
Y
Z
Living Room
Master Bedroom
Second Bedroom
Dining Room
Kitchen
Study Room
Porch
Balcony
Kids Room
Closet
Turn on your smart life
Create family
Log out
#
A
B
C
D
E
F
G
H
I
J
K
L
M
N
O
P
Q
R
S
T
U
V
W
X
Y
Z
Family Name
<
Add family
Done
Family Location Set location >
Smart devices in rooms:
Living Room
Master Bedroom
Second Bedroom
Dining Room
Kitchen
Study Room
Add Room
You can change the room settings anytime
My home
Room Name
<
Add Room
Done
Recommended
*******
Allow Smart Life to access this device's
location?
ALLOW ONLY WHILE IN USE
ALLOW ALL THE TIME
DENY
CANCEL
CONFIRM
Family created successfully
View family Completed
#
A
B
C
D
E
F
G
H
I
J
K
L
M
N
O
P
Q
R
S
T
U
V
W
X
Y
Z
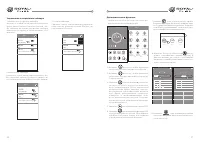
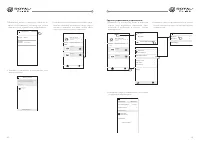
3 Введите в появившемся поле приложе-
ния код, полученные по почте
4
Введите пароль и нажмите кнопку
«DONE»
Login
******* >
Email address
<
Log in
Password
Forgot password
Forgot password
****** >
*********** X
<
Obtain verification code
Enter verification
code
Verification code is sent to your email:
***********,Resend(55s)
* * * * * *
<
Set Password
6-20 characters for password, including character, numbers
* * * * * *
<
Done
Login means that you agree with User Agreement and
Privacy Policy
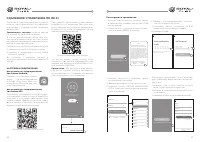
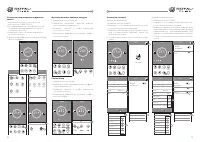
3 СПОСОБА ДОБАВЛЕНИЯ УСТРОЙСТВА
Подключение с использованием
кондиционера
1 Включите вну тренний блок кондиционе-
ра (не нужно запускать какой-либо режим
работы)
2 Нажмите «+» в верхнем правом углу до-
машней странички приложения
3 Выберите «Air conditioner (BT+Wi-Fi)»
AP Mode
Reset the device first.
Method1:When there is a DISPLAY key on the
remote control, press the DISPLAY key 6 times
in the time of 8 seconds; when there is no
DISPLAY key on the remote control, press the
ECO key 6 times in the time of 8 seconds until
the device beeps twice and the LCD screen
show CF .
Next
Cancel
Confirm the device is reset.
Resetting Devices
<
Method2:Press the General key 9 times in the
time of 8 seconds until the device beeps twice
and the LCD screen show CF .
<
Welcome Home
Set your home location for more
information
All Devices
Living Room
Master
...
Add Device
Home
Me
Work office
<
No devices
Select 2.4 Ghz
Wi-Fi Network and
enter password
Next
Cancel
If your Wi-Fi is 5GHz, please set it to
bo 2.4GHz.Common router setting
method
2.4
GHz
5
GHz
*******
Password
Add Device
<
Device added
successfully
Sample1
Living Ro...
Master Be...
Second B...
Dining R...
Kitchen
Study Ro...
Rename the
device
Select the
location room
Done
enter password
<
Add Manually
Auto Scan
Dehumidifier
Air Conditioner
(BT+Wi-Fi)
Fresh Air
Purifier
Split Air
Conditioner
Window Type
Air Conditioner
Portable Air
Conditioner
Security
Camera
Swimming
Pool H/P
Adding device...
Cancel
Ensure that the device is powered on.
2%
Scan
devices.
Register on
Cloud.
Initialize the
devices.
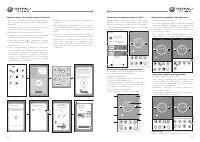
Восстановление пароля
Если вы забыли пароль или вы хотите обно-
вить пароль, следуйте инструкции:
1 Нажмите «Forgot password» (забыл пароль)
2 Введите адрес электронной почты и на-
жмите кнопку OBTAIN VERIFICATION CODE
для получения кода-подтверждения
Login
******* >
Email address
<
Log in
Password
Forgot password
Forgot password
****** >
*********** X
<
Obtain verification code
Enter verification
code
Verification code is sent to your email:
***********,Resend(55s)
* * * * * *
<
Set Password
6-20 characters for password, including character, numbers
* * * * * *
<
Done
Login means that you agree with User Agreement and
Privacy Policy
Содержание
- 3 СОДЕРЖАНИЕ
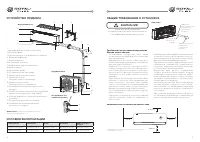
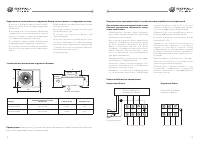
- 6 Внутренний блок
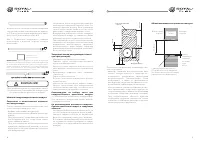
- 7 Требования по установке внутренних; Минимальное расстояние до препятствий; ОБЩИЕ ТРЕБОВАНИЯ К УСТАНОВКЕ
- 8 находиться в правильном положении; Правильное положение монтажной панели
- 9 Требования по установке наружных блоков сплит-систем:; 0 см до стены
- 10 может отсутствовать резиновая прокладка)
- 11 Установочные данные для наружных блоков:
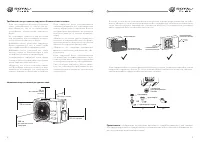
- 12 Схемы межблочных соединений; Плата управления внутреннего блока; На некоторых моделях
- 13 Наружные блоки
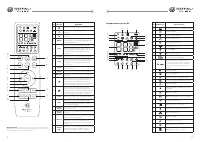
- 14 УПРАВЛЕНИЕ ПРИБОРОМ; Описание пульта дистанционного; Индикатор текущей
- 15 Панель индикации пульта дистанционного управления
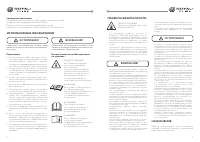
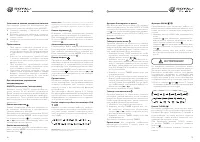
- 21 ОСТОРОЖНО
- 22 ТЕХНИЧЕСКИЕ ХАРАКТЕРИСТИКИ
- 23 ПОИСК И УСТРАНЕНИЕ НЕИСПРАВНОСТЕЙ
- 26 УХОД И ОБСЛУЖИВАНИЕ
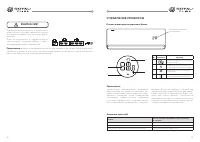
- 28 Товар сертифицирован на территории Таможенного союза.
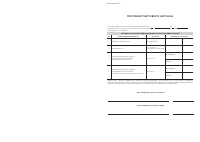
- 29 ПРОТОКОЛ О ПРИЕМКЕ ОБОРУДОВАНИЯ
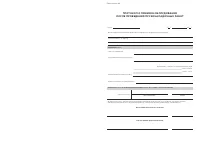
- 31 ПРОТОКОЛ ТЕСТОВОГО ЗАПУСКА
- 33 ГАРАНТИЙНЫЙ ТАЛОН; Поздравляем вас с приобретением техники отличного качества!


