
Кондиционеры Mitsubishi Electric MSZ-DM71VA/MUZ-DM71VA 01-211-301-0-501-085 - инструкция пользователя по применению, эксплуатации и установке на русском языке. Мы надеемся, она поможет вам решить возникшие у вас вопросы при эксплуатации техники.
Если остались вопросы, задайте их в комментариях после инструкции.
"Загружаем инструкцию", означает, что нужно подождать пока файл загрузится и можно будет его читать онлайн. Некоторые инструкции очень большие и время их появления зависит от вашей скорости интернета.

En-3
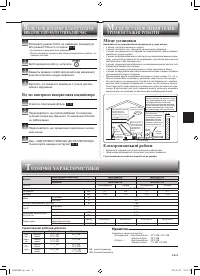
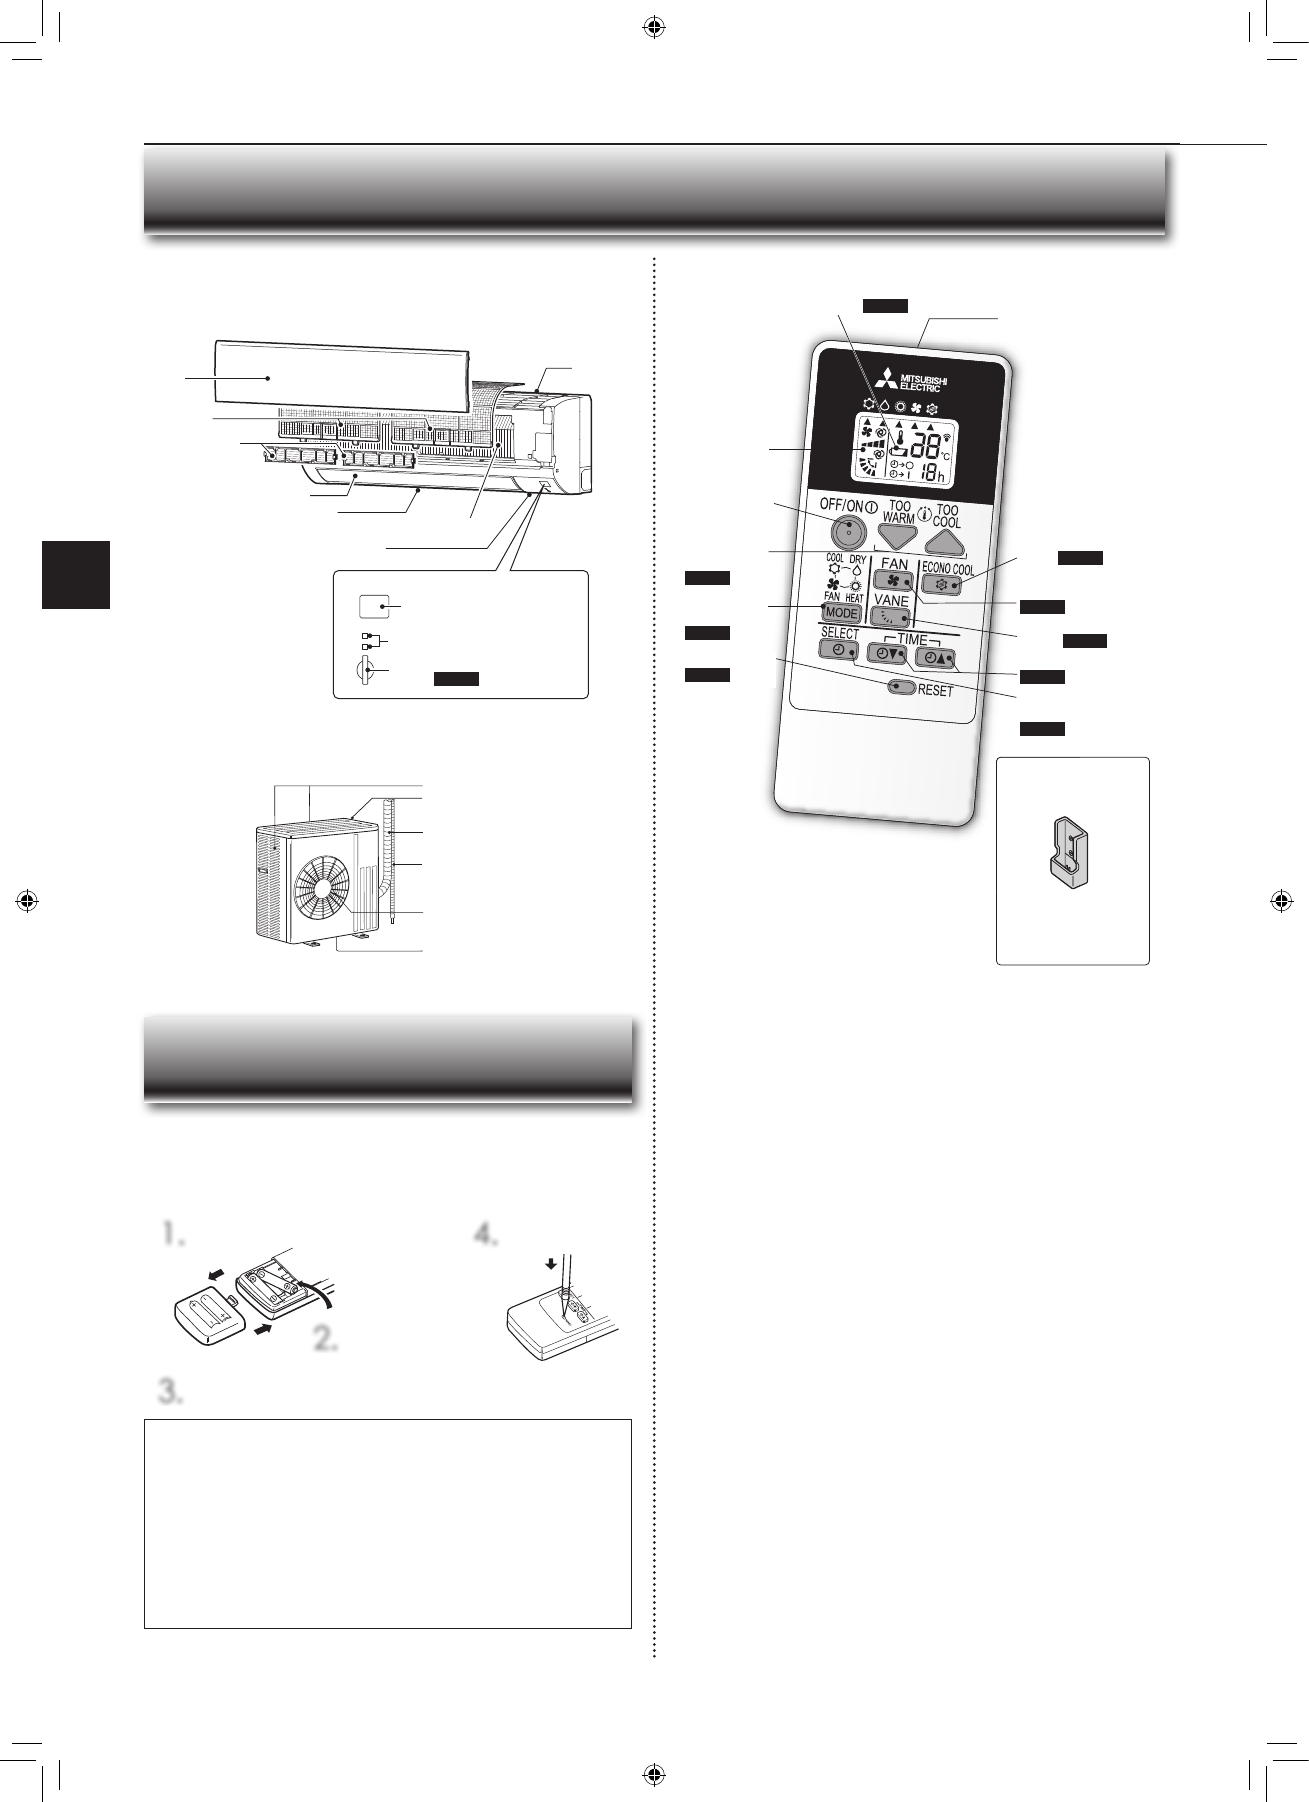
● OPERATING INSTRUCTIONS ●
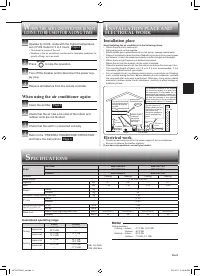
Before operation:
Insert the power supply plug into the power outlet and/or
turn the breaker on.
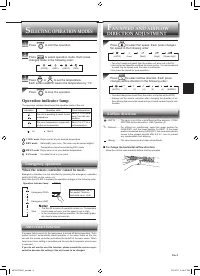
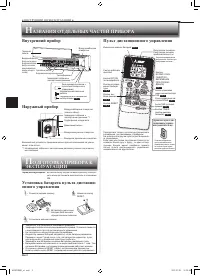
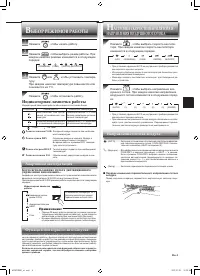
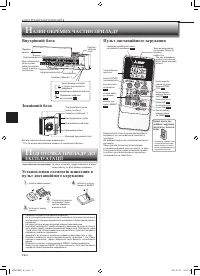
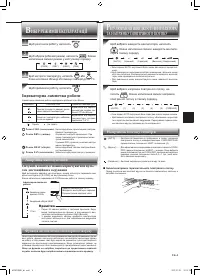
Operation indicator lamp
Remote control
receiving section
Horizontal vane
Air inlet
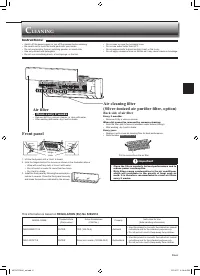
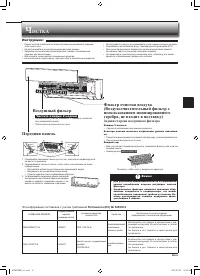
Air fi lter
Front
panel
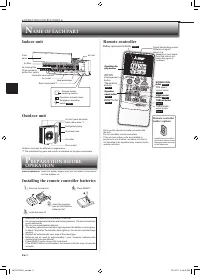
Installing the remote controller batteries
N
AME OF EACH PART
P
REPARATION BEFORE
OPERATION
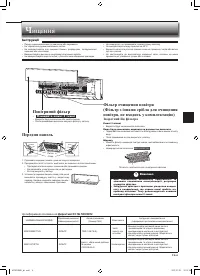
Indoor unit
Air outlet
Outdoor unit
Outdoor units may be different in appearance.
Heat exchanger
Air inlet (back and side)
Refrigerant piping
Drainage hose
Air outlet
Drain outlet
Remote controller
holder (option)
• Install the remote control-
ler holder in a place where
the signal can be received
by the indoor unit.
Only use the remote controller provided with
the unit.
Do not use other remote controllers.
If two or more indoor units are installed in
proximity to one another, an indoor unit that is
not intended to be operated may respond to the
remote controller.
Remote controller
Emergency operation
switch
Page 4
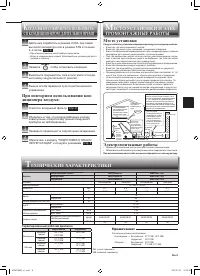
Spec name plate *1
Spec name plate *1
*1 The manufacturing year and month is indicated on the spec name plate.
Air cleaning fi lter
(Silver-ionized air
purifi er fi lter, option)
2.
Insert the negative
pole of AAA alkaline
batteries fi rst.
• Make sure the polarity of the batteries is correct.
• Do not use manganese batteries and leaking batteries. The remote controller
could malfunction.
• Do not use rechargeable batteries.
• The battery replacement indicator lights up when the battery is running low.
In about 7 days after the indicator starts lights up, the remote controller stops
working.
• Replace all batteries with new ones of the same type.
• Batteries can be used for approximately 1 year. However, batteries with
expired shelf lives last shorter.
• Press RESET gently using a thin instrument.
If the RESET button is not pressed, the remote controller may not operate
correctly.
1.
Remove the back lid.
3.
Install the back lid.
4.
Press RESET.
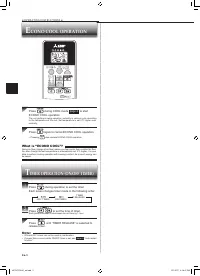
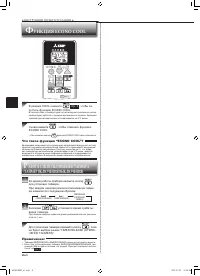
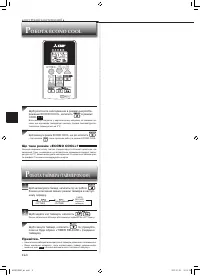
Operation dis-
play section
OFF/ON
(stop/operate)
button
Temperature
buttons
Page 4
Operation
select button
Page 4
ECONO COOL
button
Page 5
FAN speed
control button
Page 4
VANE control
button
Page 4
TIME set button
Page 5
RESET button
Page 3
TIMER mode
select button
Page 5
Battery replacement indicator
Page 3
Signal transmitting section
Distance of signal :
About 6 m
Beep(s) is (are) heard
from the indoor unit
when the signal is
received.
Operation dis-
play section
OFF/ON
(stop/operate)
button
Temperature
buttons
Page 4
Operation
select button
Page 4
ECONO COOL
button
Page 5
FAN speed
control button
Page 4
VANE control
button
Page 4
TIME set button
Page 5
RESET button
Page 3
TIMER mode
select button
Page 5
Battery replacement indicator
Page 3
JG79Y275H01_en.indd 3
1/11/2017 4:18:46 PM
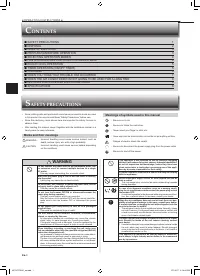
Содержание
- 10 ОДЕРЖАНИЕ; ПРЕДУПРЕЖДЕНИЕ; ЕРЫ ПРЕДОСТОРОЖНОСТИ
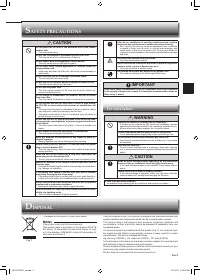
- 11 При установке прибора; ВАЖНО
- 12 ОДГОТОВКА ПРИБОРА К; АЗВАНИЯ ОТДЕЛЬНЫХ ЧАСТЕЙ ПРИБОРА; Внутренний прибор
- 13 ЫБОР РЕЖИМОВ РАБОТЫ; Индикаторная лампочка работы; Аварийная эксплуатация; Когда использование пульта дистанционного; АСТРОЙКА СКОРОСТИ ВЕНТИЛЯТОРА И; Направление потока воздуха; Функция повторного автозапуска
- 14 УНКЦИЯ ECONO COOL; Что такое функция “ECONO COOL”?; АБОТА С ИСПОЛЬЗОВАНИЕМ ТАЙМЕРА
- 15 Передняя панель; ИСТКА; Фильтр очистки воздуха; Задняя сторона воздушного фильтра; Воздушный фильтр
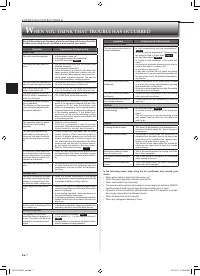
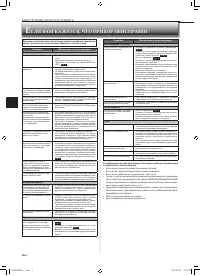
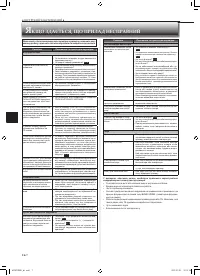
- 16 СЛИ ВАМ КАЖЕТСЯ, ЧТО ПРИБОР НЕИСПРАВЕН
- 17 При повторном использовании кон-; ОГДА ВЫ НЕ СОБИРАЕТЕСЬ ПОЛЬЗОВАТЬ-; Место установки; ЕСТО УСТАНОВКИ И ЭЛЕК-


