Кондиционеры Daikin LRYEQ-AY - инструкция пользователя по применению, эксплуатации и установке на русском языке. Мы надеемся, она поможет вам решить возникшие у вас вопросы при эксплуатации техники.
Если остались вопросы, задайте их в комментариях после инструкции.
"Загружаем инструкцию", означает, что нужно подождать пока файл загрузится и можно будет его читать онлайн. Некоторые инструкции очень большие и время их появления зависит от вашей скорости интернета.


LRYEQ16A7Y1
CONVENI-PACK
4P448939-1A – 2016.07
Installation manual
18
10. CHECKS AFTER WORK COMPLETION
• Make sure the following works are complete in accordance with the
installation manual.
Piping work
Wiring work
Air tight test/Vacuum drying
Installation work for indoor unit
Installation work for booster unit
(In case of the booster unit connection)
11. REFRIGERANT REPLENISHMENT
For refrigerant filling contractor
Use R410A for refrigerant replenishment.
The R410A refrigerant cylinder is painted with a pink belt.
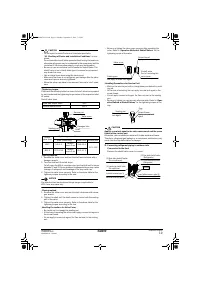
Warning
Electric Shock Warning
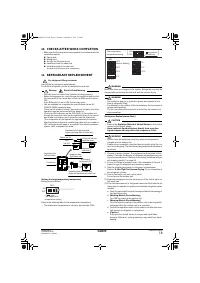
• Securely close the control box lid before turning power on.
• Before turning power on, check through the inspection hole (on the
left-hand side) of the control box lid that the RUN switch is set to
OFF.
If the RUN switch is set to ON, the fan may rotate.
• Use an insulated rod to operate the push buttons via the EL.
COMPO. BOX’s inspection door.
There is a risk of electric shock if you touch any live parts, since this
operation must be performed with the power on.
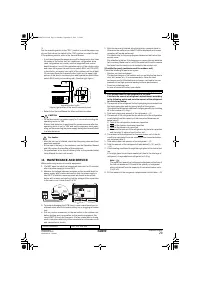
• Check the LED indicators on the PCB (A1P) of the outdoor unit
through the inspection hole (on the right-hand side) of the control
box lid after the outdoor unit is turned on (see the illustration).
(The compressor will not operate for approximately 10 minutes
after the outdoor unit and air-conditioning indoor unit are turned on.
H2P will be turned off when in a condition to be able to operate a
system. (H3P continues blink state)
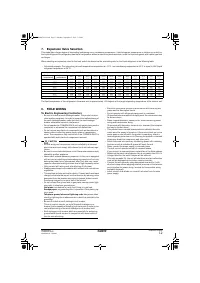
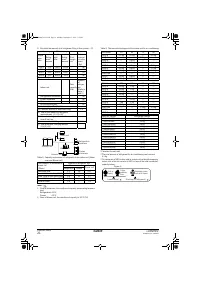
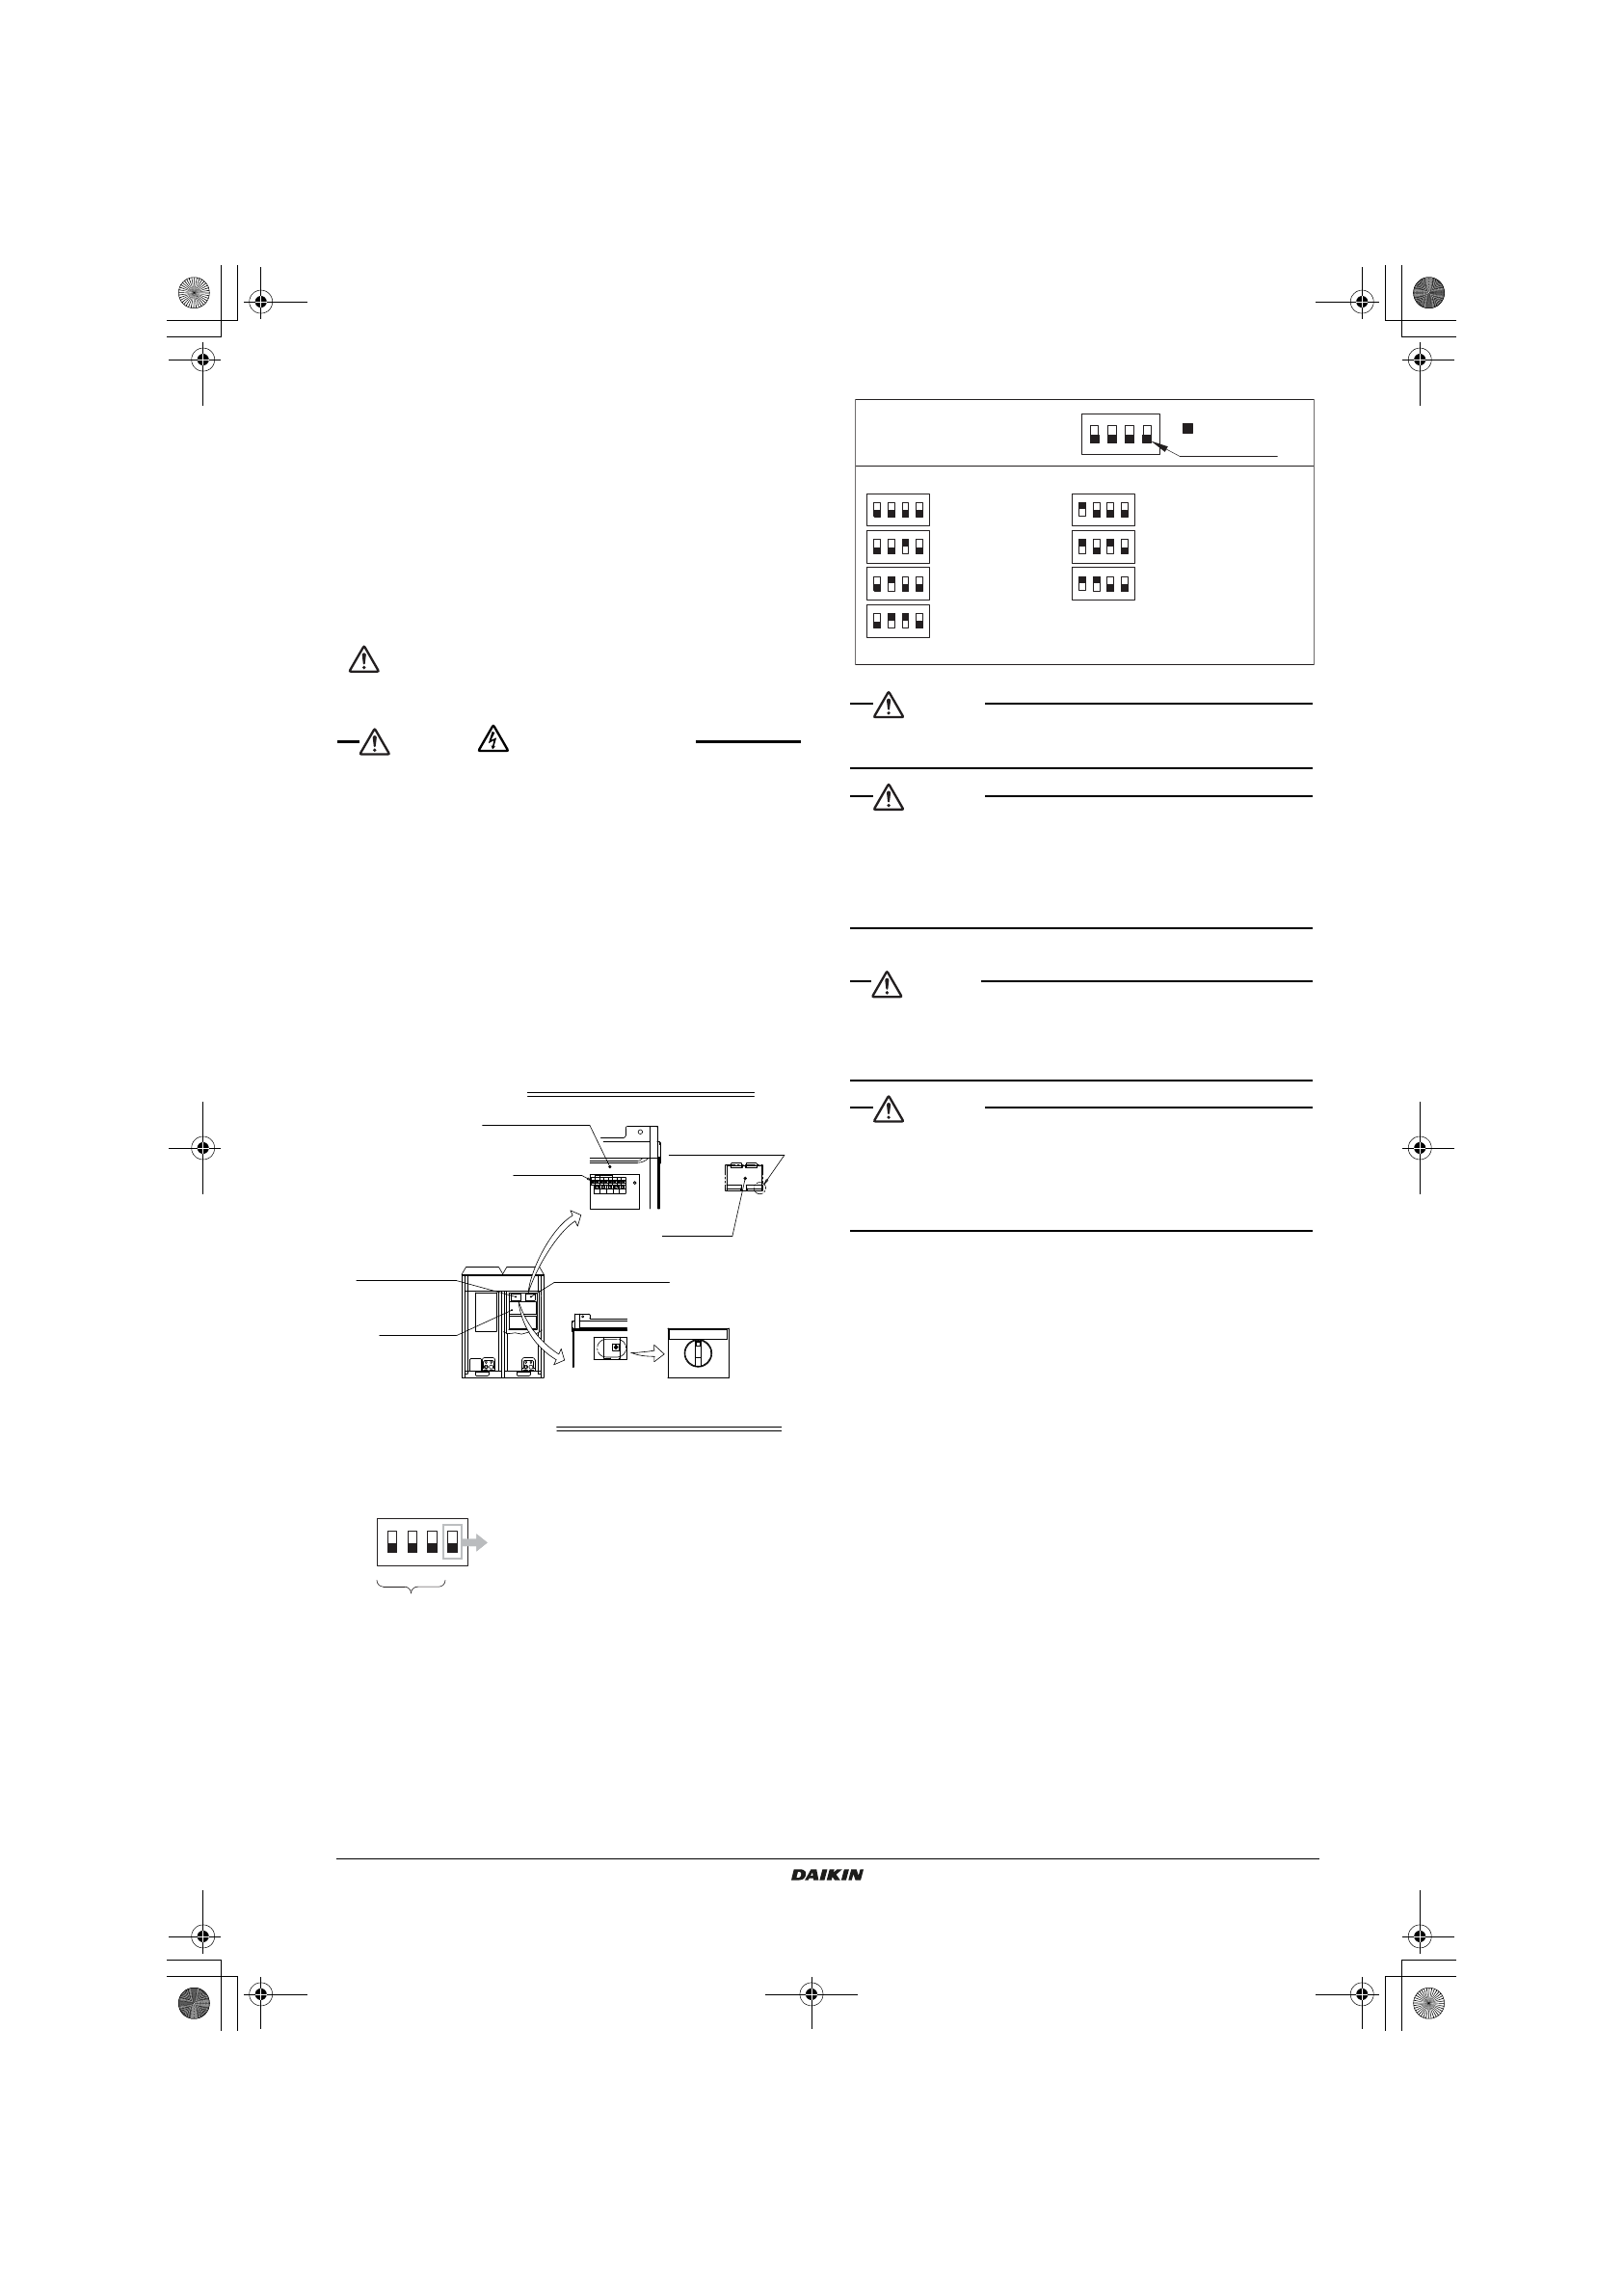
[Setting the target evaporating temperature]
Setting by dip switches
Refer to the following table for the evaporation temperature.
• The evaporation temperature is set up by dip switches (DS1).
WARNING
Make sure there is no oxygen in the system. Refrigerant may only be
charged after performing the leak test and the vacuum drying.
WARNING
• Use protective gear (e.g., protective gloves and glasses) at the
time of refrigerant filling.
• Pay attention to the rotation of the fan whenever the front panel is
opened while working.
The fan can rotate continuously for a while after the outdoor unit
stops operating.
[Refrigerant Replenishment Work]
CAUTION
• Refer to the Operation Method of Shutoff Valves for the control
method of the shutoff valves.
• Never replenish liquid refrigerant directly from a gas line.
Liquid compression may cause the compressor to fail.
WARNING
• Do not close the liquid stop valve fully, when the refrigerant is
charged into the outdoor unit.
• Please do not completely close the liquid stop valve while the out-
door unit is stopping. The field liquid piping might burst because of
liquid seal.
1. The unit is factory charged. The refrigerant must be noted for this
product. Calculate the amount of refrigerant replenishment accord-
ing to the procedures on "Method of calculating "additional refriger-
ant charging quantity"" on page 20.
2. In case re-charge is required, refer to the nameplate of the unit. It
states the type of refrigerant and necessary amount.
3. Take the following procedure for refrigerant replenishment.
Refer to "9-1 Air Tight Test/Vacuum Drying" for the connection of
the refrigerant cylinder.
(1) Turn on the indoor unit and control panel.
Do not turn on the outdoor unit.
(2) Replenish refrigerant from the service port of the shutoff valve on
the liquid side.
(3) If the calculated amount of refrigerant cannot be filled, take the fol-
lowing steps to operate the system and continue refrigerant replen-
ishment.
a. Open the gas shutoff valve all the way and adjust the opening of
the liquid stop valve.
b. [Warning/Electric Shock Warning]
Turn ON the power to the outdoor unit.
c. [Warning/Electric Shock Warning]
Turn the operation switch of the outdoor unit on and replenish
refrigerant while the outdoor unit is in operation.
d. Turn off the operation switch of the outdoor unit after the speci-
fied amount of refrigerant is replenished.
e. [Caution]
Fully open the shutoff valves on the gas and liquid sides
promptly. Otherwise, a piping explosion may result from liquid
sealing.
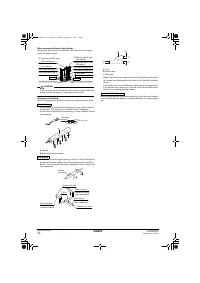
Inspection hole
(left-hand side)
Inspection hole
(right-hand side)
Control box
Inspection hole (left-hand side)
(upper left-hand side of control box)
Inspection hole (right-hand side)
(upper right-hand side of control box)
Control box lid
LED
(H1~8P)
Lift up this tab and
open the cover.
Inspection
hole cover
REMOTE OFF
ON
RUN switch
(factory set: OFF)
OFF
ON
1
DS1
3
2
4
The evaporation
temperature setting
DO NOT MOVE
+10°C
the position
of switches
–10°C
–15°C
–20°C
DS1
–5°C
(Factory Setting)
0°C
The evaporation
temperature setting
+5°C
DS1
ON
OFF
)
(
4
2
1
3
4
2
1
3
4PEN448939-1A.book Page 18 Monday, September 5, 2016 7:12 PM


