Кондиционеры Daikin LRYEQ-AY - инструкция пользователя по применению, эксплуатации и установке на русском языке. Мы надеемся, она поможет вам решить возникшие у вас вопросы при эксплуатации техники.
Если остались вопросы, задайте их в комментариях после инструкции.
"Загружаем инструкцию", означает, что нужно подождать пока файл загрузится и можно будет его читать онлайн. Некоторые инструкции очень большие и время их появления зависит от вашей скорости интернета.


LRYEQ16A7Y1
CONVENI-PACK
4P448939-1A – 2016.07
Installation manual
16
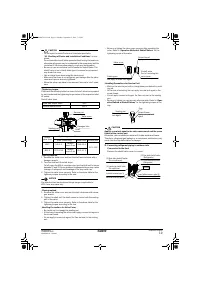
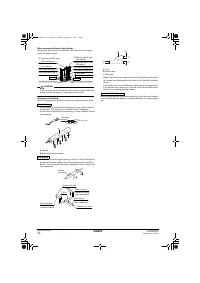
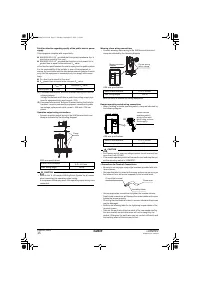
• Do not finish strand wire with solder.
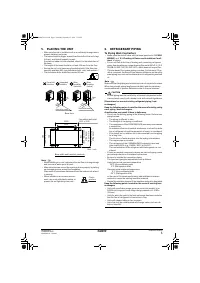
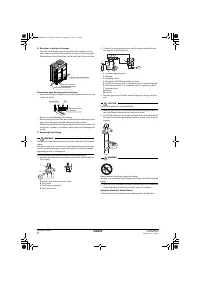
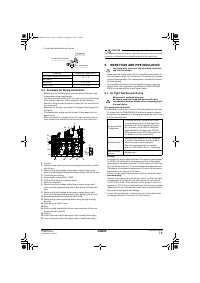
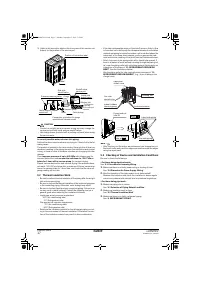
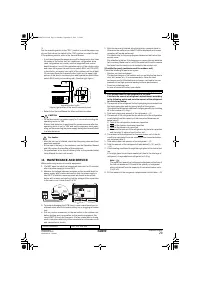
8-5 Procedure for Wiring Inside Units
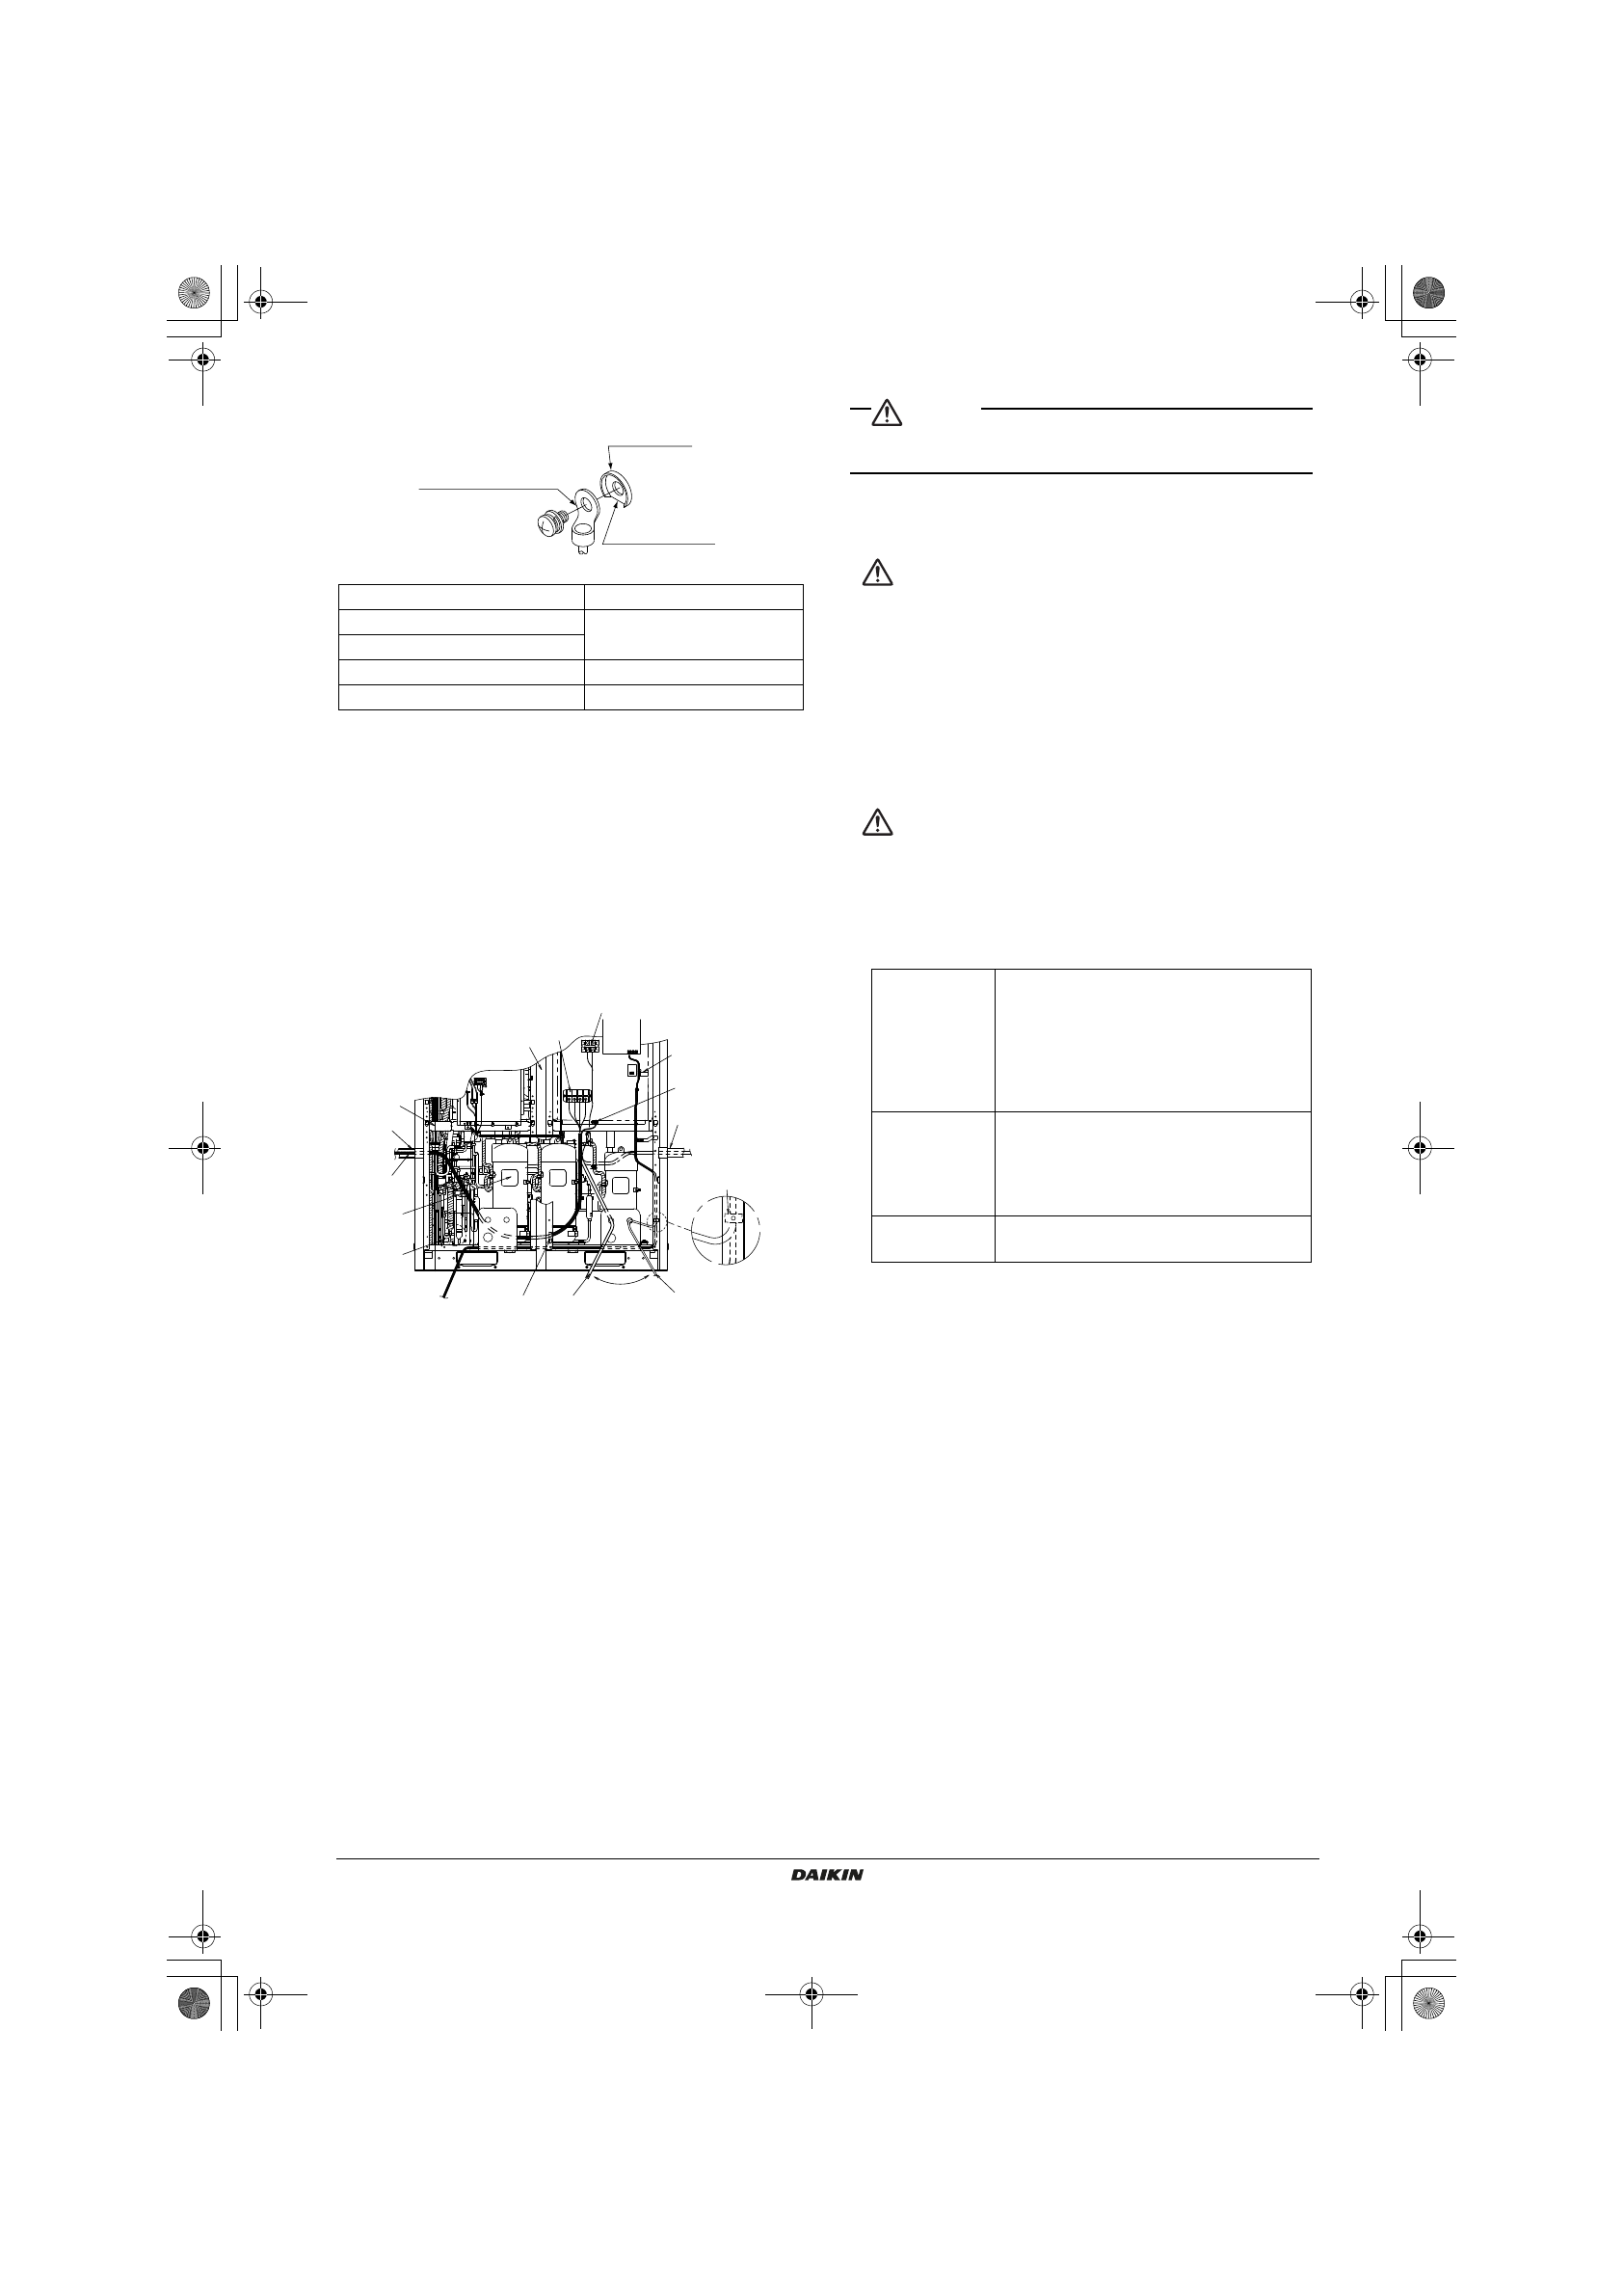
• Referring to the following figure, secure and wire the power and
transmission wiring using clamps.
• Lay the ground wire so that it will not come in contact with the lead
wires of the compressor. Other equipment will be adversely
affected if the ground wire comes in contact with the lead wires of
the compressor.
• Make sure all wiring do not contact to the pipes (hatching parts in
the figure).
• The transmission wiring must be at least 50 mm away from the
power wiring.
• After wiring work is completed, check to make sure there are no
loose connections among the electrical parts in the control box.
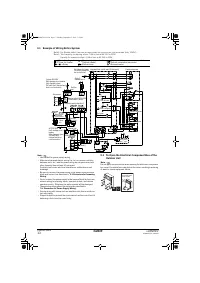
1 Conduit
2 Perform wiring carefully so that the wiring will not come in contact
with the port
3 When routing high-voltage wiring (power supply wiring, earth
wires, and warning/alarm/operation output wiring) from the left side
4 Connecting local piping
5 Power supply terminal block (X1M)
6 X2M terminal block for operation output
7 Earth terminal block
8 When routing high-voltage wiring (power supply wiring, earth
wires, and warning/alarm/operation output wiring) from the right
side
9 When routing high-voltage wiring (power supply wiring, earth
wires, and warning/alarm/operation output wiring) from the front
10 Remote operating switch terminal block (X3M)
11 When routing remote operating switch wiring through a wiring
opening
12 Separate by at least 50 mm
13 Stay
14 Perform wiring carefully so that the sound insulation of the com-
pressor will not come off
15 Support
16 Fixed to the rear side of the support with a clamp (field supply)
17 Fixed to the rear side of the support with a clamp (field supply)
CAUTION
On completion of electrical work, check that there are no disconnected
connectors or terminals of any electrical parts in the control box.
9.
INSPECTION AND PIPE INSULATION
For piping work contractor, electrical work contractor,
and trial run workers
• Never open the shutoff valve until the insulation measurement of
the main power supply circuit is finished. The measured insulation
value will become lower if the measurement is made with the shut-
off valve opened.
• On completion of inspection and refrigerant charging, open the
shutoff valve. The compressor will malfunction if the CONVENI-
PACK is operated with the shutoff valve closed.
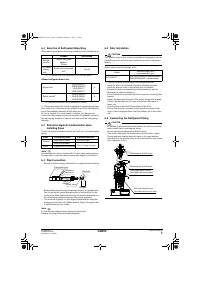
9-1 Air Tight Test/Vacuum Drying
Refrigerant is enclosed in the unit.
Be sure to keep both liquid and gas shutoff valves
closed at the time of an airtight test or vacuum drying of
the local piping.
[For piping work contractor]
On completion of piping work, make the following inspection precisely.
• To ensure that the CONVENI-PACK withstand pressure properly
and prevent the penetration of foreign substances, be sure to use
R410A-dedicated tools.
• Air tight
Pressurize the high-pressure section of the system (liquid piping)
to 4.0 MPa (40 bar) and the low-pressure section of the system
(gas piping) to the design pressure (*1) of the indoor unit (field sup-
ply) from the service port (*2) (do not exceed the design pressure).
The system is considered to have passed if there is no decrease in
the pressure over a period of 24 hours.
If there is a decrease in the pressure, check for and repair leaks.
• Vacuum drying
Connect a vacuum pump to the service ports (*) of both the liquid
and gas pipes for at least 2 hours and vacuum the unit down to
–100.7 kPa or below. Then leave the unit for at least 1 hour at a
pressure of –100.7 kPa or below and check that the vacuum gage
reading will not rise. If the pressure rises, there is residual water in
the system or the system has leakage.
*1 Contact the manufacturer in advance for more information about
the design pressure of the indoor unit (field supply).
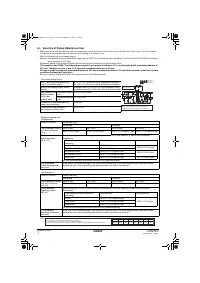
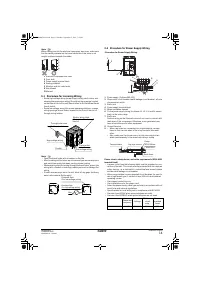
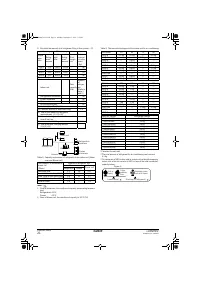
Screw size
Tightening torque (N•m)
M8 (Power supply terminal block)
5.5 - 7.3
M8 (Earth)
M4 (X2M)
2.39 - 2.91
M3.5 (X3M)
0.79 - 0.97
Crimp-style terminal
Cup washer
Cut out section
6
8
11
12
9
17
3
2
1
13
15
5
4
14
16
10
7
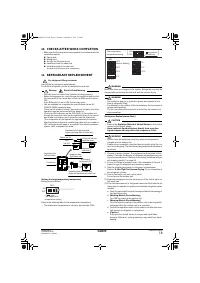
Gauge manifold
Charge hose
• To ensure that the CONVENI-PACK with-
stand pressure properly and prevent the
penetration of foreign substances (water,
dirt, and dust), use an R410A-dedicated
gage manifold and charge hose. R410A-
dedicated tools and R407C-dedicated tools
are different in screw specification.
Vacuum pump
• Pay the utmost attention so that the pump
oil will not flow backward into the system
while the pump is not in operation.
• Use a vacuum pump that can vacuum
down to –100.7kPa (5 Torr or –755mmHg).
Gas for airtight
test use
• Nitrogen gas
4PEN448939-1A.book Page 16 Monday, September 5, 2016 7:12 PM


