Кондиционеры Daikin JEHCCU-CL1 - инструкция пользователя по применению, эксплуатации и установке на русском языке. Мы надеемся, она поможет вам решить возникшие у вас вопросы при эксплуатации техники.
Если остались вопросы, задайте их в комментариях после инструкции.
"Загружаем инструкцию", означает, что нужно подождать пока файл загрузится и можно будет его читать онлайн. Некоторые инструкции очень большие и время их появления зависит от вашей скорости интернета.

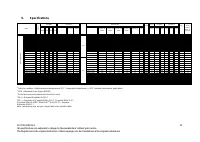
O-CU06-DEC14-1
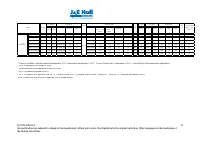
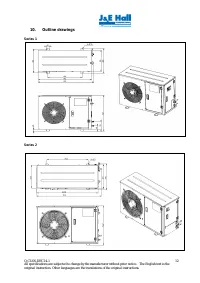
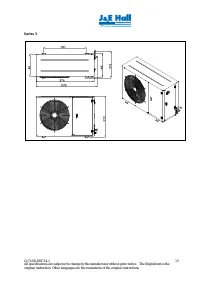
All specifications are subjected to change by the manufacturer without prior notice.
The English text is the
original instruction. Other languages are the translations of the original instructions.
7
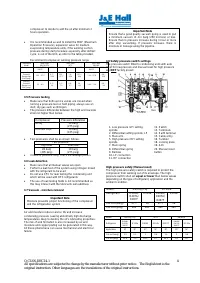
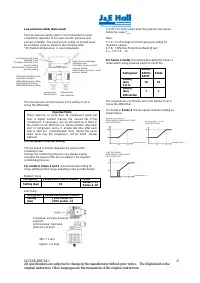
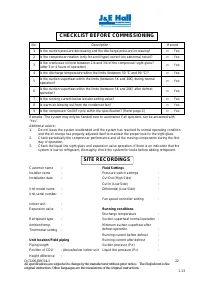
3.10 Commissioning of the Condensing Unit
Please make sure that all manual service valves are fully
open when starting the system for the first time. This
includes external and internal shut off valves as well as
liquid receiver valve in the unit.
The ball valve open position is shown as below:
3.11 Compressor electrical wiring
Verification of proper rotation direction is made by observing
that suction pressure drops and discharge pressure rises
when the compressor is energized. Reverse rotation of a
scroll compressor also results in substantially reduced
current draw. Suction temperature will be high, discharge
temperature will be low and the compressor may generate
abnormal noise.
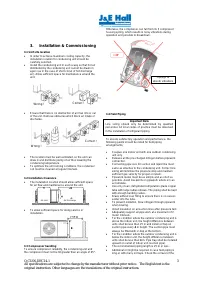
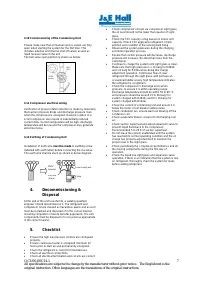
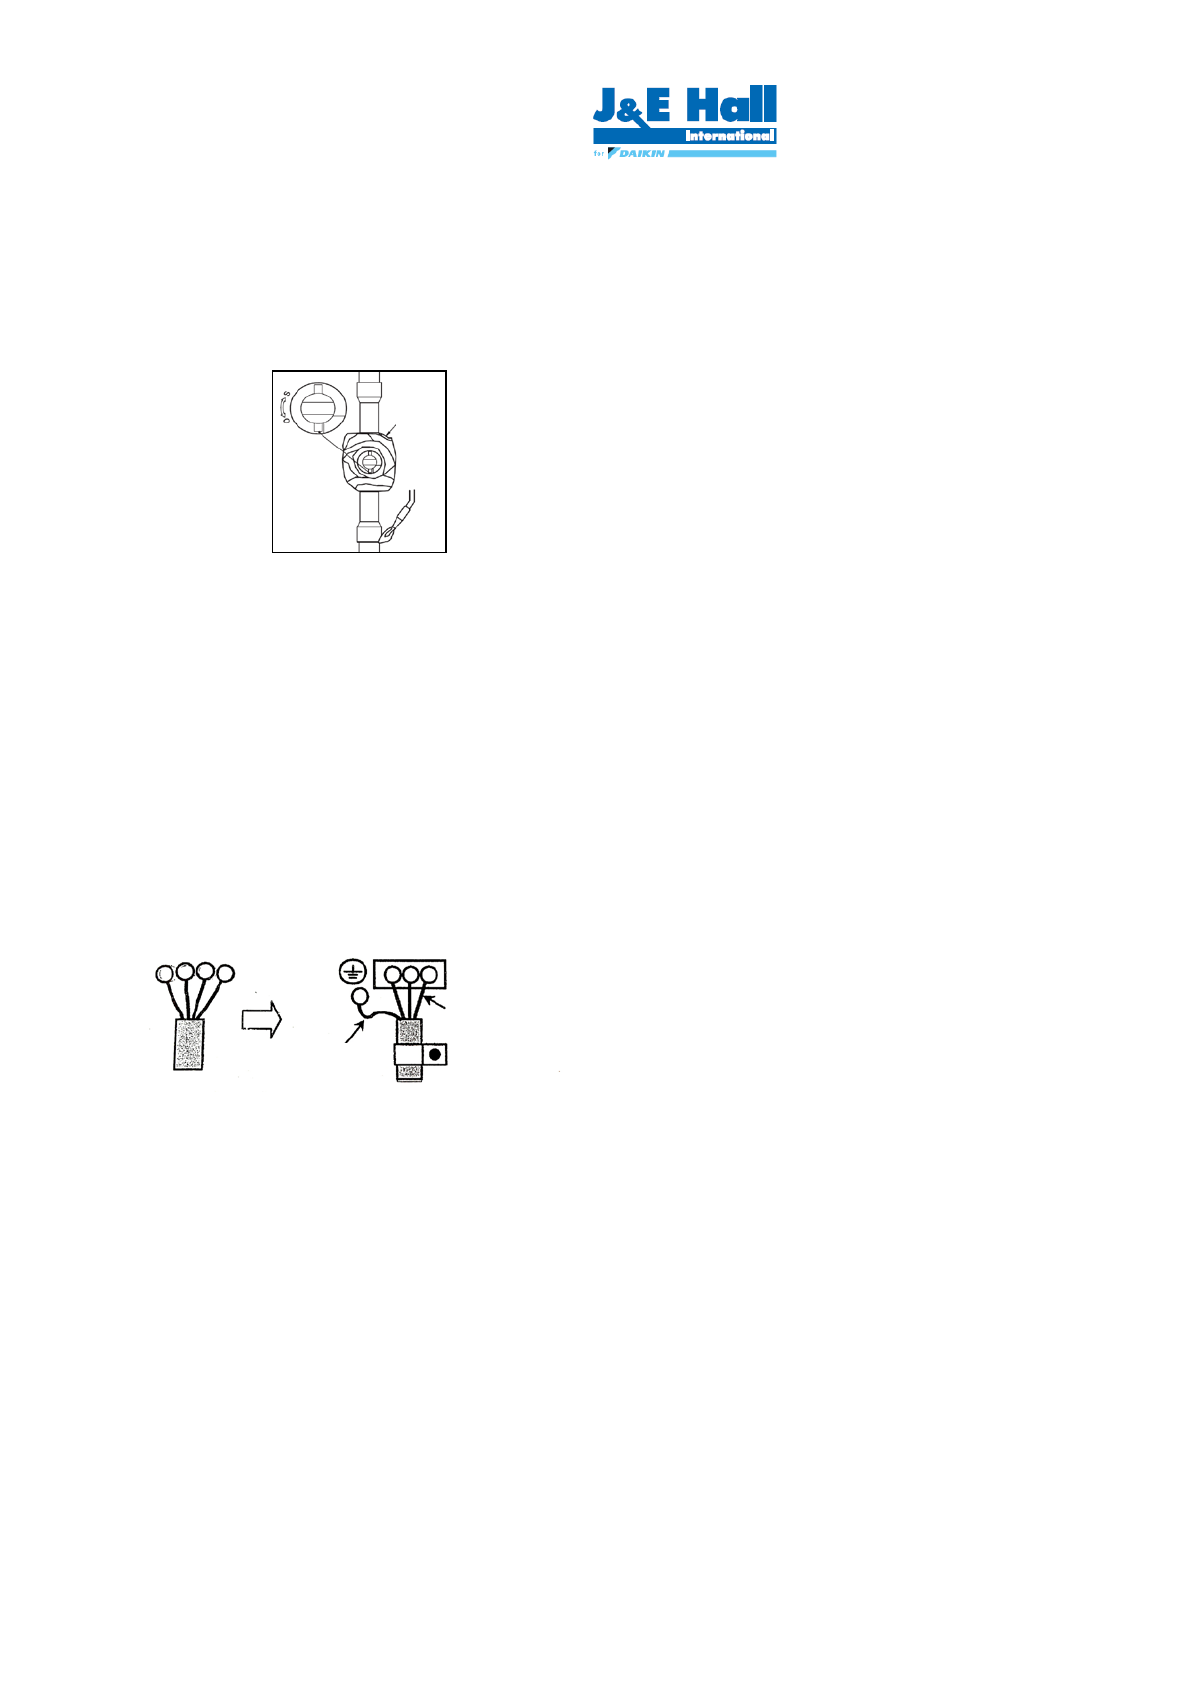
3.12 Earthing of Condensing Unit
Installation of earth wire
must be made
to earthing screw
(labelled with earth label) before connecting the live wires.
The earth wire shall be slack as shown in below diagram.
4.
Decommissioning &
Disposal
At the end of the unit’s useful life, a suitably qualified
engineer should decommission it. The refrigerant and
compressor oil are classed as hazardous waste and as such
must be reclaimed and disposed of in the correct manner,
including completion of waste transfer paperwork. The unit
components must be disposed of or recycled as appropriate
in the correct manner.
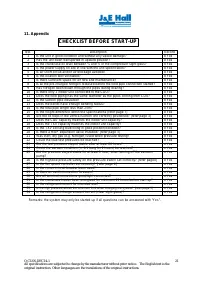
5.
Checklist
•
Ensure the high low pressure controls are configured
properly.
•
Ensure crankcase heater is energized minimum 12
hours prior to start up and permanently energized.
•
Check the refrigerant is correct for intended use.
•
Check all electrical connections.
•
Check all electrical termination and circuits are correct.
•
Check compressor oil level via compressor sight glass,
the oil level should not be lower than quarter of sight
glass.
•
Check the TXV capacity sizing based on indoor unit
capacity. Check TXV applicable refrigerant. Check
position and condition of the sensing bulb fixing
•
Observed the system pressures during the charging
and initial operation process.
•
Ensure that suction pressure will decrease, discharge
pressure will increase. No abnormal noise from the
compressor.
•
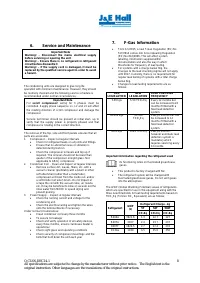
Continue to charge the system until sight glass is clear.
Make sure that high pressure is > 14 barg for R404A
and > 8 barg for R134a when doing this charge
adjustment operation. Continuous flow of clear
refrigerant through the sight glass, with perhaps an
occasional bubble at very high temperature indicates
the refrigerant is at optimum.
•
Check the compressor’s discharge and suction
pressure, to ensure it is within operating range.
Discharge temperature should be within 50 to 90 °C
and pressure should be around 15 to 26 barg (for
system charged with R404A) and 8 to 16 barg (for
system charged with R134a).
•
Check the current of condensing unit and ensure it is
below the motor circuit breaker setting value.
•
Check condenser fan, ensure warm air blowing off the
condenser coil.
•
Check evaporator blower, ensure it’s discharging cool
air.
•
Check suction superheat and adjust expansion valve to
prevent liquid flood back to the compressor.
Recommended 5 to 20 K of suction superheat.
•
Do not leave the system unattended until the system
has reached its normal operating condition and the oil
charge has properly adjusted itself to maintain the
proper level in the sight glass.
•
Check periodically the compressor performance and all
the moving components during the first day of
operation.
•
Check the liquid line sight glass and expansion valve
operation. If there is an indication that the system is low
on refrigerant, thoroughly check the system for leaks
before adding refrigerant.
MAX
150°C
OPEN
position
Eart wire
(Slack)
Power supply wire
Clamp
Earth
terminal


