Измерительные приборы CONDTROL GFX360-3 - инструкция пользователя по применению, эксплуатации и установке на русском языке. Мы надеемся, она поможет вам решить возникшие у вас вопросы при эксплуатации техники.
Если остались вопросы, задайте их в комментариях после инструкции.
"Загружаем инструкцию", означает, что нужно подождать пока файл загрузится и можно будет его читать онлайн. Некоторые инструкции очень большие и время их появления зависит от вашей скорости интернета.

8
9
user manual
EN
GFX 200/GFX 300/GFX 360/GFX 360
3
user manual
EN
GFX 200/GFX 300/GFX 360/GFX 360
3
C ROS S
L INE L A SER
C ROS S
L INE L A SER
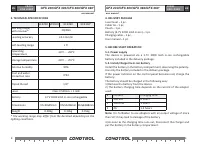
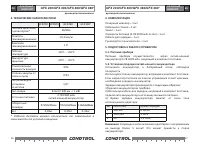
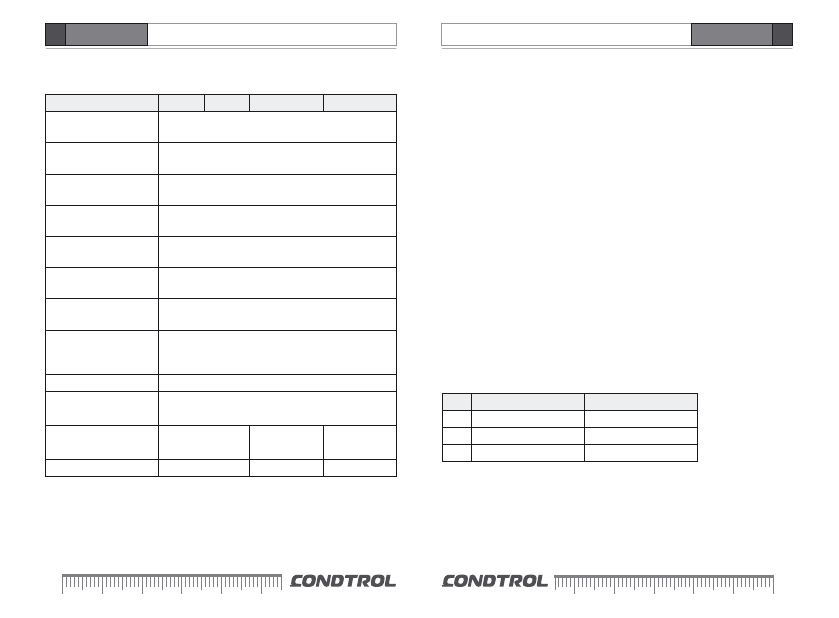
3. TECHNICAL SPECIFICATIONS
GFX200 GFX300
GFX360
GFX360
3
Working range/
with receiver*
20/40m
Leveling accuracy
±0.3 mm/m
Self-leveling range
± 5°
Operating
temperature
-10°C ... +50°C
Storage temperature
-20°C ... +70°C
Relative humidity
90%
Dust and water
protection rate
IP54
Tripod thread
1/4’’
Laser
Class II 520nm < 1 mW
Battery
3.7V 3000 mAh Li-ion rechargeable
Dimensions
97х50х85mm 97х50х98mm 112х64х98mm
Weight
0.28kg
0.29kg
0.35kg
* The working range may differ from the declared depending on the
lighting conditions.
4. DELIVERY PACKAGE
Laser level – 1 pc.
Cable tie – 1 pc.
Pouch – 1 pc.
Battery (3.7V 3000 mAh Li-ion) – 1 pc.
Charging cable – 1 pc.
User manual – 1 pc.
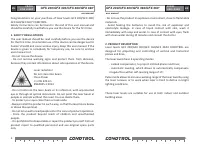
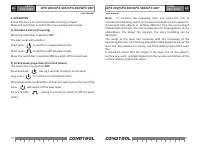
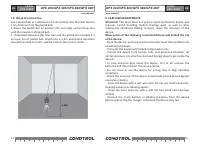
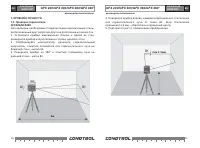
5. BEFORE START OPERATION
5.1. Power supply
The device is powered via a 3.7V 3000 mAh Li-ion rechargeable
battery included in the delivery package.
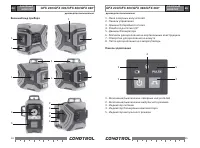
5.2. Install/charge the Li-ion battery
Install the battery in the battery compartment, observing the polarity.
Use only the battery included in the delivery package.
If the power indicator on the control panel becomes red, charge the
battery.
The battery should be charged in the following way:
1) Remove the battery from the device.
2) The battery charging time depends on the current of the adapter
used:
#
Current
Charging time
1
500 mA
6 hours
2
1000 mA
3 hours
3
2A
1.5 hours
Note:
It is forbidden to use adapters with an output voltage of more
than 5V! It may lead to damage of the battery.
4) As soon as the charging time runs out, disconnect the charger and
put the battery in the battery compartment.
Характеристики

Остались вопросы?Не нашли свой ответ в руководстве или возникли другие проблемы? Задайте свой вопрос в форме ниже с подробным описанием вашей ситуации, чтобы другие люди и специалисты смогли дать на него ответ. Если вы знаете как решить проблему другого человека, пожалуйста, подскажите ему :)


