
Холодильник Liebherr CUNesf 3903 NoFrost - инструкция пользователя по применению, эксплуатации и установке на русском языке. Мы надеемся, она поможет вам решить возникшие у вас вопросы при эксплуатации техники.
Если остались вопросы, задайте их в комментариях после инструкции.
"Загружаем инструкцию", означает, что нужно подождать пока файл загрузится и можно будет его читать онлайн. Некоторые инструкции очень большие и время их появления зависит от вашей скорости интернета.
u
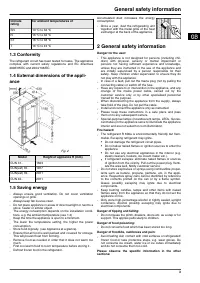
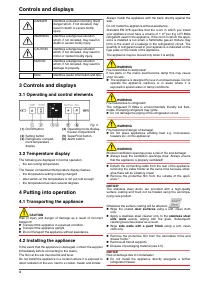
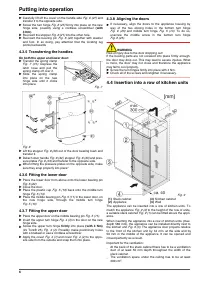
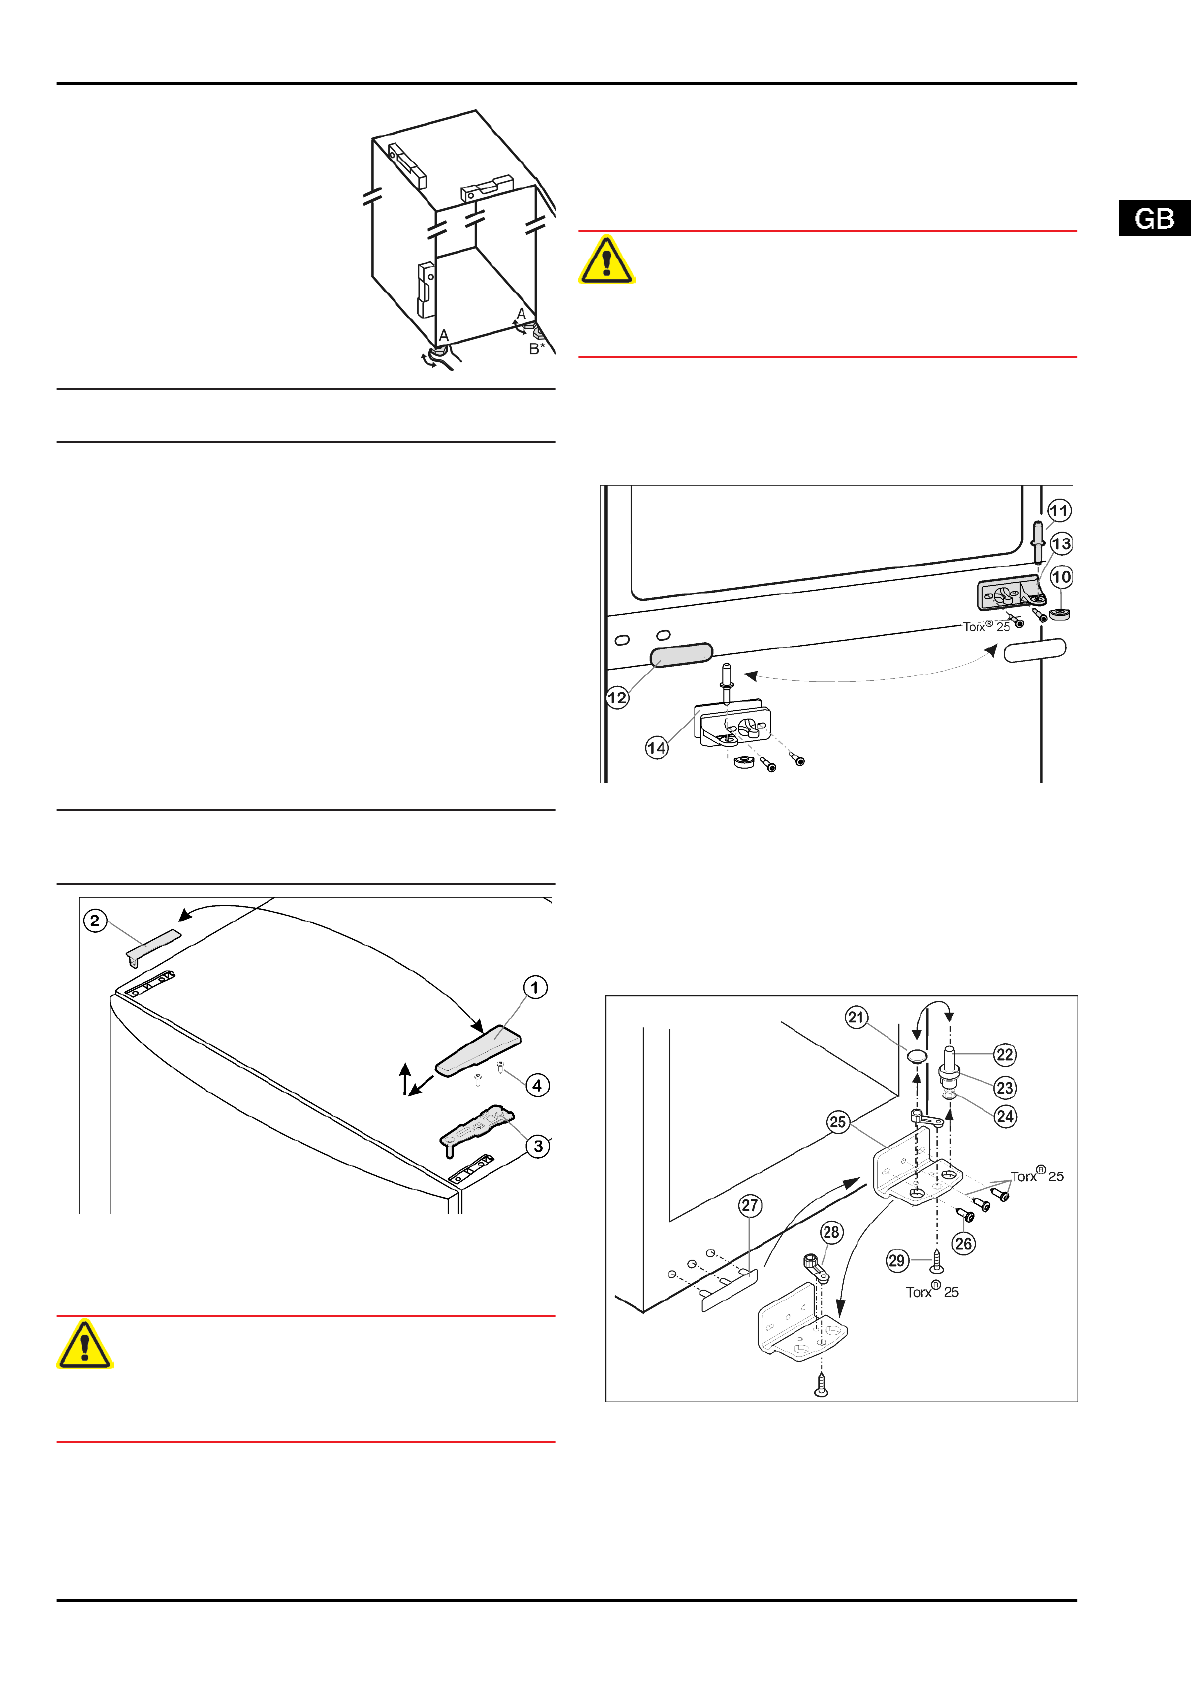
Align the appliance so that it
stands firmly and on a level by
applying the accompanying
spanner to the adjustable-
height feet (A) and using a
spirit level.
u
Then support the door: Extend
the adjustable foot at the turn
hinge (B) until it rests on the
floor and then make a further
90° turn.
Note
u
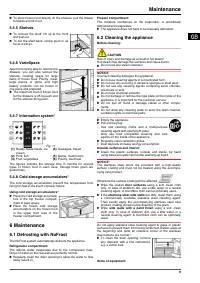
Clean the appliance (see 6.2) .
If the appliance is installed in a very damp environment,
condensate may form on the outside of the appliance.
u
Always see to good ventilation at the installation site.
4.3 Changing over the door hinges
You can change over the door hinges if necessary.
Ensure that the following tools are to hand:
q
Torx® 25
q
Torx® 15
q
Screwdriver
q
Cordless screwdriver, if necessary
q
Second person for fitting work, if needed
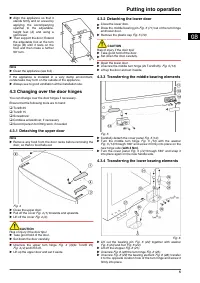
4.3.1 Detaching the upper door
Note
u
Remove any food from the door racks before removing the
door, so that no food falls out.
Fig. 4
u
Close the upper door.
u
Pull off the cover
Fig. 4 (1) forwards and upwards.
u
Lift off the cover
Fig. 4 (2).
CAUTION
Risk of injury if the door tips!
u
Take good hold of the door.
u
Set down the door carefully.
u
Unscrew the upper turn hinge
Fig. 4 (3)(2x Torx® 25)
Fig. 4 (4) and lift it off.
u
Lift up the upper door and set it aside.
4.3.2 Detaching the lower door
u
Close the lower door.
u
Draw the middle bearing pin
Fig. 5 (11) out of the turn hinge
and lower door.
u
Remove the plastic cap
Fig. 5 (10).
CAUTION
Risk of injury if the door tips!
u
Take good hold of the door.
u
Set down the door carefully.
u
Open the lower door.
u
Unscrew the middle turn hinge (2x Torx® 25).
Fig. 5 (13)
u
Lift up the door and set it aside.
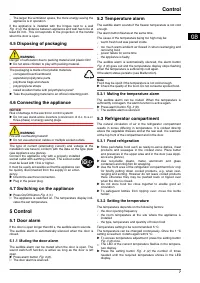
4.3.3 Transferring the middle bearing elements
Fig. 5
u
Carefully detach the cover panel
Fig. 5 (12).
u
Turn the middle turn hinge
Fig. 5 (13) with the washer
Fig. 5 (14) through 180° and screw it firmly into place on the
new hinge side (with 4 Nm).
u
Turn the cover panel
Fig. 5 (12) through 180° and snap it
into place again on the new handle side.
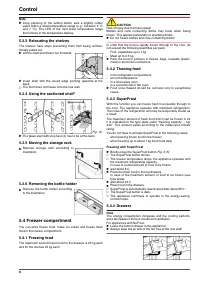
4.3.4 Transferring the lower bearing elements
Fig. 6
u
Lift out the bearing pin
Fig. 6 (22) together with washer
Fig. 6 (23) and foot Fig. 6 (24).
u
Lift off the stopper
Fig. 6 (21).
u
Unscrew
Fig. 6 (26) the turn hinge Fig. 6 (25).
u
Unscrew
Fig. 6 (29) the bearing element Fig. 6 (28), transfer
it to the opposite location hole of the turn hinge and screw it
firmly into place.
Putting into operation
5
Характеристики

Остались вопросы?Не нашли свой ответ в руководстве или возникли другие проблемы? Задайте свой вопрос в форме ниже с подробным описанием вашей ситуации, чтобы другие люди и специалисты смогли дать на него ответ. Если вы знаете как решить проблему другого человека, пожалуйста, подскажите ему :)


