
Холодильник Fhiaba S8990FR6 - инструкция пользователя по применению, эксплуатации и установке на русском языке. Мы надеемся, она поможет вам решить возникшие у вас вопросы при эксплуатации техники.
Если остались вопросы, задайте их в комментариях после инструкции.
"Загружаем инструкцию", означает, что нужно подождать пока файл загрузится и можно будет его читать онлайн. Некоторые инструкции очень большие и время их появления зависит от вашей скорости интернета.

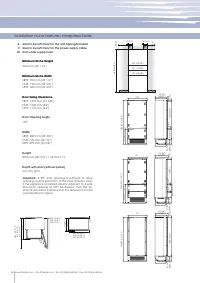

59
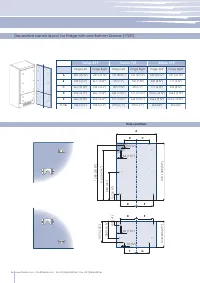
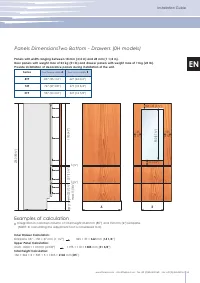
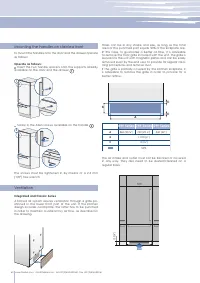
B
A
6,5 (
¼”
)
6,5 (
¼”
)
20
(
¾”
)
20
(
¾”
)
22
(
7⁄8”
)
22
(
7⁄8”
)
22 (
7⁄8”
)
22 (
7⁄8”
)
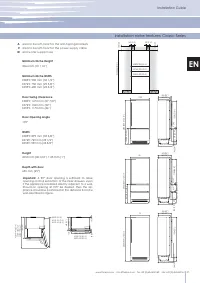
3
1
2
3
4
5
www.fhiaba.com · info@fhiaba.com · Tel +39 (0)434 420160 · Fax +39 (0)434 420161
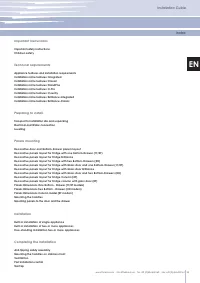
Installation Guide
EN
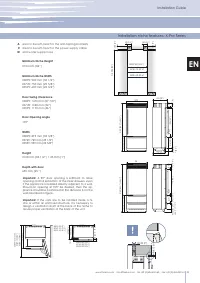
Installation
Appliance
Wall
or
furniture
Wall
or
furniture
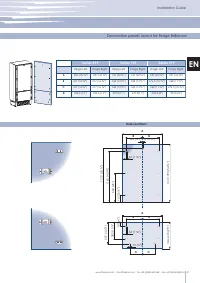
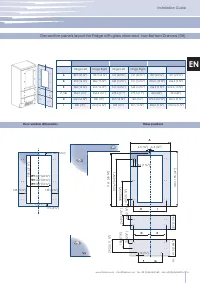
A Connecting element
B Alluminium frame
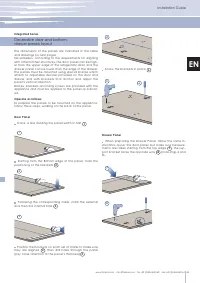
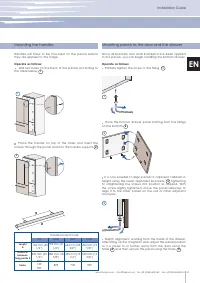
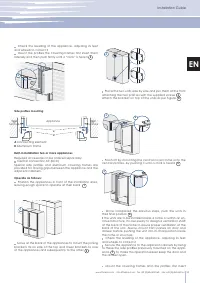
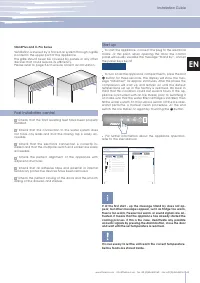
Side profiles mounting
Check the levelling of the appliance, adjusting its feet
and wheels to correct it.
Mount the profiles the covering frames: first insert them
laterally and then push firmly until a “click” is heard
3
.
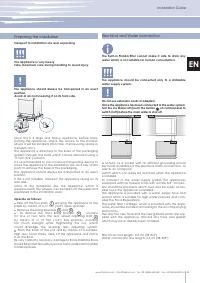
Required accessories to be ordered separately:
Central connection Kit (KCC)
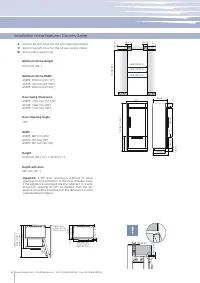
Special side profiles and aluminum covering frames are
provided for closing gaps between the appliance and the
adjacent cabinets.
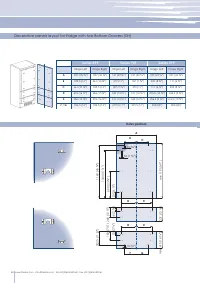
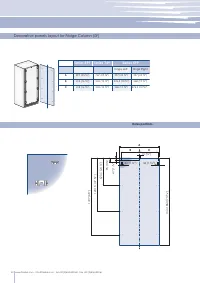
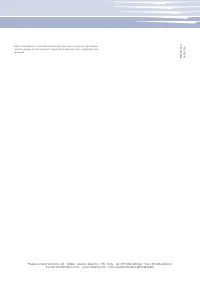
Operate as follows:
Position the appliances in front of the installation area,
leaving enugh space to operate at their back
1
.
Move at the back of the appliances to mount the joining
brackets: fix on side of the top and lower brackets to one
of the appliances and subsequently to the other
2
.
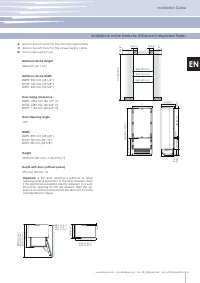
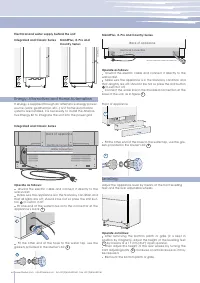
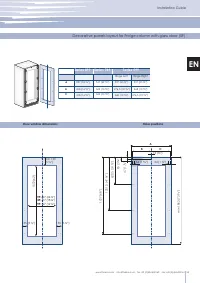
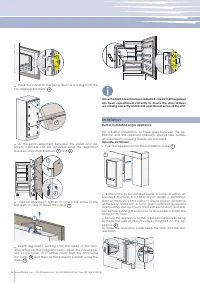
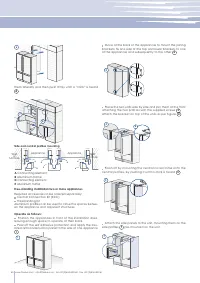
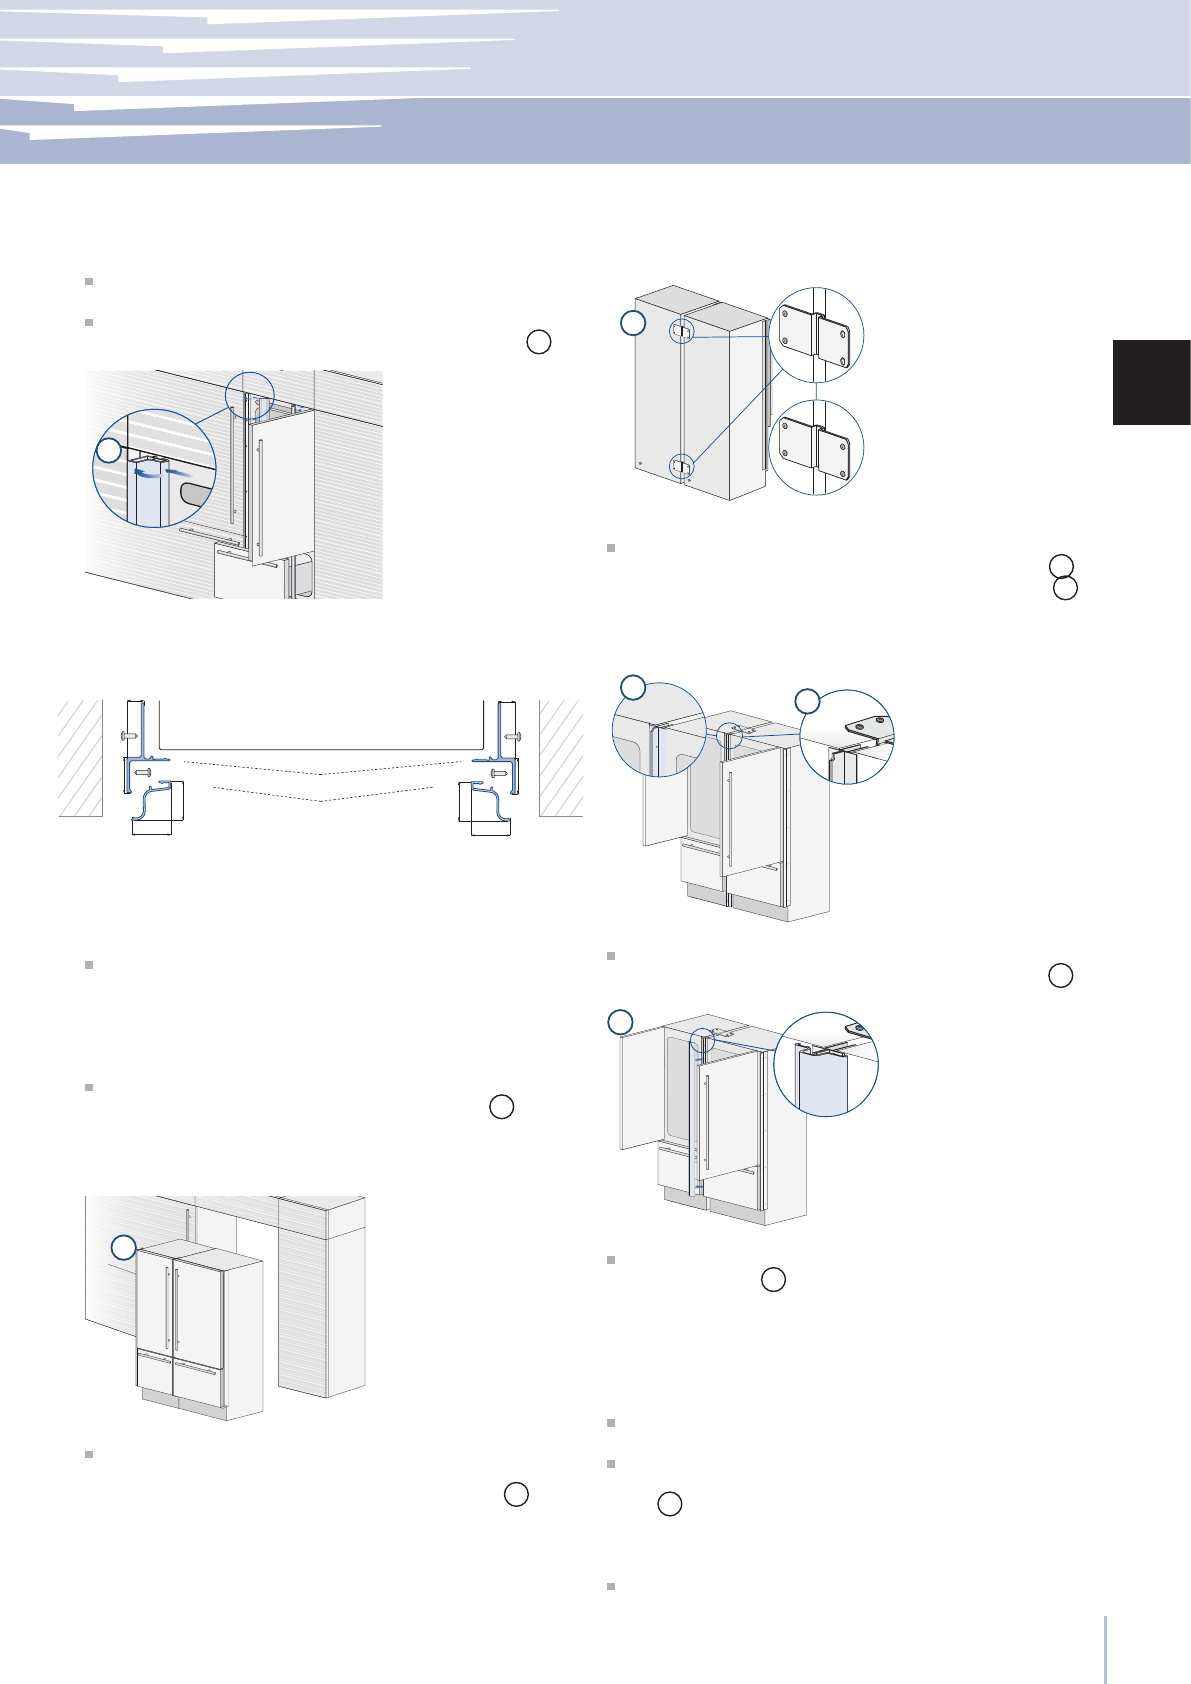
Built-in installation two or more appliances
Place the two units side by side and join them at the front
attaching the two profi les with the supplied screws
3
.
Attach the bracket on top of the units as per fi gure
4
.
Finish off by mounting the central cover frame onto the
central profiles, by pushing it until a click is heard
5
.
Once completed the previous steps, push the units in
their final position
6
.
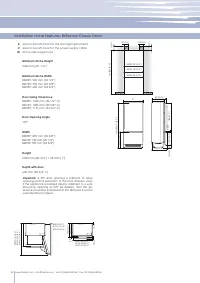
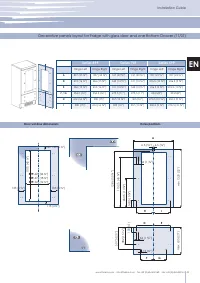
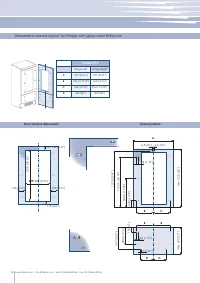
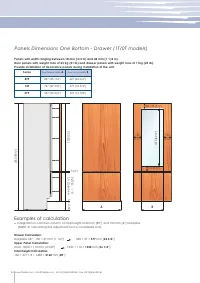
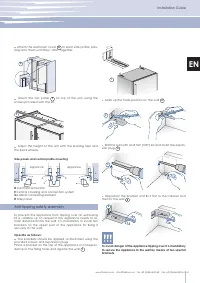
If the units are to be installed inside a niche or within an en-
closed structure, it is necessary to design a ventilation shaft
at the back of the niche to assure proper ventilation at the
back of the unit. Always mount front panels on door and
drawer before pushing the unit into its final position inside
the niche or structure.
Check the levelling of the appliance, adjusting its feet
and wheels to correct it.
Secure the appliance to the adjacent cabinets by fixing
to these the side profiles previously mounted on the appli
-
ance
7
. To make this operation easier keep the door and
the drawer open.
Mount the covering frames onto the profiles, first insert
Характеристики

Остались вопросы?Не нашли свой ответ в руководстве или возникли другие проблемы? Задайте свой вопрос в форме ниже с подробным описанием вашей ситуации, чтобы другие люди и специалисты смогли дать на него ответ. Если вы знаете как решить проблему другого человека, пожалуйста, подскажите ему :)


