
Холодильник Fhiaba S8990FR6 - инструкция пользователя по применению, эксплуатации и установке на русском языке. Мы надеемся, она поможет вам решить возникшие у вас вопросы при эксплуатации техники.
Если остались вопросы, задайте их в комментариях после инструкции.
"Загружаем инструкцию", означает, что нужно подождать пока файл загрузится и можно будет его читать онлайн. Некоторые инструкции очень большие и время их появления зависит от вашей скорости интернета.


2
1
2
1
44
E
W
E
W
1
2
1
2
www.fhiaba.com · info@fhiaba.com · Tel +39 (0)434 420160 · Fax +39 (0)434 420161
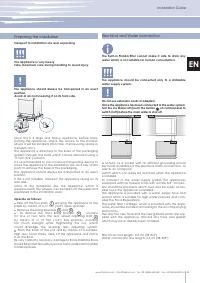
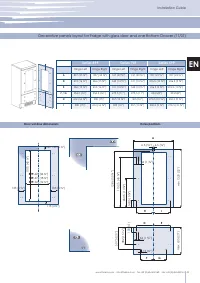
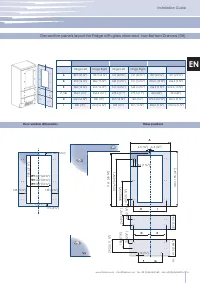
Energy: Alternatives and Home Automation
If energy is supplied through an alternative energy power
source (solar, geothermal, etc..) or if home automation
systems are installed, it is necessary to install the Alterna-
tive Energy Kit to integrate the unit into the power grid.
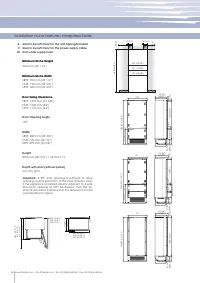
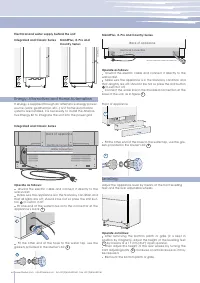
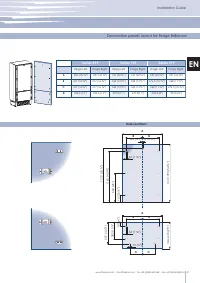
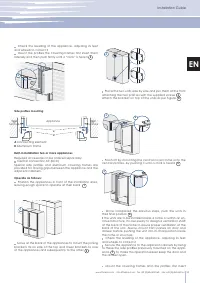
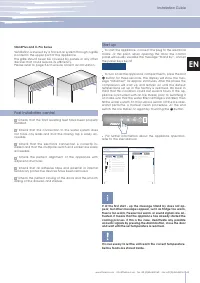
Electrical and water supply behind the unit
Integrated and Classic Series
Integrated and Classic Series
StandPlus, X-Pro and
Country Series
StandPlus, X-Pro and Country Series
Water connection
Electrical connection
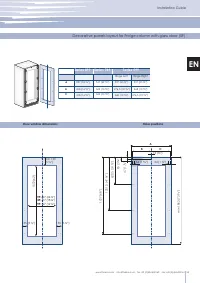
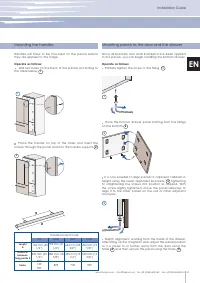
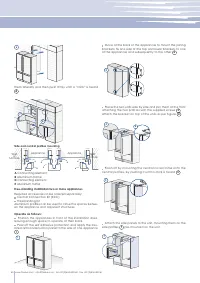
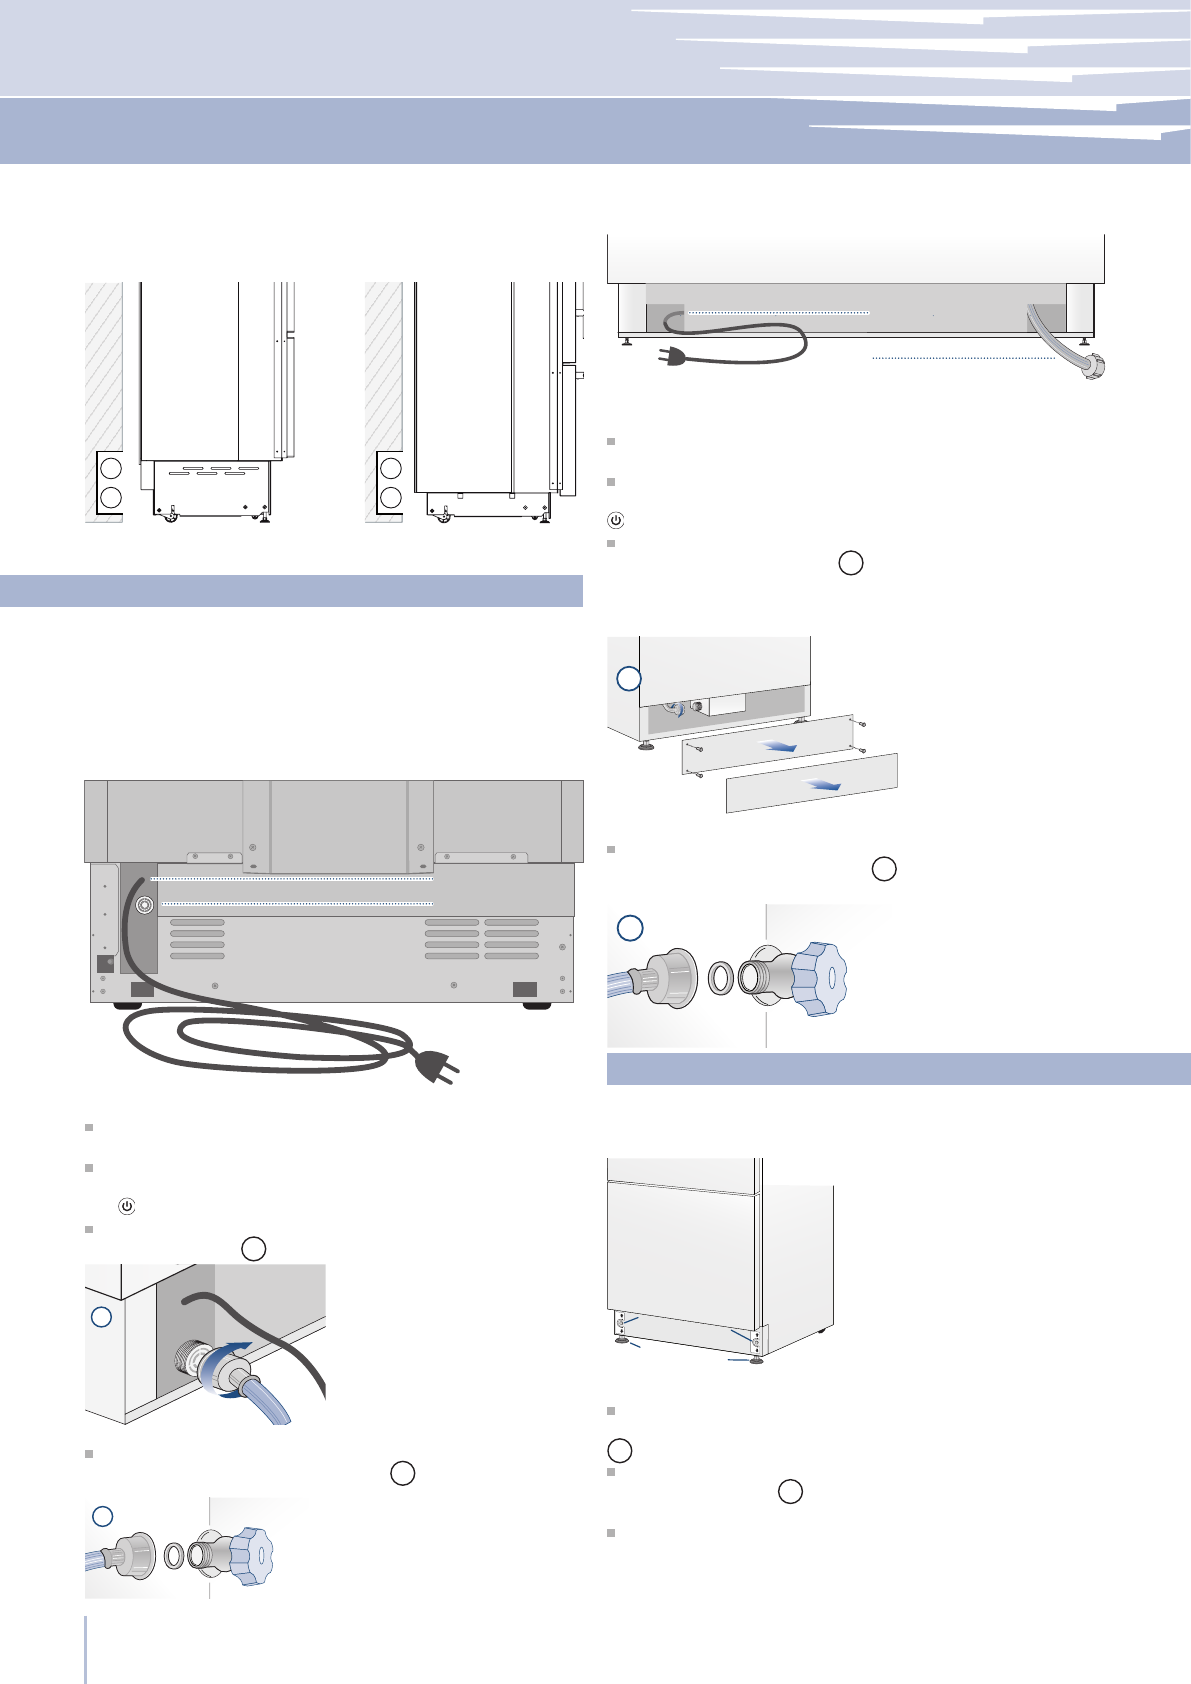
Operate as follows:
Unwind the electric cable and connect it directly to the
wall socket.
Make sure the appliance is in the Stand-by condition and
that all lights are off; should it be not so press the Unit but-
ton to switch it off.
Fit one end of the water hose onto the connector at the
appliance’s back
1
.
Fit the other end of the hose to the water tap, use the
gaskets provided in the Owner’s Kit
2
.
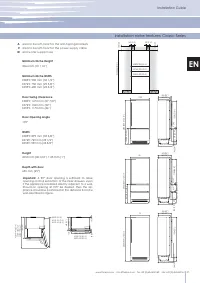
Back of appliance
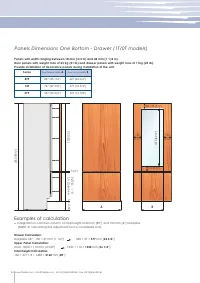
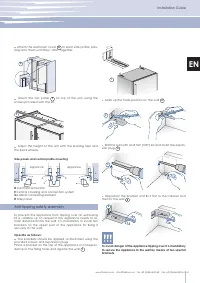
Operate as follows:
Unwind the electric cable and connect it directly to the
wall socket.
Make sure the appliance is in the Stand-by condition and
that all ights are off; should it be not so press the Unit button
to switch it off.
Connect the water line to the threaded connection at the
base of the unit, as in figure
1
.
Fit the other end of the hose to the water tap, use the gas-
kets provided in the Owner’s Kit
2
.
Back of appliance
Front of appliance
Water connection
Electrical connection
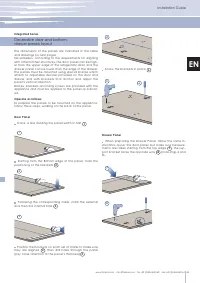
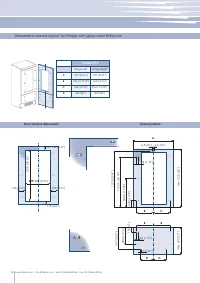
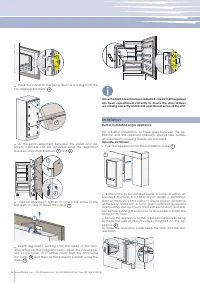
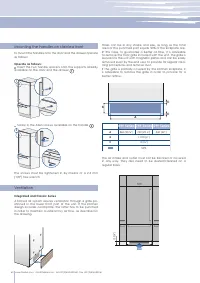
Adjust the appliance level by means of the front levelling
feet and the rear adjustable wheels.
Operate as follows:
After removing the bottom plinth or grille (it is kept in
position by magnets), adjust the height of the levelling feet
1
by means of a 17 mm (3/4”) open spanner.
Then adjust the height of the rear wheels by turning the
front adjusting bolts
2
clockwise or anticlockwise as it may
be required.
Remount the bottom plinth or grille.
Levelling
Характеристики

Остались вопросы?Не нашли свой ответ в руководстве или возникли другие проблемы? Задайте свой вопрос в форме ниже с подробным описанием вашей ситуации, чтобы другие люди и специалисты смогли дать на него ответ. Если вы знаете как решить проблему другого человека, пожалуйста, подскажите ему :)


