Холодильник Sharp SJ-FS97VSL - инструкция пользователя по применению, эксплуатации и установке на русском языке. Мы надеемся, она поможет вам решить возникшие у вас вопросы при эксплуатации техники.
Если остались вопросы, задайте их в комментариях после инструкции.
"Загружаем инструкцию", означает, что нужно подождать пока файл загрузится и можно будет его читать онлайн. Некоторые инструкции очень большие и время их появления зависит от вашей скорости интернета.


21
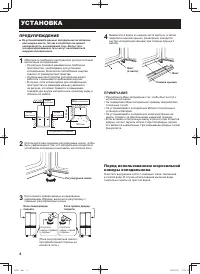
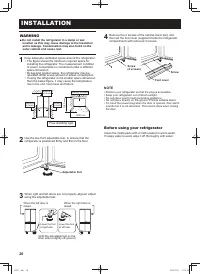
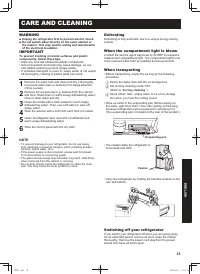
WARNING
Do not install the refrigerator in a damp or wet
■
location as this may cause damage to the insulation
and a leakage. Condensation may also build on the
outer cabinet and cause rust.
1
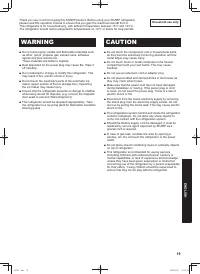
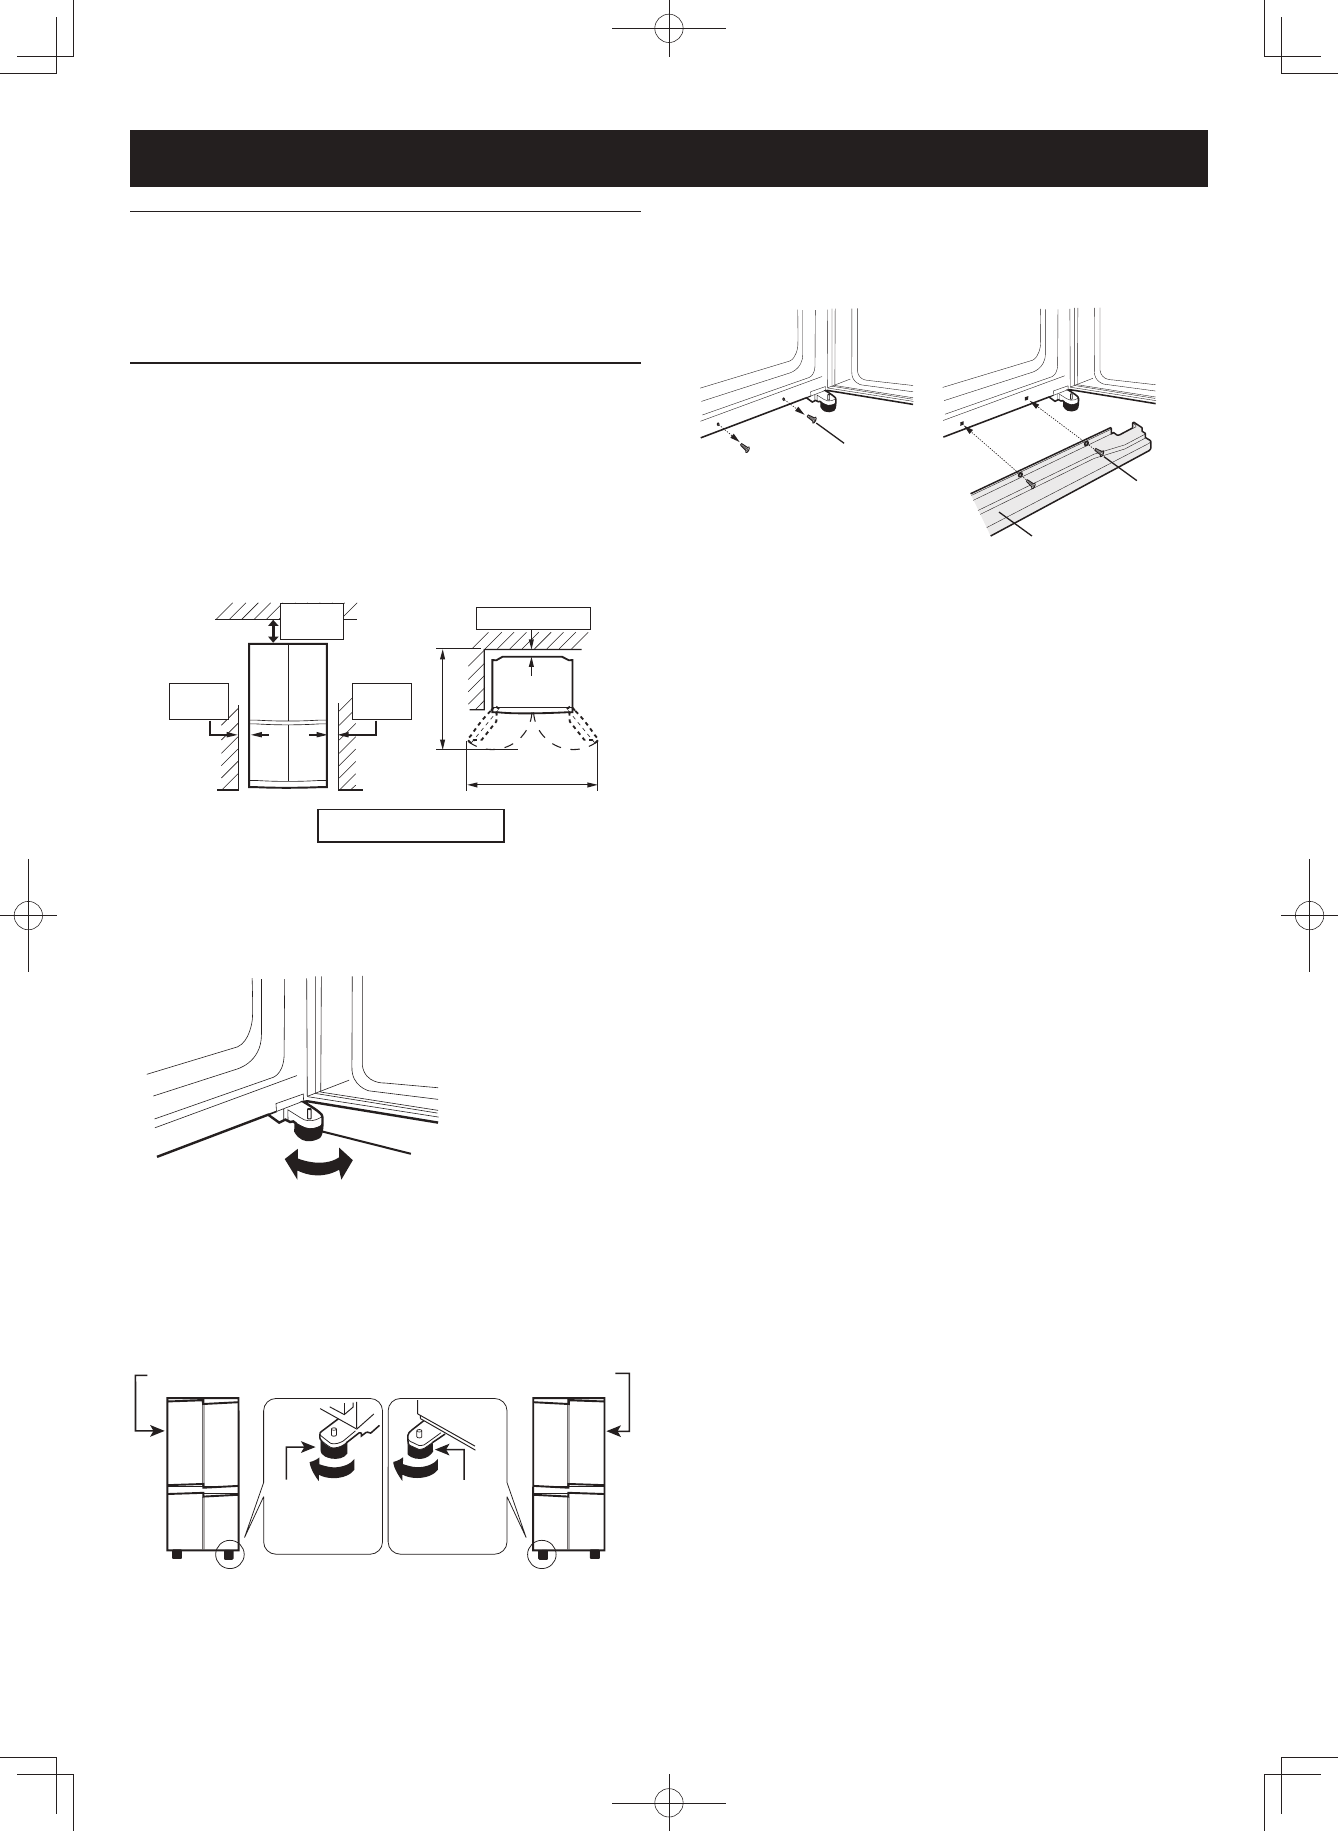
Keep adequate ventilation space around the refrigerator.
The figure shows the minimum required space for
•
installing the refrigerator. The measurement condition
of power consumption is conducted under a different
space dimension.
By keeping greater space, the refrigerator may be
•
operated under a less amount of power consumption.
If using the refrigerator in the smaller space dimension
•
than the below figure, it may cause the temperature
rise in the unit, loud noise and failure.
2
Use the two front adjustable feet, to ensure that the
refrigerator is positioned firmly and flat on the floor.
Before using your refrigerator
Clean the inside parts with a cloth soaked in warm water.
If soapy water is used, wipe it off thoroughly with water.
INSTALLATION
90mm
or more
60mm
or more
60mm
or more
1180 mm
1500 mm
60mm
or more
3
When right and left doors are not properly aligned, adjust
using the adjustable feet.
NOTE
Position your refrigerator so that the plug is accessible.
•
Keep your refrigerator out of direct sunlight.
•
Do not place next to heat generating appliance.
•
Do not place directly on the ground. Provide suitable stand.
•
To insert the power plug when the door is opened, door alarm
•
sounds but it is not abnormal. This sound stops when closing
the door.
Adjustable foot
When the left door is
raised.
When the right door is
raised.
Lower the foot
at right side.
Lower the foot
at left side.
(Until the adjustable foot on the
other side is slightly off-ground.)
4
Remove the 4 screws of the cabinet lower part, and
then set the foot cover (supplied inside the refrigerator
compartment) with removed 4 screws.
Screw
(4 screws)
Screw
Foot cover
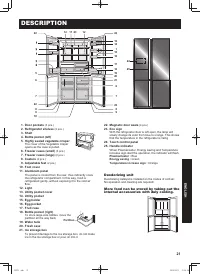
Free standing type
(B375).indb 20
2012/09/11 13:34:53
Содержание
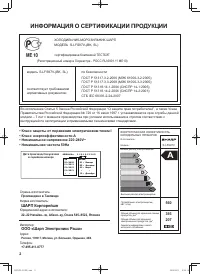
- 2 ИНФОРМАЦИЯ О СЕРТИФИКАЦИИ ПРОДУКЦИИ; Произведено в Таиланде; ШАРП Корпорейшн; • Класс защиты от поражения электрическим током I
- 3 РУССКИЙ; ПРЕДУПРЕЖДЕНИЕ
- 4 УСТАНОВКА; ПРИМЕЧАНИЕ
- 5 Дезодорирующий элемент; ОПИСАНИЕ
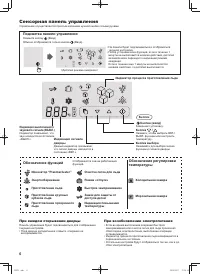
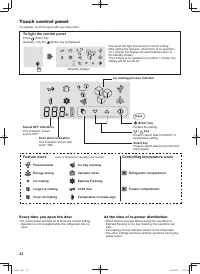
- 6 Сенсорная панель управления; Подсветка панели управления; При каждом открывании дверцы
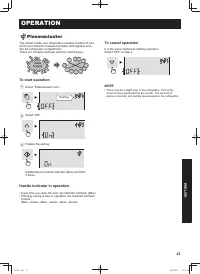
- 7 ЭКСПЛУАТАЦИЯ; Ионизатор “Plasmacluster”; Для начала операции; Для отмены операции
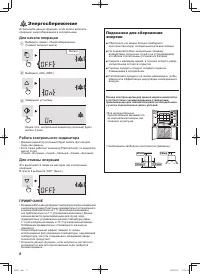
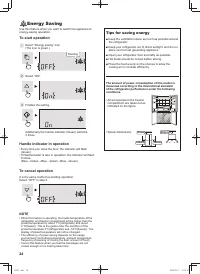
- 8 Энергосбережение; Подсказки для сбережения
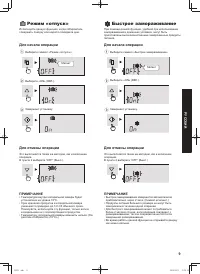
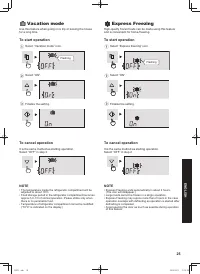
- 9 Режим «отпуск»; Быстрое замораживание
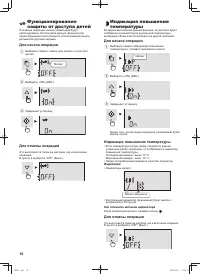
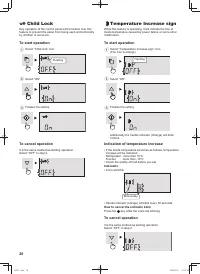
- 10 Индикация повышения
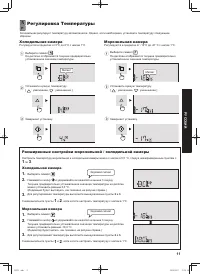
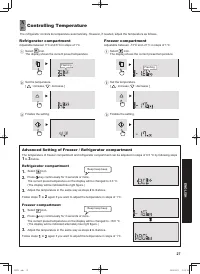
- 11 Расширенные настройки морозильной / холодильной камеры; Регулировка Температуры; Холодильная камера
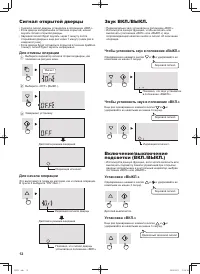
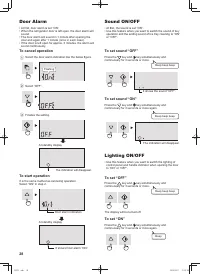
- 12 Сигнал открытой дверцы; Включение/выключение
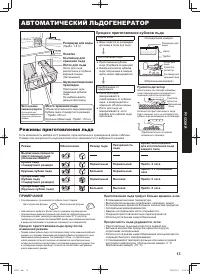
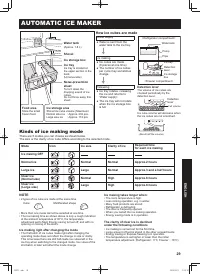
- 13 АВТОМАТИЧЕСКИЙ ЛЬДОГЕНЕРАТОР; Процесс приготовления кубиков льда; Режимы приготовления льда
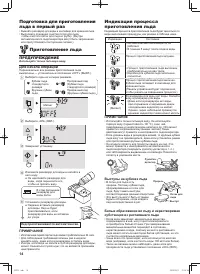
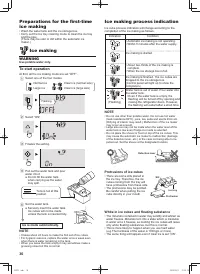
- 14 Индикация процесса
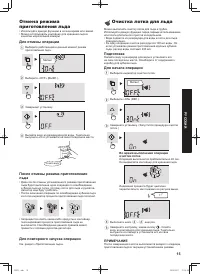
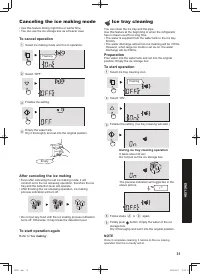
- 15 Отмена режима
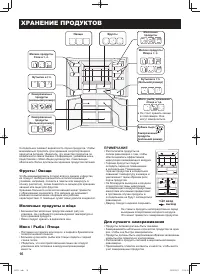
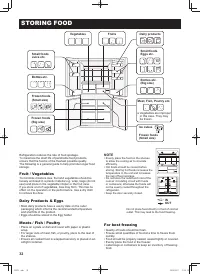
- 16 ХРАНЕНИЕ ПРОДУКТОВ; Mолочные продукты и яйца; Для лучшего замораживания
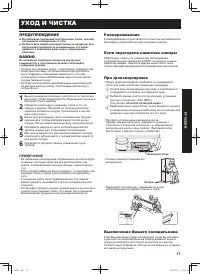
- 17 УХОД И ЧИСТКА
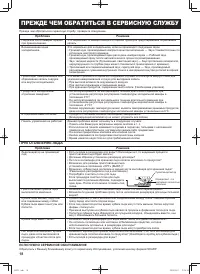
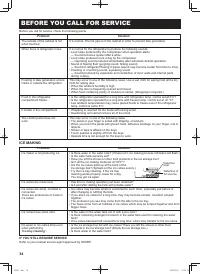
- 18 ПРИГОТОВЛЕНИЕ ЛЬДА; ПРЕЖДЕ ЧЕМ ОБРАТИТЬСЯ В СЕРВИСНУЮ СЛУЖБУ


