
Газонокосилки WORX 40 В, АКБ 4 А*ч х2, ЗУ 2А х2 WG749E - инструкция пользователя по применению, эксплуатации и установке на русском языке. Мы надеемся, она поможет вам решить возникшие у вас вопросы при эксплуатации техники.
Если остались вопросы, задайте их в комментариях после инструкции.
"Загружаем инструкцию", означает, что нужно подождать пока файл загрузится и можно будет его читать онлайн. Некоторые инструкции очень большие и время их появления зависит от вашей скорости интернета.


11
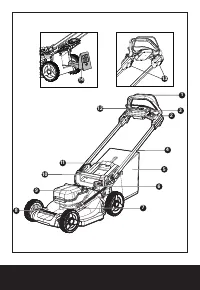
Cordless Lawn mower
EN
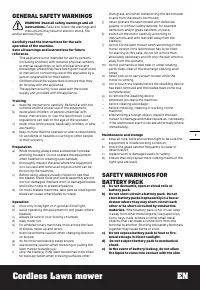
Power indicator light
See details in BATTERY STATUS
part
IMPORTANT:
When only one light is
illuminated, your battery
is overly discharged, even
though the machine may
still be capable to work.
Continuing to operate
your machine with the
battery in this discharged
condition may reduce the
life and performance of your
battery.
When no light is illuminated,
at least one battery is not
fully installed or battery
may be defective, please
double check the batteries
are fully seated into
position.
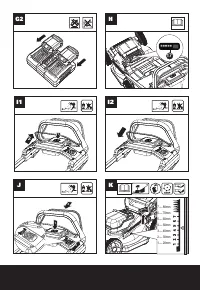
See Fig.H
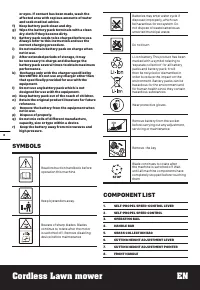
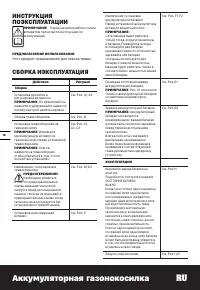
Starting and Stopping
See Fig.I1,I2
Operating the self-propel
system
See Fig. J
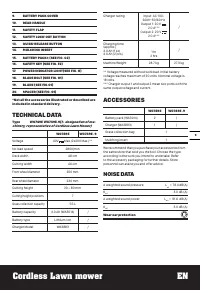
Adjusting the cutting height
WARNING!
Stop, release
Operating Bail and wait
until the motor stops before
adjusting height. The blades
continue to rotate after the
machine is switched off, a
rotating blade can cause injury.
Do not touch rotating blades.
See Fig. K
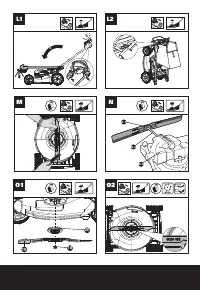
Storage
See Fig. ,L1,L2
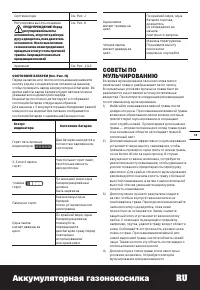
BATTERY STATUS (See Fig. H)
•
Before starting or after use, press the button beside
the power indicator light on the machine to check the
battery capacity.
•
During operation, the battery capacity will be indicated
automatically by the battery power indicator. The
indicator constantly senses and displays the battery
condition as follows.
•
Charge the machine with 2 battery packs with different
AH ,the power indicator light displays the battery
condition with the lower one of the two batteries.
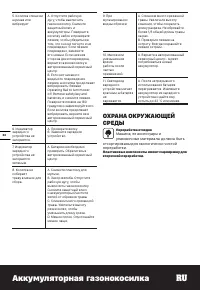
Battery indicator
light status
Battery condition
Five green lights
(
) are
illuminated.
The two batteries are in a highly
charged condition.
Two, three or four
green lights are
illuminated.
The two batteries have a remain-
ing charge. The more lights are
illuminated, the more battery
capacity.
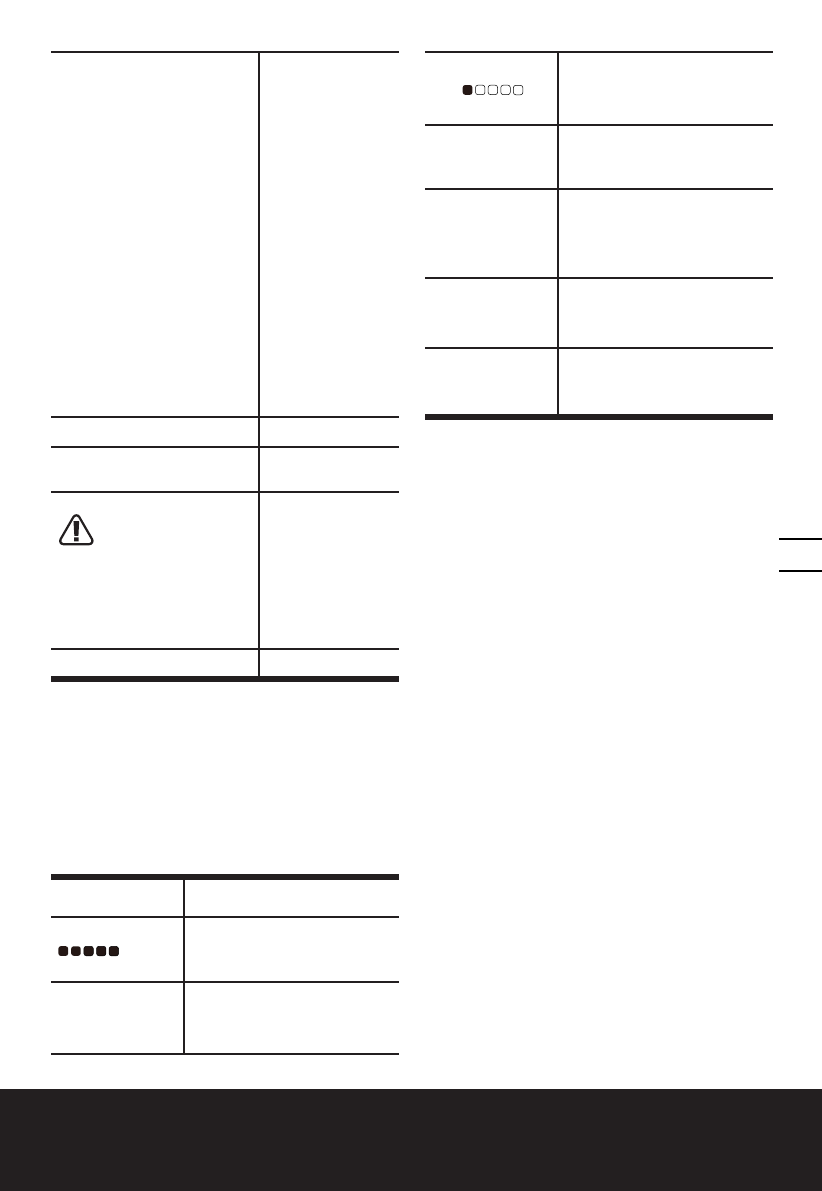
Only one green
light (
) is
illuminated.
The battery level of at least one
battery pack is very low. Please
check and charge the battery
pack.
No light is
illuminated.
At least one battery is not fully
installed or battery may be defec-
tive.
Only one light is
flashing twice per
cycle.
At least one battery is over
discharged (please refer to the
battery charge condition), please
recharge the two batteries at
once before use again or storage.
Only one light is
flashing three times
per cycle.
At least one battery is hot, wait
for them cool down before start
again.
Only one light is
flashing four times
per cycle.
The machine is over load. Raise
the cutting height or push slowly.
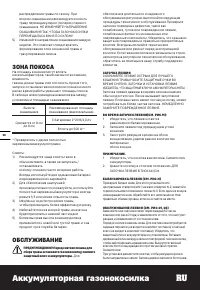
MULCHING MOWING TIPS
While mulching, your new mower is designed to cut the
grass clippings into small pieces and distribute them
back into the lawn. Under normal conditions, the mulched
grass will biodegrade quickly and deliver nutrients to the
lawn. Please review the following recommendations for
optimum mulching performance.
1) Avoid mowing when the grass is wet from rain or dew.
Wet grass may form clumps which interfere with the
mulching action and reduce the runtime. The best
time to mow the grass is in the late afternoon when the
grass is dry and the newly cut area will not be exposed
to direct sunlight.
2) For the best mulching performance, set the cutting
height to remove about one third of the grass blade
length, ideally no more than 40mm at one time. If the
lawn is overgrown, it may be necessary to increase the
cutting height to reduce the pushing effort and prevent
overloading the motor. For extremely heavy mulching,
it is advisable to first cut at a high cut height setting,
and then re-cut to the final cut height. Otherwise, make
narrower cuts and mow slowly.
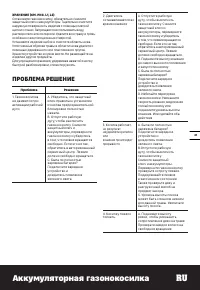
3) For the best performance, keep the mower housing
free of built-up grass. From time to time turn off
mower and wait for the blades to come to a complete
stop. Then Remove the safety key and turn mower
on its side. Using an object such as a stick, wipe out
any accumulation of grass around the blade area. Be
careful of the sharp edges of the blade. Ensure to clean
the blade area often when cutting wet or new grass and
every time after the machine is used.
4) Certain types of grass or grass conditions may require
that an area be mulched a second time to fully disperse
the grass throughout the lawn. If cutting a second time,
it is advisable to cut perpendicular (across) the first cut
pattern. DO NOT CHANGE CUT PATTERN IN ANY WAY
THAT WOULD CAUSE MOWING DOWN A HILL.


