
Электропилы Makita LXT UC250DZ - инструкция пользователя по применению, эксплуатации и установке на русском языке. Мы надеемся, она поможет вам решить возникшие у вас вопросы при эксплуатации техники.
Если остались вопросы, задайте их в комментариях после инструкции.
"Загружаем инструкцию", означает, что нужно подождать пока файл загрузится и можно будет его читать онлайн. Некоторые инструкции очень большие и время их появления зависит от вашей скорости интернета.


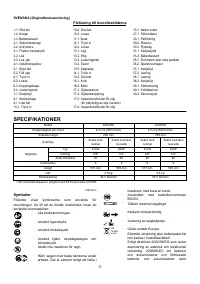


11
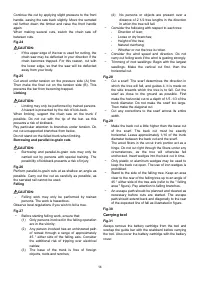
The tool may stop during operation when the tool and/or
battery are placed under the following situation. This is
caused by the activation of protection system and does
not show the tool trouble.
•
When the tool is overloaded:
At this time, release the switch trigger and
remove causes of overload and then pull the
switch trigger again to restart. When the tool
does not work even after pulling the switch
trigger, the battery power auto-stop is still at
work. Charge the battery cartridge before use.
•
When the remaining battery capacity becomes low:
Recharge the battery cartridge.
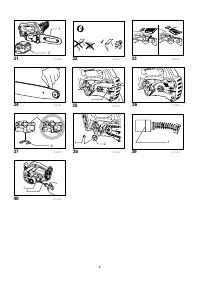
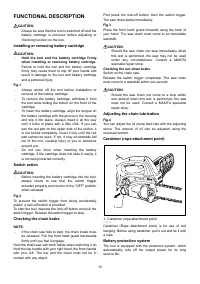
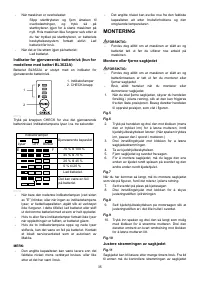
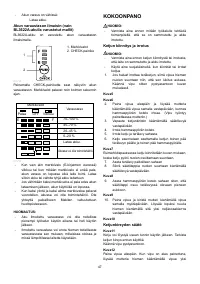
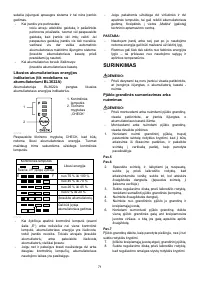
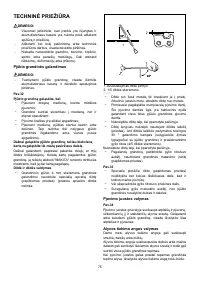
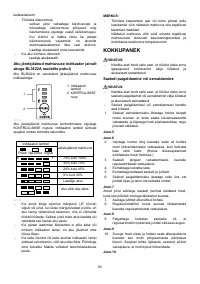
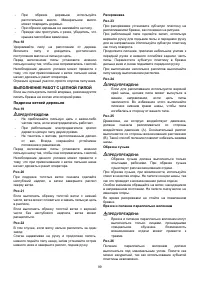
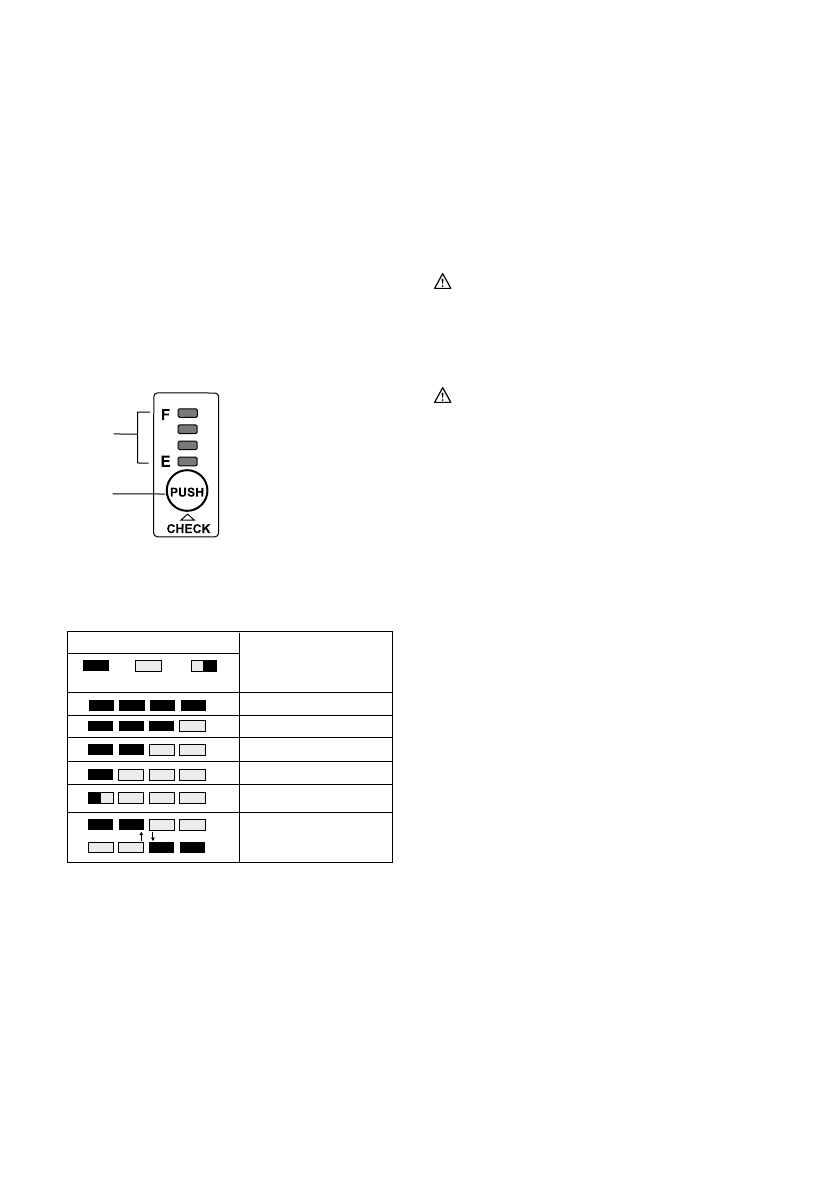
Battery remaining capacity indicator (only for
models with Battery BL3622A)
Battery BL3622A is equipped with the battery remaining
capacity indicator.
1
2
011715
Press the CHECK button to indicate the battery
remaining capacity. The indicator lamps will then light for
approx. three seconds.
Indicator lamps
Lighted
Off
Blinking
E
F
Remaining capacity
70% to 100%
45% to 70%
20% to 45%
0% to 20%
Charge the battery.
The battery may have
malfunctioned.
011713
•
When only the lowermost indicator lamp (next to
the “E”) blinks, or when none of the indicator lamps
light, the battery capacity has run out, so the tool
does not operate. In these cases, charge the
battery or replace the empty battery with a fully
charged one.
•
When two or more indicator lamps do not light
even after charging is complete, the battery has
reached the end of its service life.
•
When the upper two and lower two indicator lamps
light alternately, the battery may have
malfunctioned. Contact your local Makita
authorized service center.
NOTE:
•
The indicated capacity may be lower than the
actual level during use or immediately after using
the tool.
•
Depending on the conditions of use and the
ambient temperature, the indication may differ
slightly from the actual capacity.
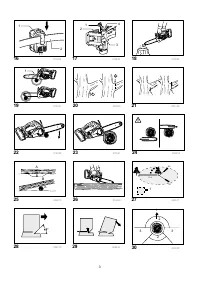
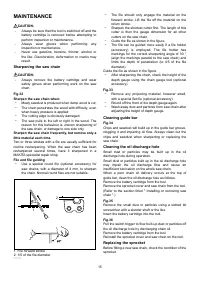
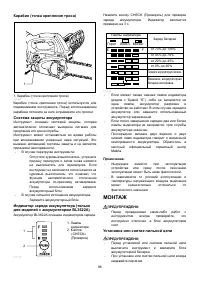
ASSEMBLY
CAUTION:
•
Always be sure that the tool is switched off and the
battery cartridge is removed before carrying out
any work on the tool.
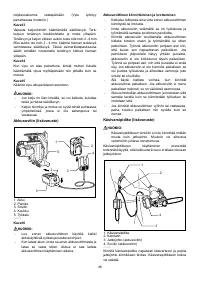
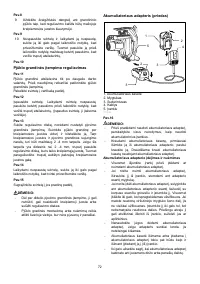
Installing or removing saw chain
CAUTION:
•
Always be sure that the tool is switched off and the
battery cartridge is removed before installing or
removing the saw chain.
•
Always wear gloves when installing or removing
the saw chain.
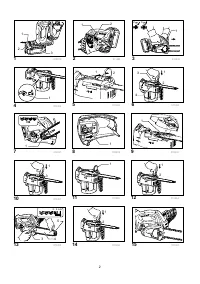
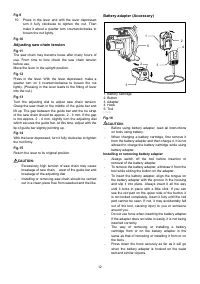
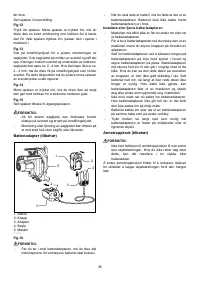
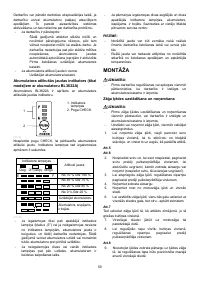
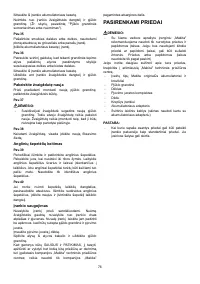
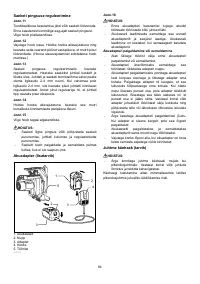
1.
To remove the saw chain, slightly slide the lever in
the direction of arrow so that it can be released
from the locked position and move the lever in the
upright position as shown in the figure.
Fig.5
Fig.6
2.
Press the lever and with the lever pressed in, turn
it counterclockwise to loosen the nut until sprocket
cover comes off. (Pressing in the lever leads to
the fitting of lever into the nut.)
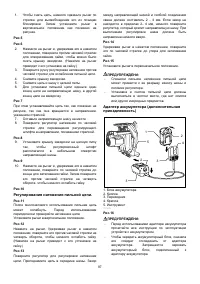
3. Turn the adjusting dial counterclockwise to
release the saw chain tension.
4.
Remove the sprocket cover.
5.
Remove the saw chain and guide bar from the
chain saw.
6.
To install the saw chain, fit in one end of the saw
chain on the top of the guide bar and the other
end of it around the sprocket.
Fig.7
At this time, fit the saw chain as shown in the figure
because it rotates in the direction of arrow.
7.
Rest the guide bar in place on the chain saw
8.
Turn the adjusting dial counterclockwise to slide
the adjusting pin in the direction of arrow.
Fig.8
9.
Place the sprocket cover on the chain saw so that
the adjusting pin is positioned in a small hole in
the guide bar.
1. Indicator lamps
2. CHECK button


