
Бензопилы Oleo-Mac GS 44 5023-9012Е1 - инструкция пользователя по применению, эксплуатации и установке на русском языке. Мы надеемся, она поможет вам решить возникшие у вас вопросы при эксплуатации техники.
Если остались вопросы, задайте их в комментариях после инструкции.
"Загружаем инструкцию", означает, что нужно подождать пока файл загрузится и можно будет его читать онлайн. Некоторые инструкции очень большие и время их появления зависит от вашей скорости интернета.


34
65
66
67
Português
English
Français
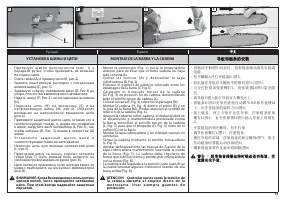
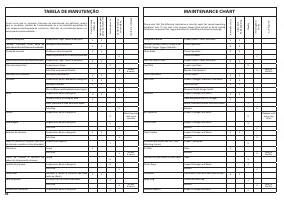
MANUTENÇÃO
MAINTENANCE
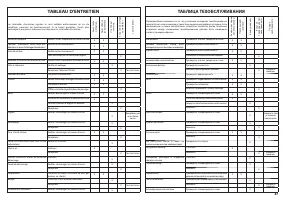
ENTRETIEN
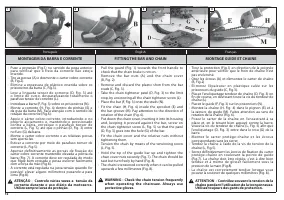
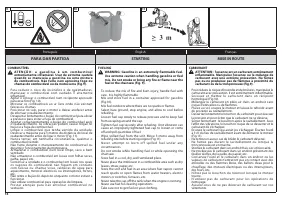
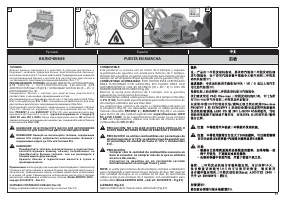
ATENÇÃO: durante as operações de manutenção use
sempre luvas de proteção.
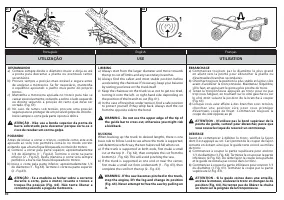
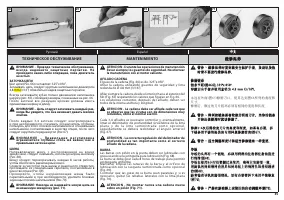
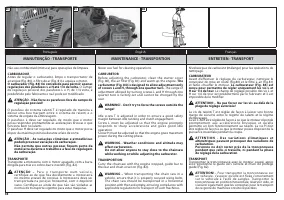
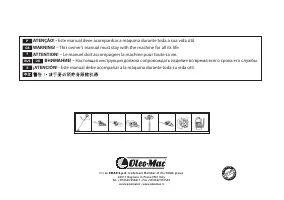
AFIAMENTO DA CORRENTE
O passo da corrente (Fig. 66) é de .325”x.050".
Afiar a corrente utilizando luvas de proteção e lima curva de
Ø 4.8 mm (3/16”) .
Afie sempre a corrente desde o interior até o exterior do
cortante (Fig. 65) respeitando os valores conforme mostra a
Fig. 66.
Os elos cortantes, depois do afiamento, devem ser todos da
mesma largura e comprimento.
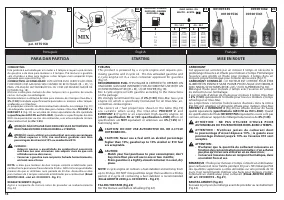
ATENÇÃO - A corrente deve ser afiada cada vez que
se observar que as maravalhas forem de dimensões
muito reduzidas como a normal serradura.
Cada 3-4 afiamentos é necessário controlar e se for preciso
limar o delimitador de profundidade, utilizando uma lima
plana e o gabarito apropriado fornecidos como optional, e
depois arredondar o ângulo anterior (Fig. 67).
ATENÇÃO - A correta regulação do delimitador de
profundidade é tão importante quanto o correto
afiamento da corrente.
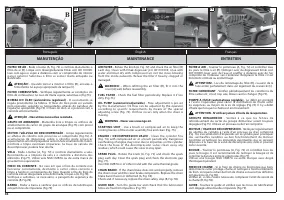
BARRA
As barras com pinhão na ponta devem ser lubrificadas com
graxa usando uma seringa para lubrificação (Fig. 68).
A barra tem que ser rodada cada 8 horas de trabalho para
permitir um desgaste uniforme.
M a n te n h a l i m p a a s r a n h u r a s d a b a r r a e o o r i f í c i o d e
lubrificação com o raspador fornecido como optional
(Fig. 69).
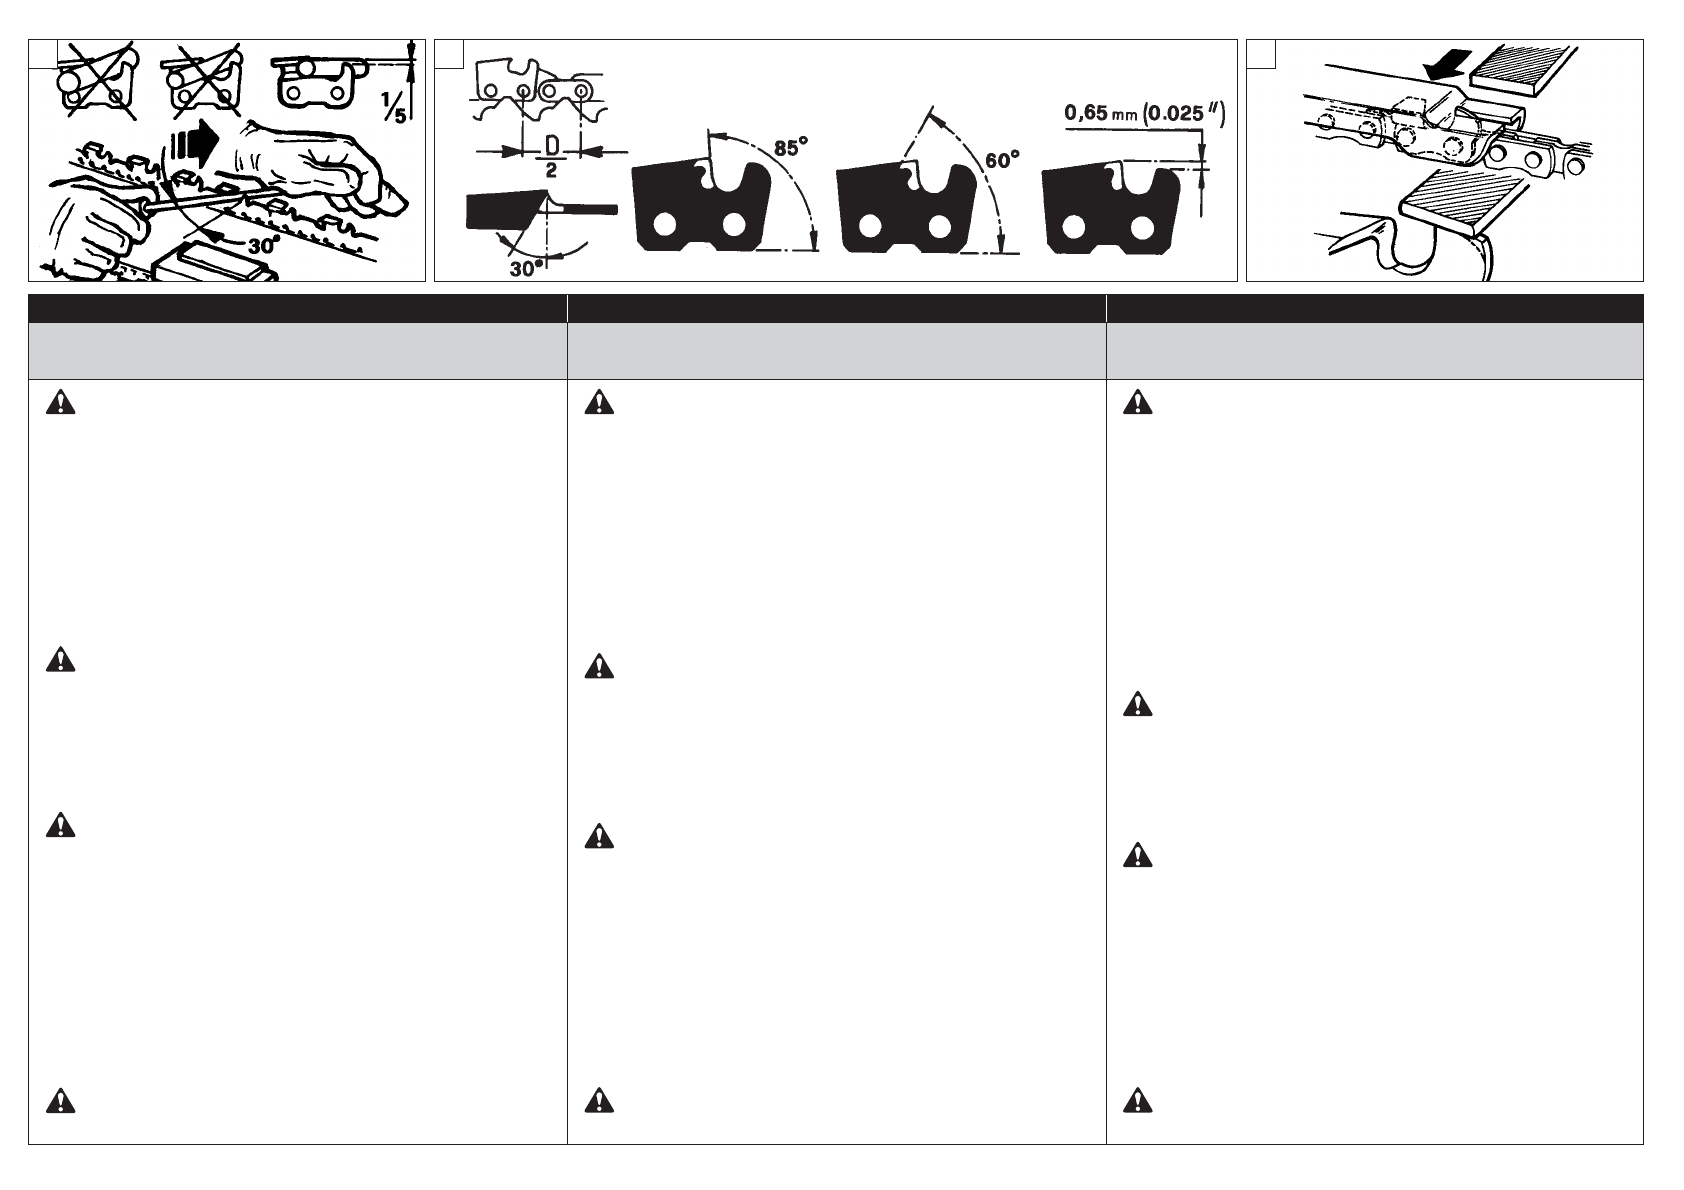
Co n t ro l e q u e a s g u i a s d a b a r r a s e j a m p a r a l e l a s e, s e
necessário, tire as rebarbas laterais com a lima plana (Fig. 70).
ATENÇÃO - Não monte nunca uma corrente nova
sobre um pinhão desgastado (Fig. 71).
WA R N I N G - A l w a y s w e a r p r o t e c t i v e g l o v e s
during maintenance operations. Do not carry out
maintenance when the engine is hot.
CHAIN SHARPENING
The pitch of the chain (Fig. 66) is .325”x.050”.
Sharpen the chain using protective gloves and a round file of
Ø 4.8 mm (3/16”).
Always sharpen the cutters only with out ward strokes
(Fig. 65) observing the values given in Fig. 66.
After sharpening, the cutting links must all have the same
width and length.
WARNING - A sharp chain produces well-defined
chips. When your chain starts to produce sawdust, it
is time to sharpen.
After every 3-4 times the cutters have been sharpened you
need to check the height of the depth gauges and, if
necessar y, lower them using the flat file and template
supplied optional, then round off the front corner (Fig. 67).
WARNING - Proper adjustment of the depth gauge is
as important as proper sharpening of the chain.
GUIDE BAR
The guide bars provided with a sprocket at their tip must be
lubricated with grease using a lubrication syringe (Fig. 68).
The bar should be reversed every 8 working hours to ensure
uniform wear.
Keep the bar groove and lubrication hole clean using the bar
groove cleaner supplied optional (Fig. 69).
Check the bar rails frequently for wear and, if necessary,
remove the burs and square-up the rails using the flat file
(Fig. 70).
WARNING - Never mount a new chain saw on a worn
sprocket (Fig. 71).
AT TENTION - Pendant les opérations d'entretien,
p o r te z t o u j o u r s d e s g a nt s. L a i s s e z re f ro i d i r l e
moteur avant d'intervenir.
AFFUTAGE DE LA CHAINE
Le pas de la chaîne (Fig.66) est de .325”x.050”.
Portez des gants de protection lorsque vous affûtez la chaîne
à l’aide d’une lime ronde de Ø 4.8 mm (3/16”).
Affûtez toujours en faisant mordre la lime en poussant vers
l’extérieur (Fig.65) et en ayant soin de respecter les valeurs
reportées sur la Fig.66.
Après l’affûtage, les gouges doivent être toutes de la même
largeur et de la même longueur les unes par rapport aux
autres.
ATTENTION - Il faut affûter la chaîne à chaque fois
que les copeaux présentent des dimensions très
réduites semblables à de la sciure.
Tous les 3-4 affûtages, contrôlez et éventuellement “abattez”
le nez de gouge à l’aide d’une lime plate et du gabarit fourni
en option, après quoi, arrondissez l’angle antérieur (Fig.67).
ATTENTION - Le réglage correct du nez de gouge est
aussi important que l’affûtage correct de la chaîne.
GUIDE
Les guides munis de pignon à la pointe doivent être lubrifiés
ave c de la graisse, en se ser vant d’une seringue pour
lubrification (Fig.68).Retournez le guide toutes les 8 heures
de travail pour répartir l’usure.
Nettoyez la rainure du guide et le trou de lubrification, à
l’aide d’un racloir fourni en option (Fig.69). Contrôlez que les
r a i n u re s d u g u i d e s o i e n t p a r a l l è l e s e t s i ce l a s’avè re
nécessaire, ébavurez les bords avec une lime plate (Fig.70).
ATTENTION - Ne montez jamais une chaîne neuve
sur un pignon usé (Fig.71).

