
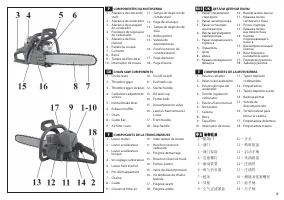
Бензопилы Oleo-Mac GS 44 5023-9012Е1 - инструкция пользователя по применению, эксплуатации и установке на русском языке. Мы надеемся, она поможет вам решить возникшие у вас вопросы при эксплуатации техники.
Если остались вопросы, задайте их в комментариях после инструкции.
"Загружаем инструкцию", означает, что нужно подождать пока файл загрузится и можно будет его читать онлайн. Некоторые инструкции очень большие и время их появления зависит от вашей скорости интернета.


20
30
31
32
Português
English
Français
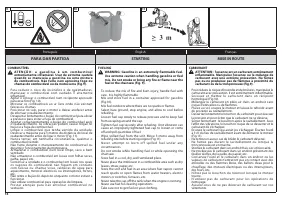
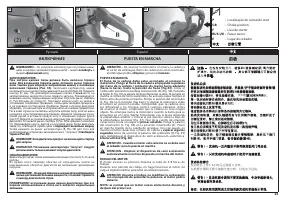
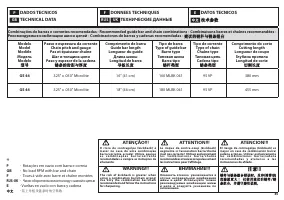
PARA DAR PARTIDA
STARTING
MISE EN ROUTE
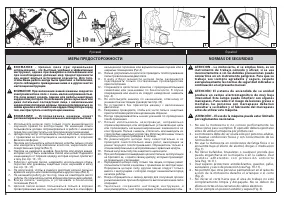
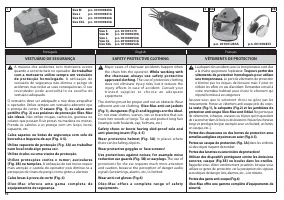
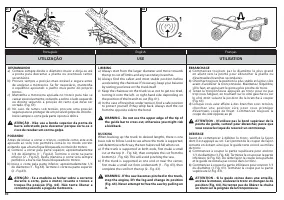
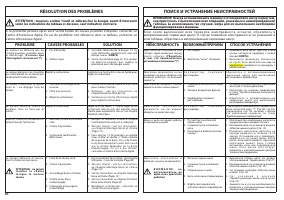
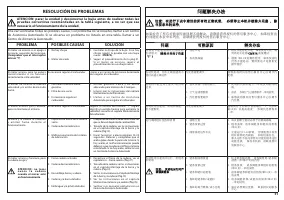
ATENÇÃO: observar as instruções de segurança para
o manuseamento do combustível. Desligar sempre
o motor antes de realizar o reabastecimento. Nunca
adicionar combustível a uma máquina com o motor
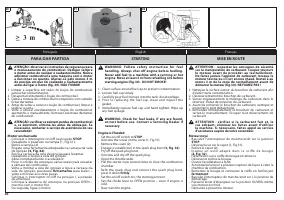
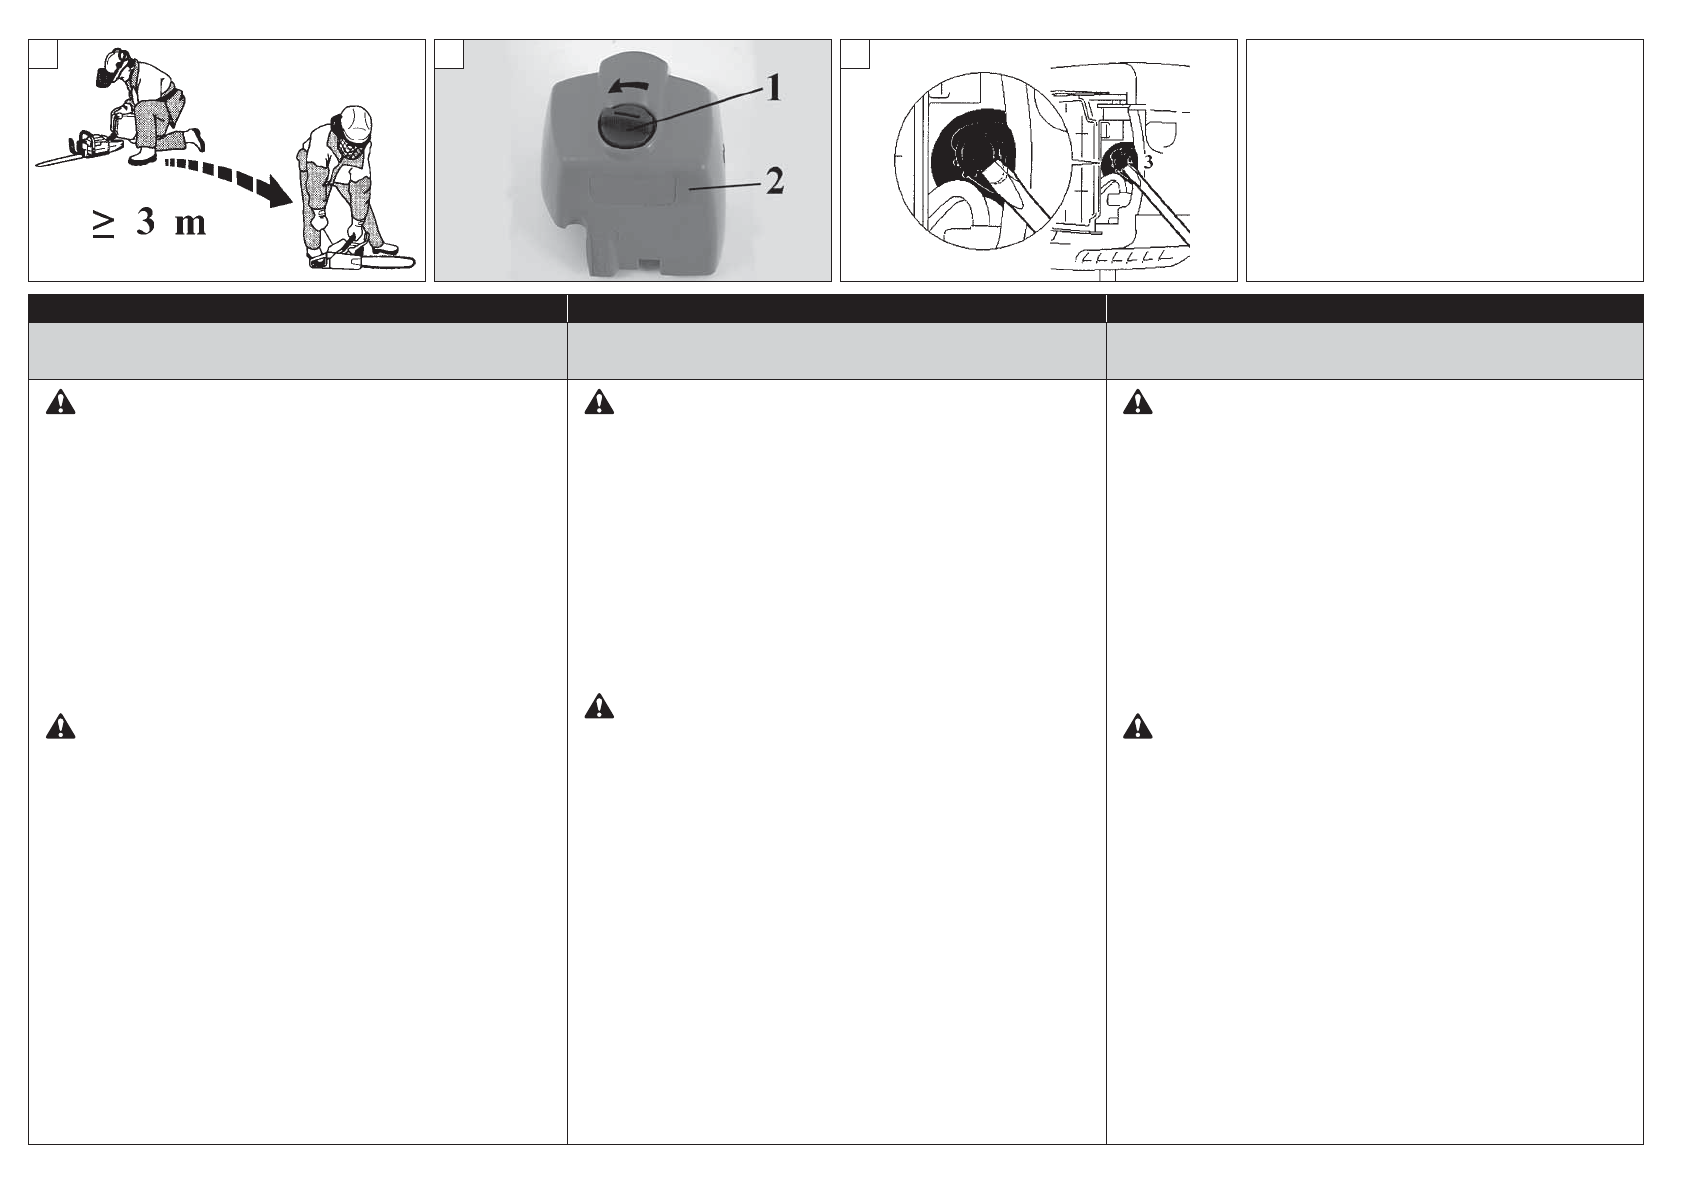
a funcionar ou quente. Afastar-se pelo menos 3 m
da posição em que foi realizado o reabastecimento
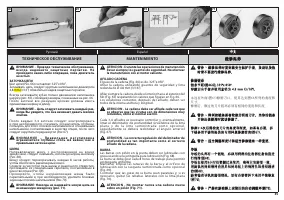
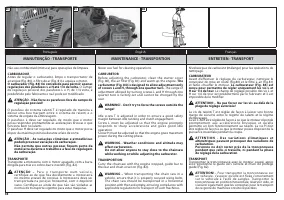
antes de ligar o motor (fig. 30). NÃO FUMAR!
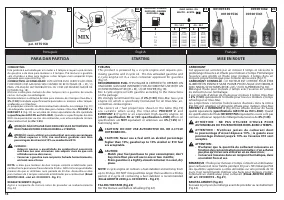
Limpar a superfície em redor do bujão do combustível
1.
para evitar contaminações.
Desapertar lentamente o bujão do combustível.
2.
Deitar a mistura do combustível no depósito com cuidado.
3.
Evitar derrames.
Antes de voltar a colocar o bujão do combustível, limpar e
4.
verificar a junta.
Volte a colocar imediatamente o bujão do combustível
5.
apertando-o manualmente. Remover eventuais derrames
de combustível.
ATENÇÃO: verificar se existem perdas de combustível
e, se existirem, eliminá-las antes da utilização. Se
necessário, contactar o serviço de assistência do seu
revendedor.
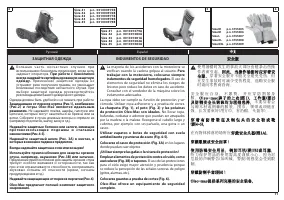
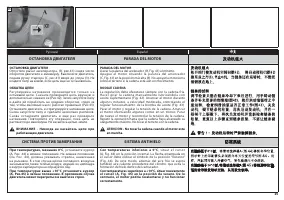
Motor encharcado
- Coloque o interruptor on/off na posição
STOP
.
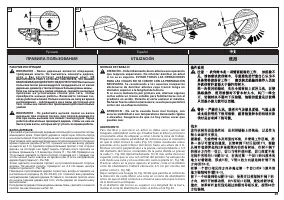
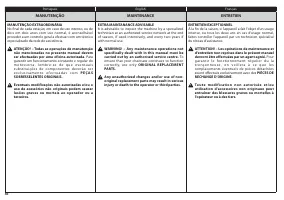
- Desaperte o parafuso na tampa (1, Fig.31 ).
- Retire a tampa (2).
- Engate uma ferramenta adequada na carcaça da vela
de ignição
(3, Fig. 32)
.
- Force a carcaça da vela de ignição para levantar.
- Desaperte e seque a vela de ignição.
- Abra
completamente
o acelerador.
- Puxe o cordão de arranque várias vezes para esvaziar
a câmara de combustão.
- Volte a montar a vela de ignição e ligue a carcaça da
vela de ignição, pressione
fi rmemente
para baixo –
volte a montar as outras peças.
- Coloque o interruptor on/off na posição I, a posição
de arranque.
- Coloque a alavanca de arranque na posição OPEN –
mesmo com o motor frio.
- De seguida, ligue o motor.
WA R N I N G : Fo l l o w s a f e t y i n s t r u c t i o n f o r f u e l
handling. Always shut off engine before fuelling.
Never add fuel to a machine with a running or hot
engine. Move at least 3 m from refuelling site before
starting engine (Fig.30). DO NOT SMOKE!
Clean surface around fuel cap to prevent contamination.
1.
Loosen fuel cap slowly.
2.
Carefully pour fuel mixture into the tank. Avoid spillage.
3.
Prior to replacing the fuel cap, clean and inspect the
4.
gasket.
Immediately replace fuel cap and hand tighten. Wipe up
5.
any fuel spillage.
WARNING: Check for fuel leaks, if any are found,
correc t before use. Contac t a Ser vicing Dealer if
necessary.
Engine is Flooded
- Set the on/off switch to STOP.
- Unscrew the screw on the cover (1, Fig.31).
- Remove the cover (2).
- Engage a suitable tool in the spark plug boot (3, Fig. 32).
- Pry off the spark plug boot.
- Unscrew and dry off the spark plug.
- Open the throttle wide.
- Pull the starter rope several times to clear the combustion
chamber.
- Refit the spark plug and connect the spark plug boot,
press it down firmly.
- Set the on/off switch to I, the starting position.
- Set the choke lever to OPEN position – even if engine is
cold.
- Now start the engine.
AT TENTION : respectez les consignes de sécurité
sur la manipulation du carburant. Coupez toujours
le moteur avant de procéder au ravitaillement.
Ne faites jamais l'appoint de carburant lorsque le
moteur tourne ou s'il est encore chaud. Restez à au
moins 3 m de la zone de ravitaillement avant de
démarrer le moteur (fig.30). NE FUMEZ PAS !
Nettoyez la surface autour du bouchon de carburant afin
1.
d'éviter toute contamination.
Dévissez lentement le bouchon de carburant.
2.
Versez soigneusement le mélange de carburant dans le
3.
réservoir. Évitez de renverser du carburant.
Avant de remonter le bouchon de carburant, nettoyez et
4.
inspectez le joint d'étanchéité.
Remontez immédiatement le bouchon de carburant et
5.
serrez-le manuellement. Essuyez tout déversement de
carburant
AT TENTION : vérifiez si le carburant fuit et, le
cas échéant, éliminez les fuites avant d'utiliser
la machine. Si nécessaire, faites appel au service
d'assistance auprès de votre revendeur.
Moteur noyé
- Basculez l’interrupteur de marche/arrêt sur la position
STOP.
- Dévissez la vis sur le capot (1, Fig.31).
- Retirez le capot (2).
- I n s é r e z u n o u t i l a d a p t é d a n s l a c o i f f e d e b o u g i e
(3, Fig. 32).
- Faites levier sur la coiffe de bougie et retirez-la.
- Dévissez et séchez la bougie.
- Ouvrez l’accélérateur à fond.
- Actionnez le lanceur à plusieurs reprises de façon à vider la
chambre de combustion.
- Remontez la bougie et connectez la coiffe en l’enfonçant
fermement.
- Basculer l’interrupteur de marche/arrêt sur I, la position de
démarrage.
- Passez le levier d’étrangleur sur la position OUVRIR, même
si le moteur est froid.
- Démarrez à présent le moteur.

