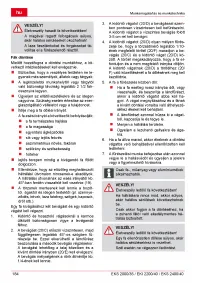
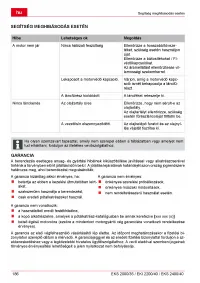
Бензопилы AL-KO EKI 2200/40 - инструкция пользователя по применению, эксплуатации и установке на русском языке. Мы надеемся, она поможет вам решить возникшие у вас вопросы при эксплуатации техники.
Если остались вопросы, задайте их в комментариях после инструкции.
"Загружаем инструкцию", означает, что нужно подождать пока файл загрузится и можно будет его читать онлайн. Некоторые инструкции очень большие и время их появления зависит от вашей скорости интернета.


en
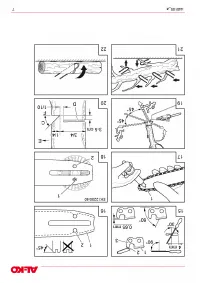
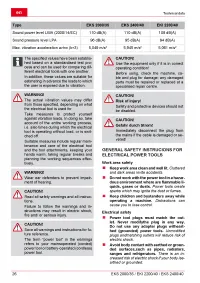
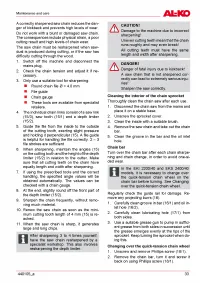
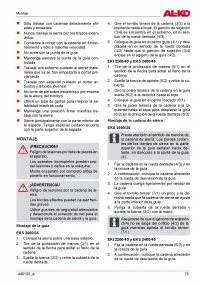
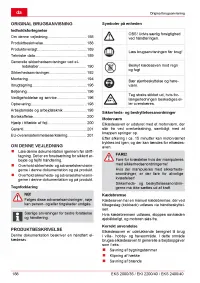
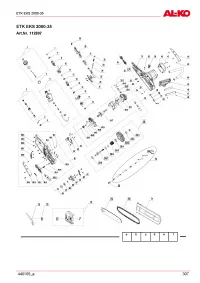
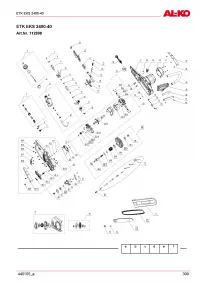
A s s e m b ly
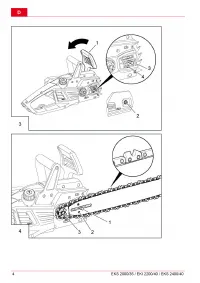
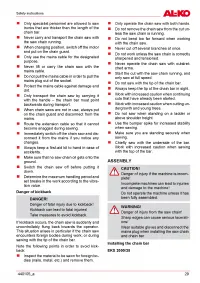
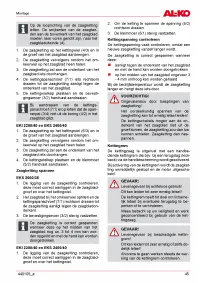
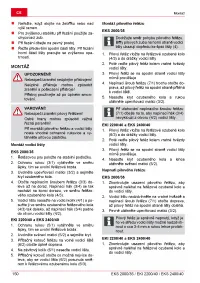
1. Place the chain saw on a stable base.
2. Pull hand guard (3/1) in the direction o f the
arrow in order to release the chain brake.
3. Unscrew fastening nut (3/2) and remove the
sprocket cover.
4. Turn chain tensioning screw (3/3) to the left as
far as the stop. Tensioning hook (3/4) is then
located at the end o f the stop, in the direction
o f chain sprocket (4/3).
5. Place the chain bar on guide pin (4/1) and
push sufficie ntly far in the direction of chain
sprocket (4/3) until tensioning hook (3/4) fits
in the hole in chain bar (4/2).
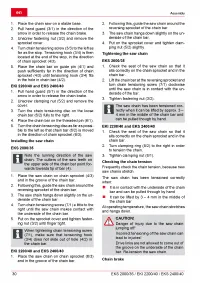
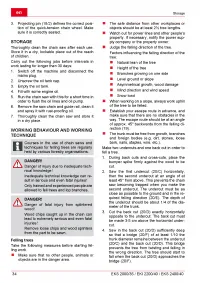
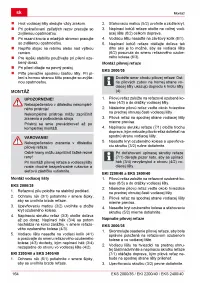
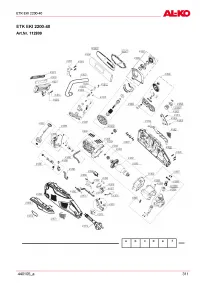
EKI 2200/40 a n d EKS 2400/40
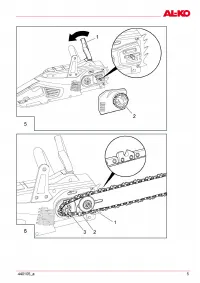
1. Pull hand guard (5/1) in the direction o f the
arrow in order to release the chain brake.
2. Unscrew clamping nut (5/2) and remove the
cover.
3. Turn the chain tensio nin g disc on the loose
chain bar (6/2) fully to the right.
4. Place the chain bar on the threaded pin (6/1).
5. Turn the chain tensioning disc as far as possi-
ble to the left so that chain bar (6/2) is moved
in the direction o f chain sprocket (6/3).
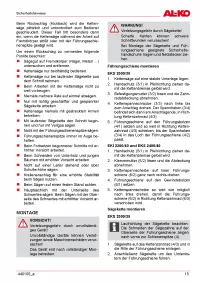
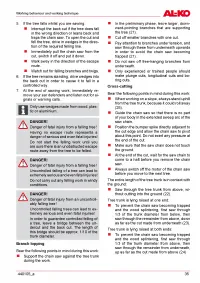
I n s t a llin g th e s a w c h a in
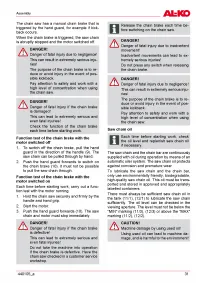
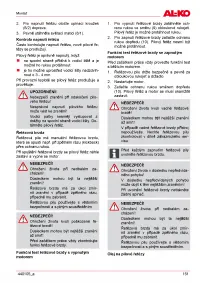
EKS 2000/35
1. Place the saw chain on chain sprocket (4/3)
and in the groove o f the chain bar.
2. Following this, guide the saw chain around the
reversing sprocket o f the chain bar.
3. The saw chain hangs down slightly on the un-
derside o f the chain bar.
4. Turn chain tensioning screw (7/1) a little to the
right until the saw chain makes contact with
the underside o f the chain bar.
5. Put on the sprocket cover and tighten fasten
ing nut (3/2) until finger tight.
1. Place the saw chain on chain sprocket (6/3)
and in the groove o f the chain bar.
2. Following this, guide the saw chain around the
reversing sprocket o f the chain bar.
3. The saw chain hangs down slightly on the un-
derside o f the chain bar.
4. Put on the sprocket cover and tighten cla m
ping nut (5/2) slightly.
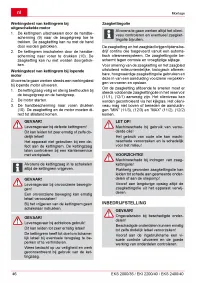
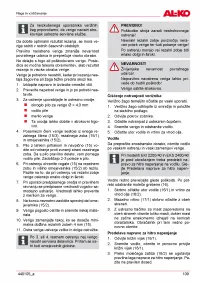
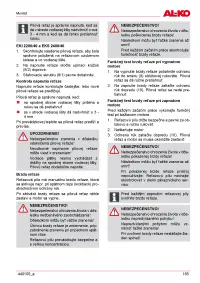
T ig h te n in g th e s a w c h a in
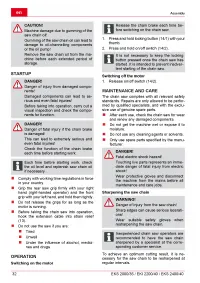
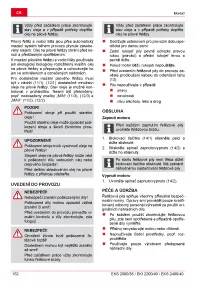
EKS 2000/35
1. Check the seat o f the saw chain so that it
sits correctly on the chain sprocket and in the
chain bar.
2. Lift the chain bar at the reversing sprocket and
turn chain tensioning screw (7/1) clockwise
until the saw chain is in contact with the un-
derside o f the bar.
3. Tighten fastening nut (3/2).
The saw chain has been tensioned cor-
rectly when it can be lifted by approx. 3 -
4 mm in the middle o f the chain bar and
can be pulled though by hand.
EKI 2200/40 an d EKS 2400/40
1. Check the seat o f the saw chain so that it
sits correctly on the chain sprocket and in the
chain bar.
2. Turn clamping ring (8/2) to the right in order
to tension the chain.
3. Tighten clamping nut (8/1).
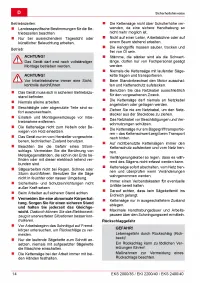
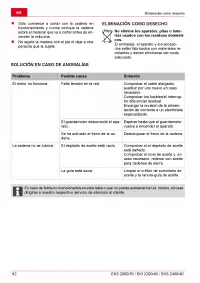
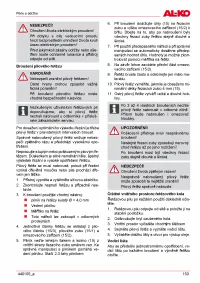
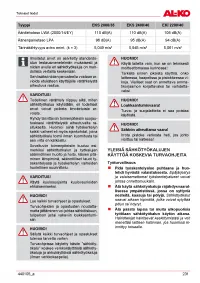
C h e c k in g th e c h a in te n s io n
Frequently check the chain tension, because new
saw chain s stretch.
The saw chain has been tensioned correctly
when:
■
It is in contact with the underside o f the chain
bar and can be pulled through by hand
■
It can be lifted by 3 - 4 mm in the middle o f
the chain bar
At operating tem perature, the saw chain stretches
and hangs down.
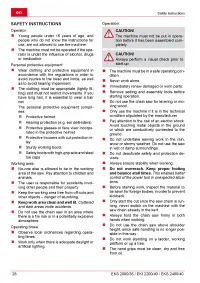
A
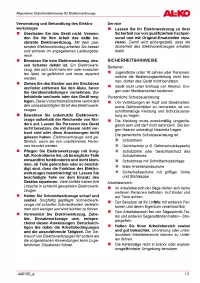
CAU TIO N!
Danger o f injury due to the saw chain
ju m pin g off!
Incorrect tensioning o f the saw chain can
lead to injuries!
Drive links are not allowed to come out of
the groove on the underside o f the chain
bar. Re-tension the saw chain.
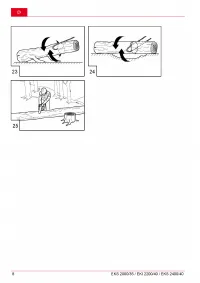
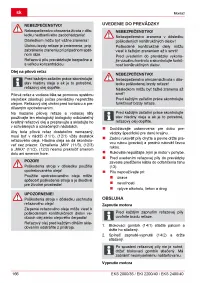
C h a in b ra ke
Note the running direction o f the saw
chain. The cutters o f the saw teeth on
the upper side o f the chain bar point for-
w a rds tow a rds tip o f bar (4).
When tightening chain tensioning screw
(7/1), make sure that tensioning hook
(3/4) does not slide out o f hole (4/2) in
the chain bar.
EKI 2200/40 a n d EKS 2400/40
1
30
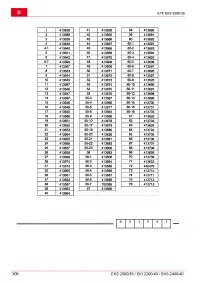
EKS 2000/35 / EKI 2200/40 / EKS 2400/40
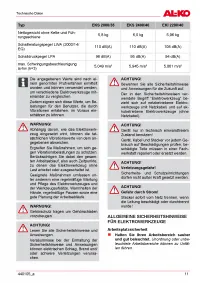
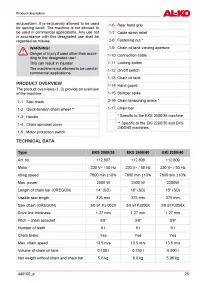
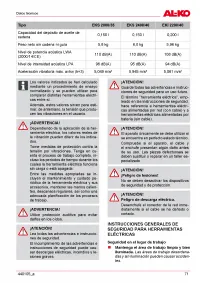
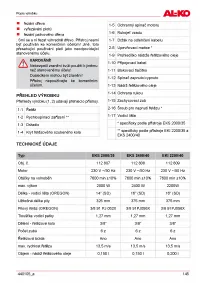
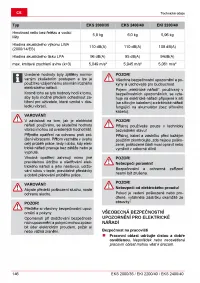
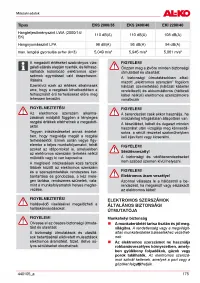
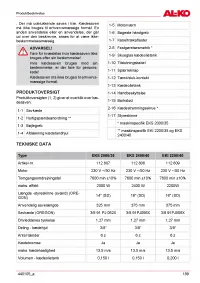
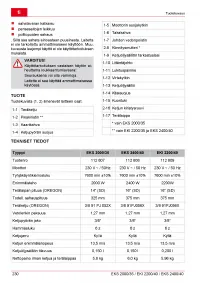
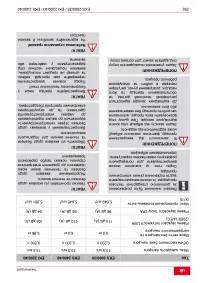
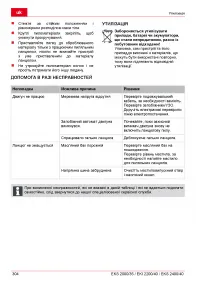
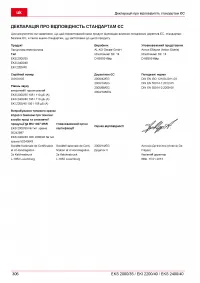
Характеристики

Остались вопросы?Не нашли свой ответ в руководстве или возникли другие проблемы? Задайте свой вопрос в форме ниже с подробным описанием вашей ситуации, чтобы другие люди и специалисты смогли дать на него ответ. Если вы знаете как решить проблему другого человека, пожалуйста, подскажите ему :)


