
Вытяжки Jetair Ca 3/520 2m INX-09 - инструкция пользователя по применению, эксплуатации и установке на русском языке. Мы надеемся, она поможет вам решить возникшие у вас вопросы при эксплуатации техники.
Если остались вопросы, задайте их в комментариях после инструкции.
"Загружаем инструкцию", означает, что нужно подождать пока файл загрузится и можно будет его читать онлайн. Некоторые инструкции очень большие и время их появления зависит от вашей скорости интернета.
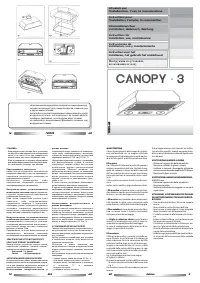
J60
J60
J60
J60
6
INSTALLATION
- Der eingebaute Dunstabzug sollte sich im Falle von
Elektroherden in einem Abstand von mindestens 60
cm von der Arbeitsfläche befinden und im Falle von
Gas- oder Mischherden in einem Abstand von min-
destens 65 cm.
- Sollten die Installationsanweisungen einen
größeren Abstand der Gaskochvorrichtung
vorschreiben, so sind diese Angaben zu
berücksichtigen.
Elektrischer Anschluß
Vor dem Anschluß muß sichergestellt werden, daß
die Netzspannung den auf dem Typenschild (im In-
nern des Gerätes) angegebenen Werten entspricht.
Bitte lassen Sie den Elektroanschluß ausschließlich
durch Fachpersonal durchführen.
Mit Stecker bestücktes Gerät
Schließen Sie das Gerät an eine den einschlägigen
Bestimmungen entsprechende Steckdose an.
Der angeschlossene Stecker sollte sich an einer leicht
zugänglichen Stelle befinden.
Sollte das Gerät direkt an das Stromnetz angeschlos-
sen werden, ist der Stecker zu entfernen, und eine
Trennvorrichtung mittels eines vorschriftsmäßigen
zweipoligen Schalters mit einer Kontaktöffnung, die
3 mm nicht unterschreiten darf, zu installieren.
Gerät ohne Stecker
Versehen Sie das Gerät mit einem vorschriftsmäßi-
gen, den einschlägigen Normen entsprechenden
Stecker oder einem zweipoligen Schalter mit einer
Kontaktöffnung, die 3 mm nicht unterschreiten darf.
Jegliche Haftung für Schäden, die durch Nichtein-
haltung obiger Anweisungen auftreten, wird zurück-
gewiesen.
GERÄTE DER KLASSE 2 ERFORDERN KEINEN
ERDANSCHLUSS
Geräte der Klasse 2, auf deren Typenschild das Symbol
eines Doppelvierecks abgebildet ist, sind wie folgt
anzuschließen:
BRAUN
=
L
(Leitungsnetz)
BLAU
=
N
(Nulleiter)
BETRIEBSART
Die Haube kann sowohl als Abluftgërat als auch als
Umluftgërat eingesetzt werden.
EINSATZ ALS ABLUFTGERÄT
Die Luft wird durch eine Rofrleitung, die mit dem
Ringstutzen (A) Abb. 1 an die Lufttaustrittsöffnung Ø
120 mm. anzuschließen ist, ins Freie abgeleitet.
Deutsch
Die Abluft darf nicht in einen Entlüfttungsschacht, in
dem Warmluft zirkuliert oder der für die Entlüftung
der Abgase von nicht elektrisch betriebenen Geräten
verwendet wird, abgeleitet werden. Bei
gleichzeitigem Betrieb einer Dunstabzugshaube und
einer umluftabhängigen Feuerstätte (z.B.gas-, öl-oder
kohlebetriebene Heizgeräte, Durchlauferhitzer usw.)
ist Vorsicht geboten, da die Abzugshaube beim
Absaugen der Luft dem Raum die Luft entzieht, die
Feuerstätte zur Verbrennung benötigt.
Für einen sicheren Betrieb ist deshalb durch Türen,
Fenster oder andere technische Maßnahmen die
ausreichende Belüftung des Raumes sicherzustellen.
Bei Ableitung der Abluft sind die behördlichen
Vorschriften zu beachten. Die Abluft darf nicht in
einen Schornstein abgegeben werden der für Abgase
von geräten, die mit nicht elektrischer Energie
betrieben werden, benutzt wird.
ACHTUNG:
Bei gleichzeitigem Betrieb der Dunstabzugshaube
im Abluftbetrieb und Feuerstätten darf im Aufstell-
raum der Feuerstätte der Unterdruck nicht höher
als 4 Pa(4x10
5
bar) sein.
EINSATZ ALS UMLUFTGERÄT
Besteht keine Möglichkeit, die Abluft ins Freie
abzuleiten, ist die Verwendung eines AktivKohlefilters
vorgesehen. Die Abluft wird durch den Filter gereinigt
und strömt wieder in den Raum zurück. Folgende
Arbeitsschritte sind durchzuführen:
- Fügen sie den kohlefilter "D" ein (Abb. 2).
Die Luft wird durch ein Rohr mit Ø 120 mm.
Durchmesser, das durch den Hängeschrank verläuft
und an den Rinstutzen (A) angeschlossen wird, wieder
in den Raum zurückgeführt.
BEFESTIGUNG DER DUNSTABZUGSHAUBE
Nachdem die Dunstabzugshaube für den
entsprechenden Einsatz eingestellt worden ist,
können Sie diese installieren:
- Dieses Gerät ist für den Einbau in einen
Hängeschrank oder ähnliches bestimmt.
- Es ist ein Ausschnitt in den Boden des
Hängeschrankes vorzunehmen, der den in der
Abbildung 4 angegebenen Abmessungen
entspricht.
Zur Befestigung der Dunstabzugshaube verfahren
Sie wie folgt:
- Nehmen sie den rahmen ab und drücken sie die
taste "B" Abb. 3.
*ACHTUNG: in der version mit halogenlampen
zuerst die verbinder "F" ausschalten Abb. 3.1.
- Die Dunstabzugshaube in den Ausschnitt
einsetzen.
- Introducir los tornillos, suministrados en
dotación, en los orificios C, sujetando el
grupo a la alacena Fig.4.
- Vuelva a montar el marco.
* A t e n c i ó n : e n l a v e r s i ó n c o n l á m p a r a s
h a l ó g e n a s c o n e c t a r l o s f o c o s a n t e s d e
volver a montar el marco.
MANTENIMIENTO
E l b u e n f u n c i o n a m e n t o d e l a c a m p a n a
depende de la regularidad con la que se
e f e c t ù a n l a s l a b o r e s d e m a n t e n i m i e n t o ,
e s p e c i a l m e n t e d e l l a r e j i l l a y d e l f i l t r o d e
carbòn activo.
Filtro de grasas
Tiene la funciòn de retener las partículas de
grasa o sólidas en suspensión en el aire. Por
l o t a n t o , s e p u e d e t a p a r e n d i s t i n t o s
momentos según el uso y el tipo de cocina.
De todos modos, cada dos meses al máximo
es necesario limpiarlo o sostituirlo.
El filtre de grasas puede ser suministrado en
cuatro versiones:
acrílico, papel, metálico y rejillas de aluminio
estirado.
El filtro acrílico
se lava a mano con agua
tibia y detergente líquido neutro, dejando
aflorar la suciedad, se deja secar sin retorcer.
El filtro de papel
no es lavable y debe ser
sustituido cuando las líneas rojas aparecen
en la parte inferior, visibles a través de los
orificios de la rejilla.
El filtro metálico
tiene una duración casi
i l i m i t a d a , s e l a v a i g u a l q u e e l s i n t é t i c o ,
dejándolo secar antes del montaje.
Las rejillas de aluminio estirado
son lavadas
a m a n o o e l l a v a p l a t o s u n a v e z a l m e s ,
dejándolos secar antes del montaje.
En caso de inobservancia de las instrucciones
de lavado, existe el peligro de incendio.
Filtro de carbon activo
El filtro de carbón activo, presente en la versión de
campana filtrante, cumple la tarea de detener los
olores y depurar el aire que pasa.
L a s a t u r a c i ó n d e e s t e f i l t r o s e p r o d u c e
después de un uso
p r o l o n g a d o , c o n f o r m e e l t i p o d e
preparaciones y de la regularidad con que
se limpia el filtro grasas.
D e t o d o s m o d o s , c o n v i e n e r e e m p l a z a r e l
cartucho cada cuatro meses.
español
1 1
P A R A E L D E S M O N TA J E , O P E R A R D E L
SIGUIENTE MODO:
- Quitar el marco
- Girar el botón central del filtro de carbón
en sentido antihorario y extraerlo de su
sede (fig.2).
Para montar el nuevo filtro proceder del modo
inverso.
Limpiar frecuentemente todos los depòsitos
sobre el ventilador y otras superficies, usan-
d o u n p a n o h u m e d e c i d o c o n a l c o h o l
d e s n a t u r a l i z z a d o o d e t e r g e n t e s l i q u i d o s
neutros no abrasivos.
SUSTITUCIÓN DE LAS LÁMPARAS
HALÓGENAS
- Desconectar el aparato de la red eléctrica.
- Extraer, desatornillando, las virolas cromadas
- Sustituir las lámparas dañadas utilizando
exclusivamente lámparas halógenas de 20
W-máx.
- Montar nuevamente las virolas cromadas.
SUSTITUCIÓN DE LAS LÁMPARAS
INCANDESCENTES
40W (E14) máx
- Dejar sin corriente el aparato
- Quitar la rejilla
- Sustituir la bombilla dañada con una nueva
de igual valor.
ATENCION! EN DETRMINADOS CIRCUNSTANCIAS
LOS ELECTRODOMESTICOS PUEDEN RESULTAR
PELIGROSOS.
-No manipular el filtro con la campana en
marcha.
-No obstruir el tubo de descarga.
- N o t o c a r l a l à m p a r a o s u p r o t e c c i ò n
después de un uso prolongado del aparato.
-No cocinar a la llama debajo de la campan.
-Cocinar a la llama es perjudical para los
filtros y existe peligro de incendio.
-Cuando se realicen fritos, controlar costan-
temente la paella ya que el aceite puede
incendiarse.
-Antes de efectuar cualquier operaciòn de
limpieza desconectar la campana de la red
elèctrica.
-Se declina toda responsabilidad por danos
e v e n t u a l m e n t e p r o v o c a d o s p o r n o h a b e r
observado las citadas advertencias.
I
NSTALLATION
- Once installed, the appliance must be no less than 60
cm away from an electric hob and no less than 65 cm
away from gas hob or a mixed hob.
- If the instructions for the installation of the gas
hob specify a greater distance, please take this
into account.
Electrical Connection
- B e f o r e m a k i n g t h e e l e c t r i c a l c o n n e c t i o n ,
make sure that the voltage of the electrical
mains complies with the value indicated on
the rating sticker.
It is highly recommended that the connec-
tion be made by a qualified electrician.
Unit Fitted with Plug
Insert the plug into an outlet that complies
with the electrical safety codes currently in
e f f e c t .
Once inserted into the outlet, the plug must
be easily accessible. If you intend to connect
the unit directly to the electrical mains, re-
move the plug and install a standard bipolar
switch with a minimum contact break of 3 mm.
Unit Not Fitted with a Plug
Install a standard plug or a standard bipolar
switch with a minimum contact break of 3 mm.
The manufacturer will not be held liable for
any problems arising out of the failure to com-
ply with the foregoing instructions.
CLASS 2 APPLIANCES DO NOT HAVE TO BE
EARTHED
Class 2 appliances labelled with the symbol
in the form of a double square must be con-
nected as follows:
BROWN
=
L
(current)
BLUE
=
N
(neutral)
UTILIZATION
The hood is designed to be utilized either for
s u c t i o n v e r s i o n a t e x t e r n a l e v a c u a t i o n o r
filtering version at internal recirculation.
SUCTION VERSION
EXTERNAL EXHAUST
The air is vented outdoors by a duct which
m u s t b e c o n n e c t e d t o e x h a u s t h o l e Ø 1 2 0
mm. by the connecting ring (A) Fig.1. The hood
TO REMOVE THE CHARCOAL FILTER, PROCEED
AS FOLLOWS:
- Remove the frame
- Turn the center knob on the charcoal filter in
the counterclockwise direction and remove
the filter from its seat (Fig. 2).
To install the new filter proceed as described
above in the reverse order.
Clean frequently au the deposits on the fan and
other surfaces, utilizing a cloth moistened by
methylated spirits or neutral and not abrasive
fluid detersive.
REPLACING HALOGEN LAMPS
- Unplug the appliance from the electrical power
supply;
- Unscrew the chrome-plated diffuser ring and
remove them;
- Replace the faulty lamps, using only 20 W
(max) halogen lamps;
- Remount the chrome-plated diffuser rings.
REPLACING INCANDESCENT LAMPS
40W (E14) max
- Disconnect the hood from the electricity
- Remove the grate
- Replace the damaged lamp with one of the
same power.
WARNING! UNDER CERTAIN CIRCUMSTANCES
DOMESTIC APPLIANCES MAY BE DANGEROUS.
- Do not check filters with hood running.
- Do not obstruct vented outlets.
- Do not touch light bulbs or lamp-cover after
long periods of use.
- Not to be used over eye-level grill.
- No food must be cooked flambè underneath
the hood.
- The use of an unprotected flame is dangerous
for the filters and could cause fires.
- When frying foods, never leave the pan alo-
ne, because the cooking oil could flare up.
- Before performing any maintenance operation,
disconnect the hood from the mains.
- T h e m a n u f a c t u r e s r e f u s e t o a c c e p t a n y
responsability for eventual damages to the
hood, because of failure to observe the above
instructions.
english
english
8
9
must not be connected to fuel exaust flues or
to a duct in which hot air is circulated, or is
utilized to remove the fumes from appliances
stocked by an energy different from the electric
one. Pay attention when there is the contemporary
functioning of an hood and a burner or furnace
depending from the air of the surrounding (stocked
by an energy different from the electric one), because
the hood, suctioning, takes away from the
surrounding the air that the burner or the furnace
need for the combustion.
So, for a sure functioning, provide a suitable
ventilation of the room by doors, windows or
other technical devices.
For the external exhaust you have to follow
the Authoritys rules. The external exhaust
must not be made in a flue, utilized for the
combustible gas of appliances not stocked
by the electric energy.
FILTERING VERSION
INTERNAL RECYCLING
When there is no exhaust duct for venting
outdoors, you can use a carbon filter. The air
is depurated by the filter and put again in the
s u r r o u n d i n g . To u s e t h e a p p l i a n c e i n t h i s
version, proceded as follows:
-Insert the carbon filter "D" Fig. 2.
The air is vented outdoors by a duct Ø 120
m m . p a s s i g t h r o u g h t h e w a l l u n i t s a n d
connected to the connecting ring (A).
MOUNTING THE HOOD
Once the hood has been set up to vent or recirculate
the air, proceed with the installation process.
- This appliance is designed to be installed
w i t h i n a c a b i n e t o r o t h e r s u p p o r t i n g
structure.
- T h e c u t o u t w h i c h m u s t b e m a d e o n t h e
b o t t o m o f t h e c a b i n e t m u s t h a v e t h e
dimensions shown in Figure 4.
Tho mount the hood, proceed as follows:
- Remove the frame by pushing the buttons
"B" Fig. 3.
* N o t e : F o r t h e v e r s i o n w i t h h a l o g e n
lamps,switch off the connectors "F" Fig. 3.1.
- Insert the hood into the cutout.
- Insert the screws supplied with the hood
intro the "C" holes and tighten the hood to
the cabinet (Fig. 4).
- Remount the frame
*Note: For the version with halogen lamps,
connect the spot lights before remounting
the frame.
MAINTENANCE
The effective functioning of the hood depends
on the regularity with which the maintenance
operations are carried out, particulary in the case
of the synthetic-fibre and activated charcoal
filters.
Grease filter
It has the function of catching the fat and solid
particles suspended in the air. It is thus subject
to clogging at various intervals, according to use
and the type of cooking.
In any case it is necessary to clean the filter at
least every two months, or replace it.
The grease filter is available in four versions :
acrylic, paper, metal and stretched aluminium.
The acrylic filter
should be washed by hand in
warm water using a neutral liquid detergent.
Let soak and allow the grease and impurities to
escape. Let dry without twisting.
The paper filter
cannot be washed and must be
replaced when the red lines appear on the
bottom part of the filter. The lines are visible
through the holes in the grill.
The metal filter
lasts almost indefinitely. The
cleaning procedure is the same as that for the
acrylic filter. Let dry before reinstalling.
Stretched aluminium filters
they are to be
washed by hand or by dishwashev once a
month and leaving them to dry before fitting.
F a i l u r e t o c o r r e c t l y f o l l o w t h e s e c l e a n i n g
procedures will result in the risk of fire.
Charcoal filter
The charcoal filter, present only in the filtering
version, has the function of trapping odors and
purifying the air.
The saturation of the charcoal filter occurs after
more or less prolonged utilization, depending
on the type of cooking and on the regularity of
cleaning of the grease filter. In any case it is
necessary to replace the cartridge at least every
four months.


