
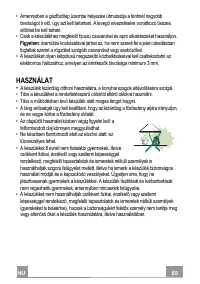
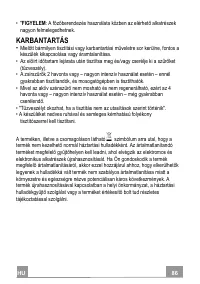
Вытяжки Faber CUBIA PLUS EV8 X A60 - инструкция пользователя по применению, эксплуатации и установке на русском языке. Мы надеемся, она поможет вам решить возникшие у вас вопросы при эксплуатации техники.
Если остались вопросы, задайте их в комментариях после инструкции.
"Загружаем инструкцию", означает, что нужно подождать пока файл загрузится и можно будет его читать онлайн. Некоторые инструкции очень большие и время их появления зависит от вашей скорости интернета.


EN
9
9
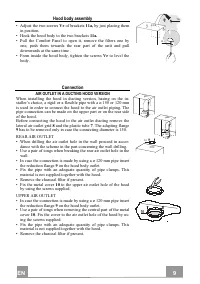
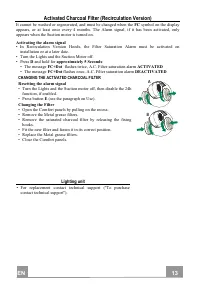
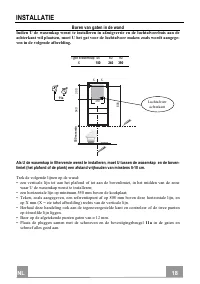
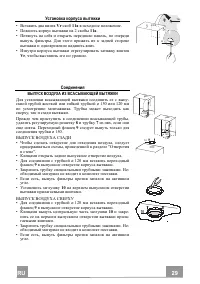
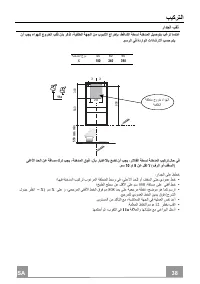
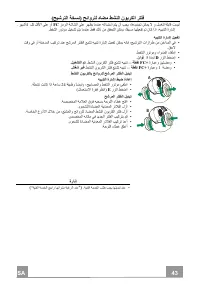
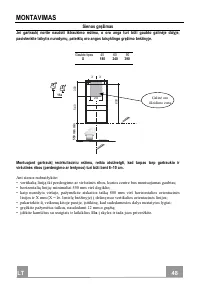
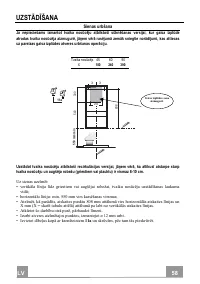
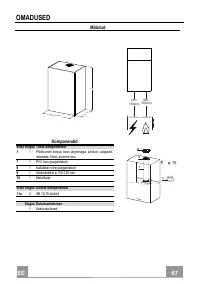
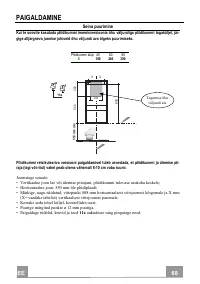
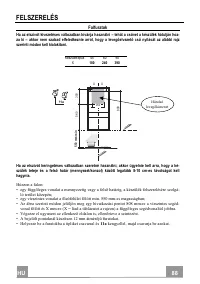
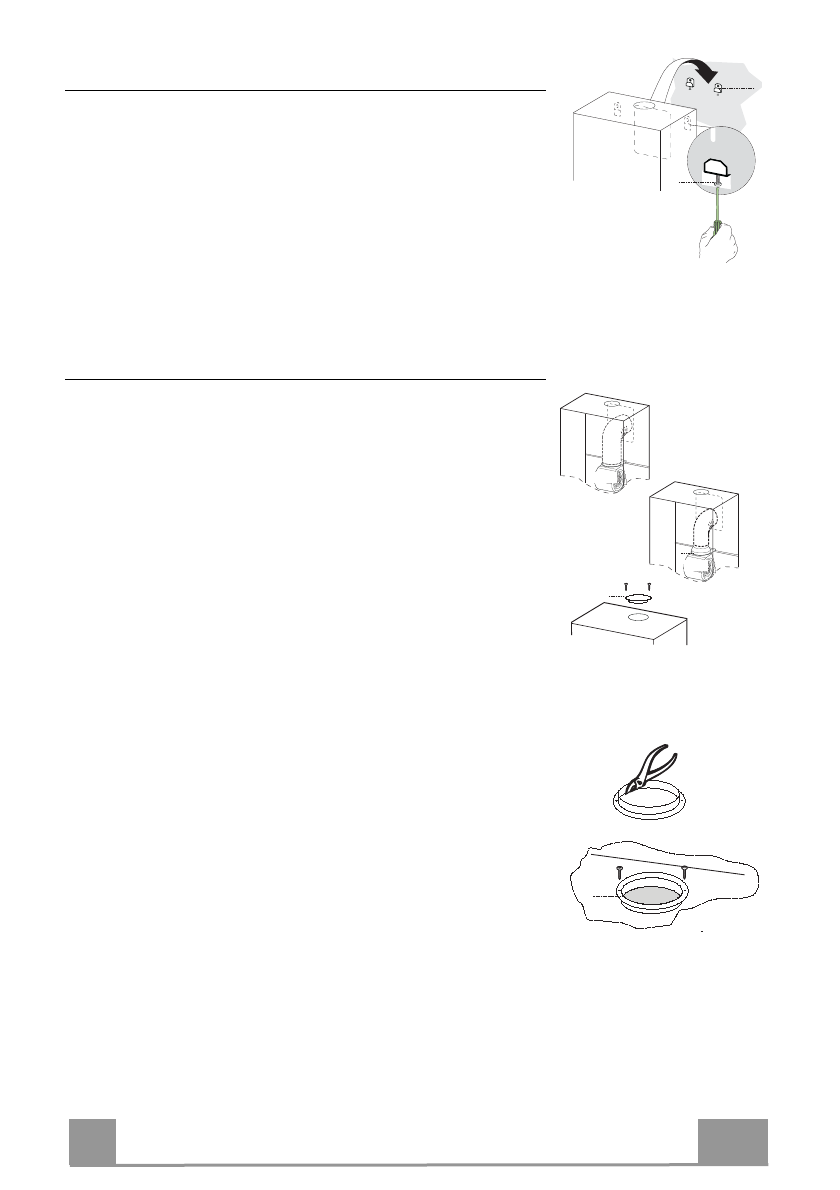
Hood body assembly
• Adjust the two screws
Vr
of brackets
11a,
by just placing them
in position.
• Hook the hood body to the two brackets
11a.
• Pull the Comfort Panel to open it, remove the filters one by
one, push them towards the rear part of the unit and pull
downwards at the same time .
• From inside the hood body, tighten the screws
Vr
to level the
body.
Vr
11a
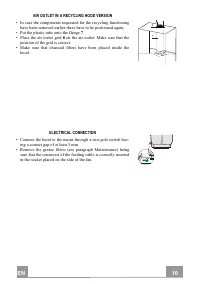
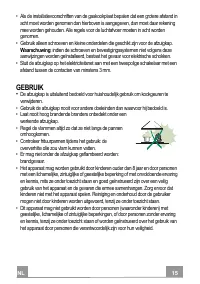
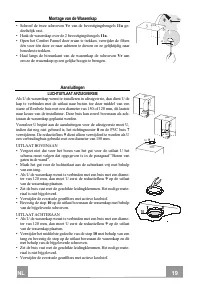
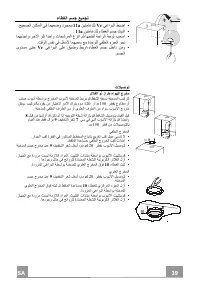
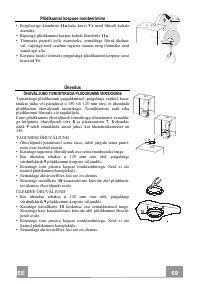
Connection
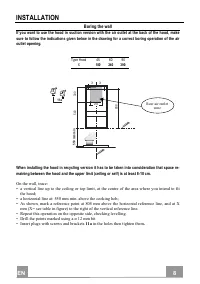
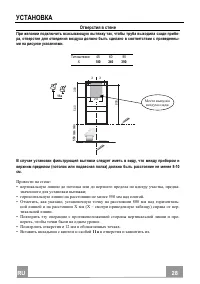
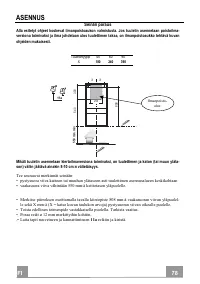
AIR OUTLET IN A DUCTING HOOD VERSION
When installing the hood in ducting version, basing on the in-
staller’s choice, a rigid or a flexible pipe with a ø 150 or 120 mm
is used in order to connect the hood to the air outlet piping. The
pipe connection can be made on the upper part or on the rear side
of the hood.
Before connecting the hood to the air outlet ducting remove the
lateral air outlet grid
8
and the plastic tube
7
. The adapting flange
9
has to be removed only in case the connecting diameter is 150.
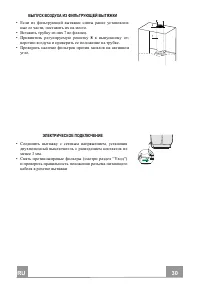
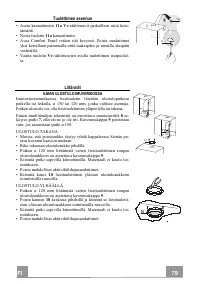
REAR AIR OUTLET
• When drilling the air outlet hole in the wall proceed in accor-
dance with the scheme in the part concerning the wall drilling.
• Use a pair of tongs when breaking the rear air outlet hole in the
wall.
• In case the connection is made by using a ø 120 mm pipe insert
the reduction flange
9
on the hood body outlet.
• Fix the pipe with an adequate quantity of pipe clamps. This
material is not supplied together with the hood.
• Remove the charcoal filter if present.
• Fix the metal cover
10
to the upper air outlet hole of the hood
by using the screws supplied.
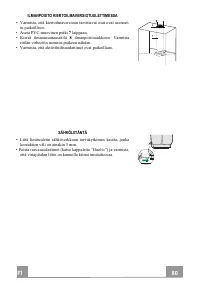
UPPER AIR OUTLET
• In case the connection is made by using a ø 120 mm pipe insert
the reduction flange
9
on the hood body outlet.
• Use a pair of tongs when removing the central part of the metal
cover
10
. Fix the cover to the air outlet hole of the hood by us-
ing the screws supplied.
• Fix the pipe with an adequate quantity of pipe clamps. This
material is not supplied together with the hood.
• Remove the charcoal filter if present.
ø 150
9
ø 120
10
10
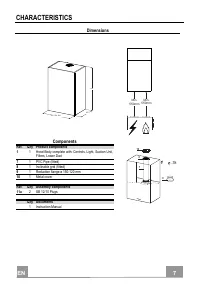
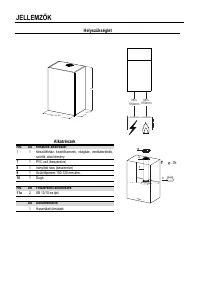
Характеристики

Остались вопросы?Не нашли свой ответ в руководстве или возникли другие проблемы? Задайте свой вопрос в форме ниже с подробным описанием вашей ситуации, чтобы другие люди и специалисты смогли дать на него ответ. Если вы знаете как решить проблему другого человека, пожалуйста, подскажите ему :)


