
Вытяжки Elica GLIDE IX/A/90 - инструкция пользователя по применению, эксплуатации и установке на русском языке. Мы надеемся, она поможет вам решить возникшие у вас вопросы при эксплуатации техники.
Если остались вопросы, задайте их в комментариях после инструкции.
"Загружаем инструкцию", означает, что нужно подождать пока файл загрузится и можно будет его читать онлайн. Некоторые инструкции очень большие и время их появления зависит от вашей скорости интернета.


8
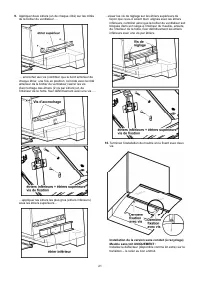
Installation
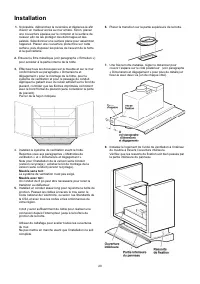
1.
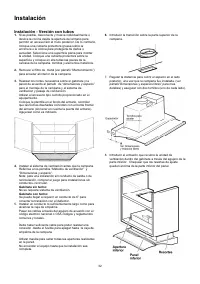
If possible, disconnect and move freestanding or slide-in
range from cabinet opening to provide easier access to
rear wall. Otherwise put a thick, protective covering over
countertop, cooktop or range to protect from damage
and debris. Select a flat surface for assembling the unit.
Cover that surface with a protective covering and place
all canopy hood parts and hardware in it.
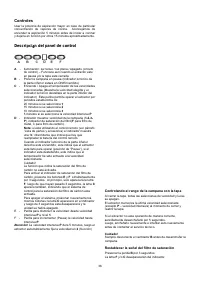
2.
Remove the metal filter (see paragraph "Maintenance")
top access the inside of the range hood.
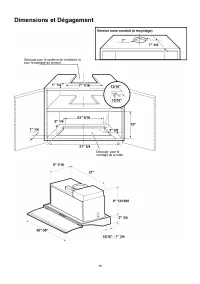
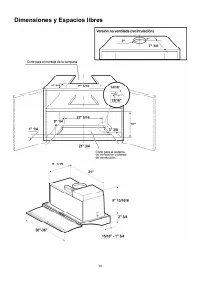
3.
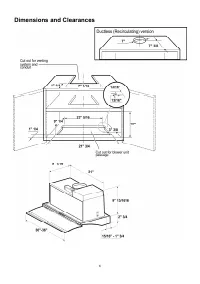
Perform any necessary cutout on cabinet and wall as per
"Dimensions and clearances" paragraph for range hood
mounting and for vent system and conduit passage.
Use the supplied template to perform the cut out on
cabinet.
Tape the template on the bottom of the cabinet, check
that printed arrows match with the front edge of the
cabinet (without considering the cabinet door).
Cut as indicated.
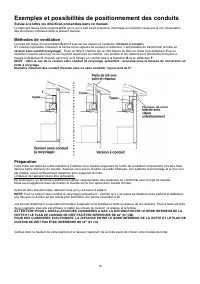
4.
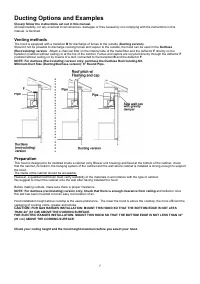
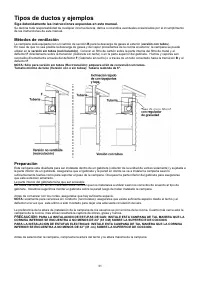
Install the vent system before the range hood. See
„Venting methods“ and „Dimensions and
clearance“ paragraphs.
Note - for Ductless - recirculating - installations:
Purchase
the
Ductless recirculating kit
Cabinet without ceiling:
Vent system is not required.
Cabinet with ceiling:
A 6" section of duct may be required to connect
transition to deflector.
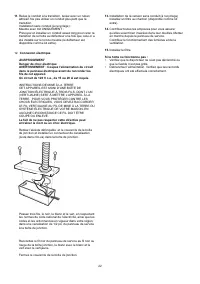
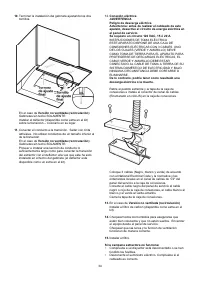
5.
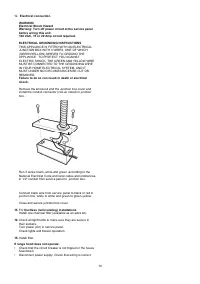
Install a conduit long enough to reach the junction box.
Run wires through hole according the National Electrical
Code or CSA Standards and local codes and ordinances.
There must be enough power supply cable from the
fused disconnect (or circuit breaker) box to make the
connection in the hood’s Junction box/es.
Use caulking to seal all openings on wall.
Do Not turn on power until installation is completed.
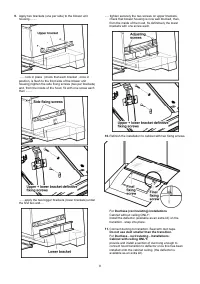
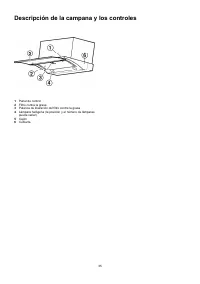
6.
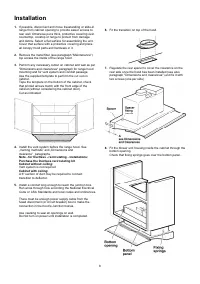
Fit the transition on top of the hood.
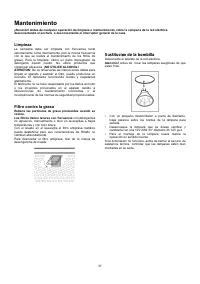
7.
Regulate the rear spacer to cover the clearance on the
rear side once the hood has been installed (see also
paragraph "Dimensions and clearances") and fix it with
two screws (one per side).
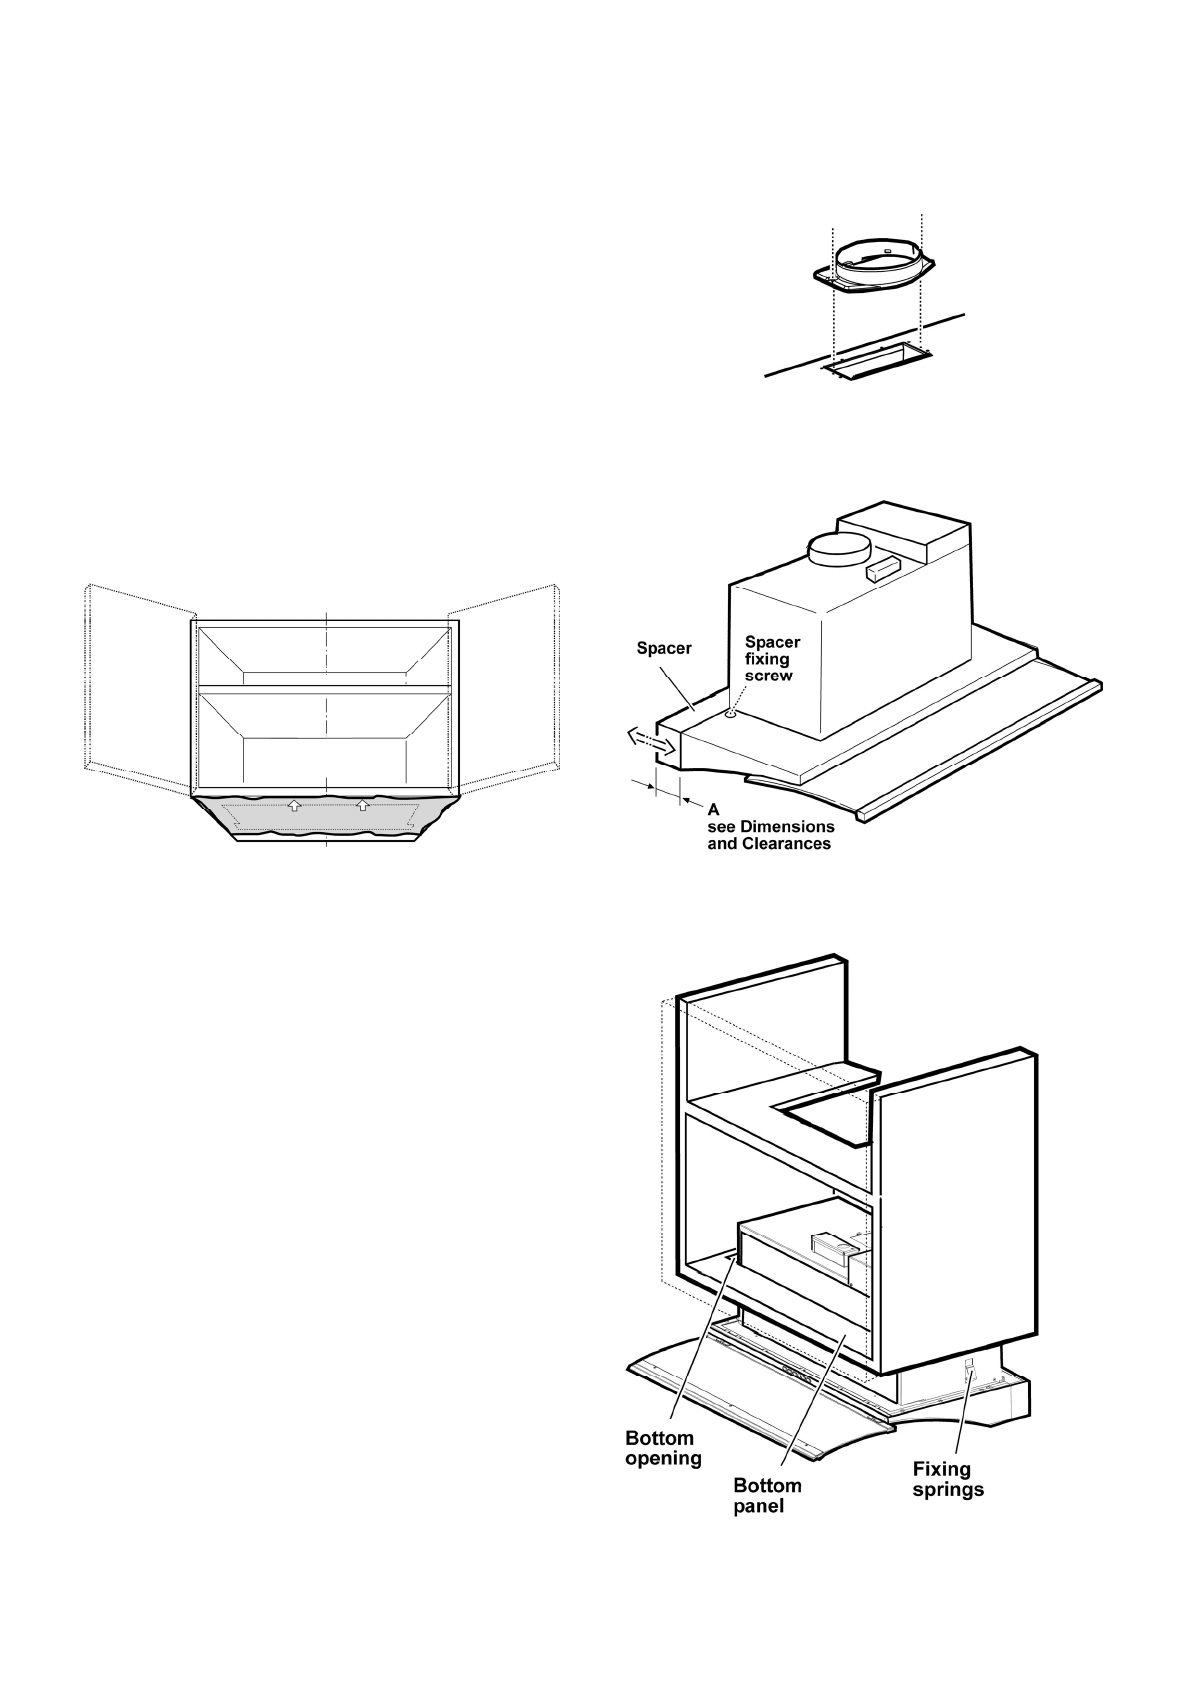
8.
Fit the blower unit housing inside the cabinet through the
bottom opening.
Check that fixing springs goes over the bottom panel..
Характеристики

Остались вопросы?Не нашли свой ответ в руководстве или возникли другие проблемы? Задайте свой вопрос в форме ниже с подробным описанием вашей ситуации, чтобы другие люди и специалисты смогли дать на него ответ. Если вы знаете как решить проблему другого человека, пожалуйста, подскажите ему :)


