Воздуходувки Bosch GHG 20-60 - инструкция пользователя по применению, эксплуатации и установке на русском языке. Мы надеемся, она поможет вам решить возникшие у вас вопросы при эксплуатации техники.
Если остались вопросы, задайте их в комментариях после инструкции.
"Загружаем инструкцию", означает, что нужно подождать пока файл загрузится и можно будет его читать онлайн. Некоторые инструкции очень большие и время их появления зависит от вашей скорости интернета.


English |
11
Bosch Power Tools
1 609 92A 2MS | (14.9.16)
Selecting the Air-volume Level
With the On/Off switch
4
it is possible to select between two
air-volume levels:
A reduced air-volume level may be required in certain cases,
e. g., to avoid overheating the workpiece surroundings or to
avoid displacing the workpiece if the air jet is too strong.
A higher air-volume level heats up the workpiece more quickly
and the hot-air gun can be held at a greater distance from the
workpiece.
Setting the Temperature
Infinitely variable temperature control of the air jet is possible
with the thumbwheel
3
.
The marked thumbwheel positions correspond with the fol-
lowing temperature ranges:
Working Advice
Before any work on the machine itself, pull the mains
plug.
Note:
Do not apply the nozzle
1
too close to the workpiece
being worked. The hot air build-up can lead to overheating of
the power tool.
Removing the Heat Protection
The heat protection collar
2
can be removed when working at
particularly hard-to-reach locations.
Be careful of the hot nozzle!
Increased danger of burning
exists when working without the heat protection collar.
To remove or mount the heat protection collar
2
, switch the
power tool off and allow it to cool down.
Turn the heat protection collar
2
in anticlockwise direction to
remove and in clockwise direction to mount again.
Placing Down the Power Tool
To cool down the power tool or have both hands free, place it
down on the standing surface
5
.
Be especially careful when working with the placed
down power tool!
There is danger of burning oneself on
the hot nozzle or on the hot air jet.
Work Examples
The illustrations of the work examples can be found on the
fold-out pages.
The temperature settings in the work examples are reference
values that can vary, depending on the material characteris-
tics. The distance between the nozzle and the workpiece de-
pends on the material to be worked.
The optimal temperature for the respective application can be
determined by practical testing. Always start with a low tem-
perature setting.
All application examples can be performed without accesso-
ries except for “Removing Varnish/Paint from Windows”.
However, the use of recommended accessories simplifies the
work and significantly improves the quality of the result.
Be careful when changing the nozzle! Do not touch the
hot nozzle. Allow the power tool to cool down and wear
protective gloves while changing the nozzle.
Danger of
burning oneself on the hot nozzle.
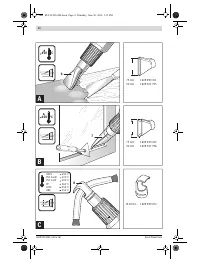
Removing Varnish/Softening Adhesives (see figure A)
Mount the wide jet nozzle
6
(accessory). Briefly soften the
varnish applying hot air and remove it using a sharp, clean
scraper or putty knife. Applying heat too long will burn the
varnish, making it more difficult to remove.
Many adhesives (e. g. of stickers) become soft when heated.
Heated adhesives allow for bonds to be separated or exces-
sive adhesive to be removed.
Removing Varnish/Paint from Windows (see figure B)
Use of the glass protection nozzle 7 (accessory) is
essential.
Danger of glass breaking.
On profiled surfaces, varnish can be removed using an appro-
priately fitting spatula and brushed off with a soft wire brush.
Shaping Plastic Tubing (see figure C)
Mount the reflector nozzle
8
(accessory). To avoid kinking of
the tubing, fill the tubing with sand and plug both ends. Heat
the tubing evenly by by applying the heat from side to side.
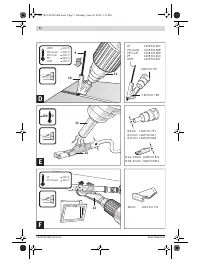
Welding Plastics (see figure D)
Mount the reduction nozzle
11
and the welding shoe
10
(both
accessories). The workpieces to be welded and the welding
rod
9
(accessory) must be of the same material (e. g. both of
PVC). The seam must be clean and grease-free.
Carefully heat up the seam location until it becomes doughy.
Please note that the temperature difference between the
doughy and liquid state of plastic is low.
Feed in the welding rod
9
and allow it to run into the gap so
that a uniform bead is produced.
Shrinking (see figure E)
Mount the reduction nozzle
11
(accessory). Select the diam-
eter of the heat-shrinkable sleeve
12
(accessory) according
to the workpiece (e. g. a cable lug). Heat the heat-shrinkable
sleeve evenly.
Defrosting Water Pipes (see figure F)
Before heating pipes, check to make sure that it is actu-
ally a water pipe.
Water lines often do not differ in appear-
ance from gas lines. Gas lines are not to be heated under
any circumstances.
Place on the angle nozzle
13
(accessory). Heat the frozen
zone always from the outside to the middle.
Heat up plastic pipes as well as connections between pipe
pieces especially careful to prevent damage.
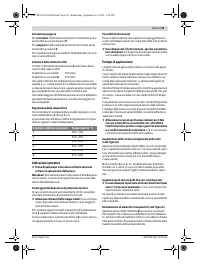
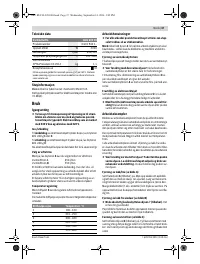
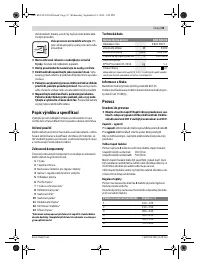
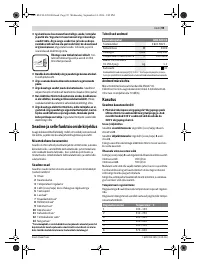
Hot-air level
I
:
350 l/min
Hot-air level
II
:
550 l/min
Thumbwheel Position
Temperature in ° C
1
100 – 120
2
210 – 250
3
300 – 340
4
420 – 450
5
500 – 550
6
570 – 600
OBJ_BUCH-228-004.book Page 11 Wednesday, September 14, 2016 3:02 PM
Содержание
- 63 Описание продукта и услуг; Применение по назначению
- 64 Технические данные; Работа с инструментом; Включение электроинструмента
- 65 Техобслуживание и сервис; Техобслуживание и очистка
- 66 Утилизация; Українська; Вказівки з техніки безпеки; Ця гаряча повітродувка не при-; Інакше; Дітям дозволяється очищати
Характеристики

Остались вопросы?Не нашли свой ответ в руководстве или возникли другие проблемы? Задайте свой вопрос в форме ниже с подробным описанием вашей ситуации, чтобы другие люди и специалисты смогли дать на него ответ. Если вы знаете как решить проблему другого человека, пожалуйста, подскажите ему :)


