
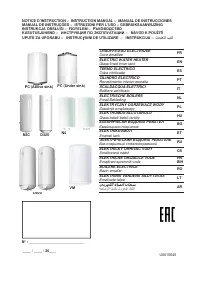
Водонагреватели Atlantic STEATITE EGO 80 - инструкция пользователя по применению, эксплуатации и установке на русском языке. Мы надеемся, она поможет вам решить возникшие у вас вопросы при эксплуатации техники.
Если остались вопросы, задайте их в комментариях после инструкции.
"Загружаем инструкцию", означает, что нужно подождать пока файл загрузится и можно будет его читать онлайн. Некоторые инструкции очень большие и время их появления зависит от вашей скорости интернета.


1.21
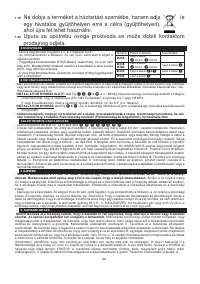
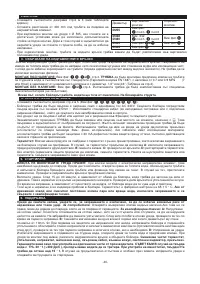
Do not dispose your water heater in the garbage, but hand
it to a place assigned for this purpose (collection point)
where it can be recycled.
1.22
The instruction book of this product is available by contacting the
after-sales service.
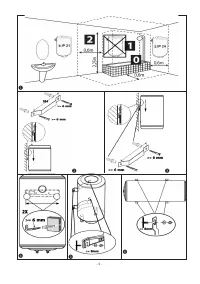
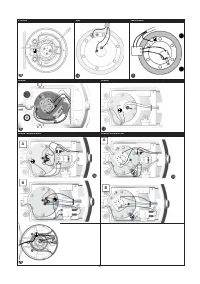
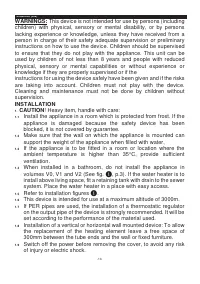
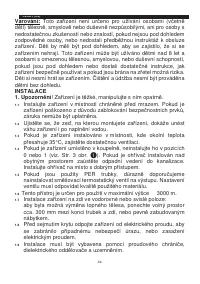
2. INSTALLATION
- Refer to the corresponding diagrams p.2 & 3 (see table on right):
- Make sure to keep free space of 300 mm below pipes for the
exchange of the heating element.
- For vertical installation of Ø 505 devices if the wall is not strong
enough, an optional ground support is available. Nevertheless, it
is mandatory to fix the unit to the wall with the top bracket to avoid
tipping.
- For horizontal installation, the water connection tubes must
always be in a vertical position below the device.
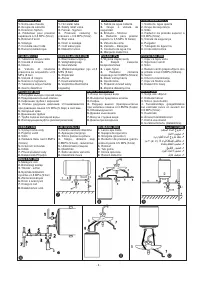
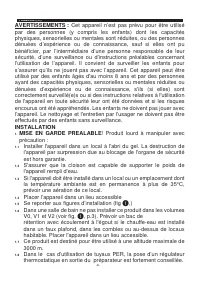
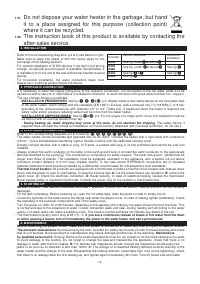
3. HYDRAULIC CONNECTION
- It is necessary to clean the supply piping prior to the hydraulic connection. The connection to the hot water outlet is to be
carried out with a cast iron or steel sleeve or a dielectric connector, to avoid corrosion of the pipe (direct contact iron / copper).
The use of brass fittings is prohibited.
INSTALLATION PRESSURISED
: See fig.
,
&
, p.4.
Always install a new safety device on the cold water pipe
of the water heater, which comply with the standards (EN 1487 in Europe), with a pressure of 0.7 or 0.9 MPa (7 or 9 bar)
according to the nominal pressure, with diameter 1/2" or 3/4" (Table p.2). If expansion down the mains is required, the
safety valve and/or pressure reducing valve must be 3 mts from the water heater.
INSTALLATION UNPRESSURISED
:
See fig.
&
, p.4. For the supply of a single point of use, the installation must be
carried out with an optional special mixer tap.
-
During heating up, water dripping may occur at the valve, do not obstruct the dripping
. The safety device if
supplied does not meet the criteria for installation on French territory (Mainland and Overseas territories), do not use it.
4. ELECTRICAL CONNECTION
- Refer to the corresponding diagrams p.2 & 5 (See fig.
- The water heater can be connected and operated only on AC 230V. Connect the heater with a rigid cable with conductors
2,5mm ². Use a standardised channeling (rigid or flexible conduit) until the calibrated housing cover.
- Directly connect devices with a cable or plug. In France, a product with plug is strictly prohibited and cannot be sold and
installed.
- Always connect the earth conductor of the cable to the earth ground wire or connect the earth conductor to the appropriate
terminal identified by the symbol . This connection is compulsory for safety reasons. The earth wire green - yellow must be
longer than those of phases. The installation must be equipped, upstream of the appliance, with a bipolar cut-out device
(minimum contact distance of 3 mm fuse, breaker switch). In the case where HYDRAULIC connexions are in insulated
material, electrical circuits shall be protected by a differential circuit breaker 30 mA adapted to local standards.
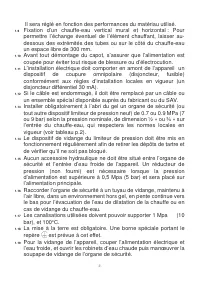
-
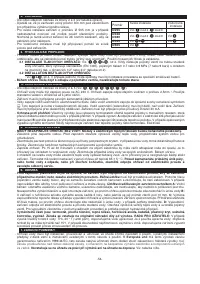
Thermal circuit breaker:
All products are equipped with a thermostat including a thermal circuit breaker with manual reset,
which cuts the power in case of overheating. In case the security trips
A
: Cut the power before any operation.
B:
remove the
plastic cover.
C:
Check the electrical connection.
D:
Reset security. In case of repetitive tripping, replace the thermostat.
Never bypass safety or regulation thermostat. Connect the power only on the sockets or thermostat input.
5. STARTING UP
-
NEVER POWER THE WATER HEATER WITHOUT WATER:
Models with an electric heating element will be certainly
damaged.
- Fill the tank completely. Before powering up, open the hot water taps, drain the pipes in order to empty the air.
- Check the tightness of the tubes and of the flange seal under the plastic cover. In case of leaking tighten moderately. Check
the operating of the hydraulic components and of the safety valve.
- Turn the power on. After 15 to 30 minutes, depending of the capacity of the device, the water should drip from the drain. This
is normal and due to the expansion of water. Check connection leaks and seal. During heating and according to the water
quality, hot water tanks can make a bubbling noise. This noise is normal and does not indicate any defect of the unit.
- The thermostat is factory set to stop at 65 ± 5 ° C.
If you see a continuous release of steam or hot water from the drain
or when opening a faucet, turn off immediately the power to the water heater and call a professional.
6. MAINTENANCE
-
Before removing the plastic cover, make sure the power is turned off to avoid any risk of injury or electric shock
.
The domestic maintenance
must be done by the user. Operate the safety device every month to prevent scaling and check
that it’s not blocked. Not executing this maintenance may cause damage and the loss of the warranty.
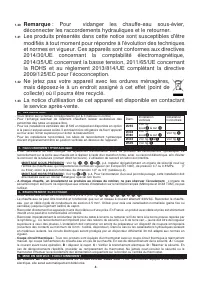
Maintenance
by qualified personnel
A:
Scaling: Remove the scale deposited as mud. Do not scratch or hit the scale sticking to the walls
to avoid damage to the coating. Do not forget to change the seal and reassemble the appliance, check that there is no
leakage of water after the first heating.
B:
For devices with magnesium anode, change the magnesium anode every two
years or as soon as its diameter is less than 10mm.
C:
The change of a sheathed heating element involves draining of the
water heater and the change of the seal. Reassemble the heating element, reasonably tight nuts (cross tightening), check
that there is no leakage after the first heating-up, and tighten again if necessary.
D:
Drain: Turn off power and cold water
-12-
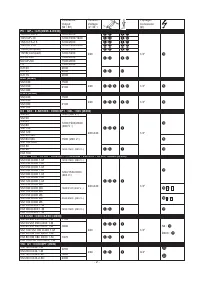
Diameter Vertical installation
Horizontal
installation
Ø255
See fig. under
& above
Ø338
Ø380
See fig. under
& above
See fig.
Ø433
See fig.
&
See fig.
Ø505
See fig.
Характеристики

Остались вопросы?Не нашли свой ответ в руководстве или возникли другие проблемы? Задайте свой вопрос в форме ниже с подробным описанием вашей ситуации, чтобы другие люди и специалисты смогли дать на него ответ. Если вы знаете как решить проблему другого человека, пожалуйста, подскажите ему :)


