
Водонагреватели Ariston SUPERLUX FLAT PW 100 V 3700469 - инструкция пользователя по применению, эксплуатации и установке на русском языке. Мы надеемся, она поможет вам решить возникшие у вас вопросы при эксплуатации техники.
Если остались вопросы, задайте их в комментариях после инструкции.
"Загружаем инструкцию", означает, что нужно подождать пока файл загрузится и можно будет его читать онлайн. Некоторые инструкции очень большие и время их появления зависит от вашей скорости интернета.


EN
32
- connection to mains with a rigid pipe (if the appliance has no cable clamp); use a cable with a minimum 3x1.5
mm
2
section;
- with a flexible cable (type H05VV-F 3x1.5mm
2
, 8.5 mm in diameter) if the appliance is supplied with a cable
clamp.
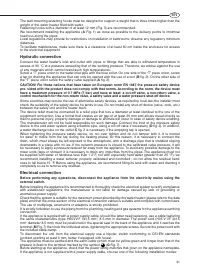
Startup and commissioning
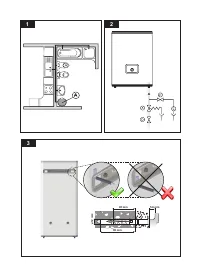
Before powering up the appliance, fill the heater with mains water.
To do so, open the mains cock and the hot water tap until all the air has been vented from the boiler. Check
for water leaks from the flanges, from the by-pass pipe, tighten down the bolts not too much, if necessary (
C
Fig. 5) and/or the rings (
W
Fig. 7).
Power the appliance by actuating the switch.
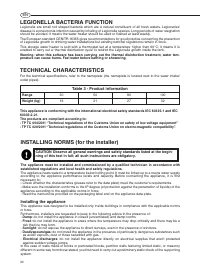
MAINTENANCE REGULATIONS (for competent person)
CAUTION Observe all general warnings and safety standards listed at the begin-
ning of this text in full; all such instructions are obligatory.
All maintenance operations and service visits should be performed by a competent person (who
have the skills required by the applicable norms in force).
Before calling your Technical Servicing Centre, check that the fault is not due to lack of water or power failure.
Emptying the appliance
The appliance must be emptied if it is to be left unused in premises subject to frost.
When necessary, empty the appliance as follows:
- disconnect the appliance from the electricity mains;
- turn off the domestic mains tap;
- turn on the hot water tap (wash basin or bathtub);
- open the drain valve
B
(fig. 2).
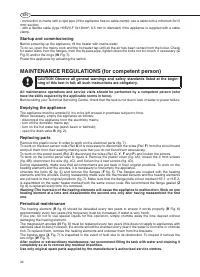
Replacing parts
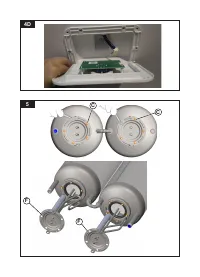
Remove the plastic cover in order to work on the electrical parts (fig. 7).
To work on the door-sensor rods (Ref.
K
) it is necessary to disconnect the wires (Ref.
F
) from the circuit board
and pull them from their seating making sure that you do not bend them excessively.
To work on the power board (Ref.
Z
) disconnect the wires (Ref.
C
,
Y
,
F
and
P
) and loosen the screws.
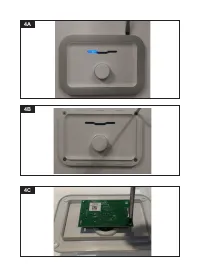
To work on the control panel refer to figure 4. Remove the plastic cover (fig. 4A), loosen the 4 front screws
(fig. 4B), disconnect the wire (fig. 4C), and loosen the 4 rear screws (fig. 4D).
During reassembly, make sure that all components are put back in their original positions. To work on the
heating elements and the anodes, it is necessary to first empty the appliance.
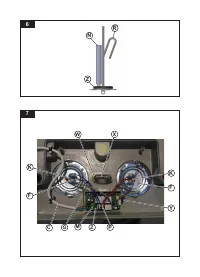
Unscrew the bolts (
C
fig. 5) and remove the flanges (
F
fig. 5). The flanges are coupled with the heating
elements and the anodes. During reassembly make sure the thermostat sensors and the heating elements
are put back in their original positions (fig. 7). Make sure that the flange plate colour marked H.E.1 or H.E.2,
is assembled on the water heater marked with the same colour code. We recommend the flange gasket (
Z
fig. 6) is replaced every time it is removed.
Warning! The inversion of the heating elements will cause the appliance to malfunction. Work on one
heating element at a time and disassemble the second one only alter having reassembled the first
one.
Periodical maintenance
The heating element (
R
fig. 6) should be descaled every two years to ensure it works properly (
R
Fig. 6)
approximately every two years (the frequency must be increased, if water is very hard).
If you pre- fer not to use special liquids for this operation, simply crumble away the lime deposit without
damaging the heating element.
The magnesium anodes (
N
Fig. 6) must be replaced every two years (this does not apply to appliances with
stainless steel boilers); however, the anode should be checked every year if the water is corrosive or chloride
rich. To replace them, remove the heating elements and unscrew them from the brackets.
The bypass pipe (
X
Fig. 7) is inspected in the event of fault due to its obstruction. To inspect it remove the
two rings (
W
Fig. 7).
After routine or extraordinary maintenance, we recommend filling its tank with water and draining it
completely so as to remove any residual impurities.
Use only original spare parts supplied by the manufacturer’s authorised service centres.
Содержание
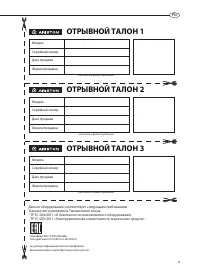
- 9 ОТРЫВНОЙ ТАЛОН 1
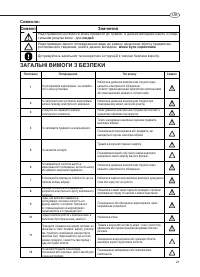
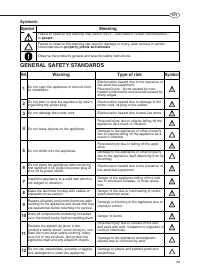
- 11 ОБЩИЕ ТРЕБОВАНИЯ
- 12 Символ Значение
- 13 Бактерицидная функция против legionella; принятием душа или ванны.
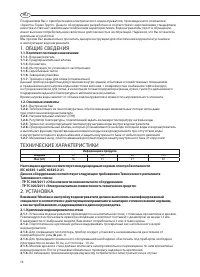
- 14 ТЕХНИЧЕСКИЕ ХАРАКТЕРИСТИКИ; - ТР ТС 004/2011 «О безопасности низковольтного оборудования»
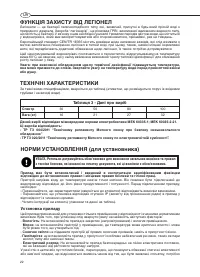
- 16 ВКЛЮЧЕНИЕ И РАБОТА; Регулировка температуры и активация функций прибора; ТЕХНИЧЕСКОЕ ОБСЛУЖИВАНИЕ И РЕМОНТ
- 17 от электрической сети.
- 35 Идентификационная табличка; Идентификационная табличка
- 44 WE MAKE USE OF


