
Варочная панель Kuppersberg FGC 63 W - инструкция пользователя по применению, эксплуатации и установке на русском языке. Мы надеемся, она поможет вам решить возникшие у вас вопросы при эксплуатации техники.
Если остались вопросы, задайте их в комментариях после инструкции.
"Загружаем инструкцию", означает, что нужно подождать пока файл загрузится и можно будет его читать онлайн. Некоторые инструкции очень большие и время их появления зависит от вашей скорости интернета.


6
7
USER MANUAL
ENGLISH
ENGLISH
USER MANUAL
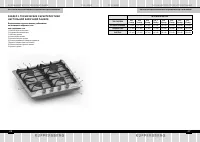
Table top cooker & built - in cooker
Table top cooker & built - in cooker
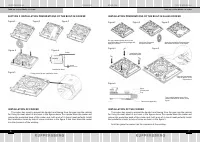
S E CT I O N 2. I N S TA L L AT I O N P R E PA RAT I O N S O F T H E B U I LT
-
I N CO O K E R
I N S TA L L AT I O N P R E PA RAT I O N S O F T H E B U I LT
-
I N G L A S S CO O K E R
Figure 1
Figure 1
Figure 4
Figure 4
Figure 5
Figure 5
Figure 6
Figure 6
Figure 2
Figure 2
Figure 3
Figure 3
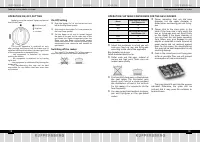
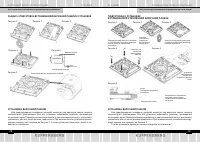
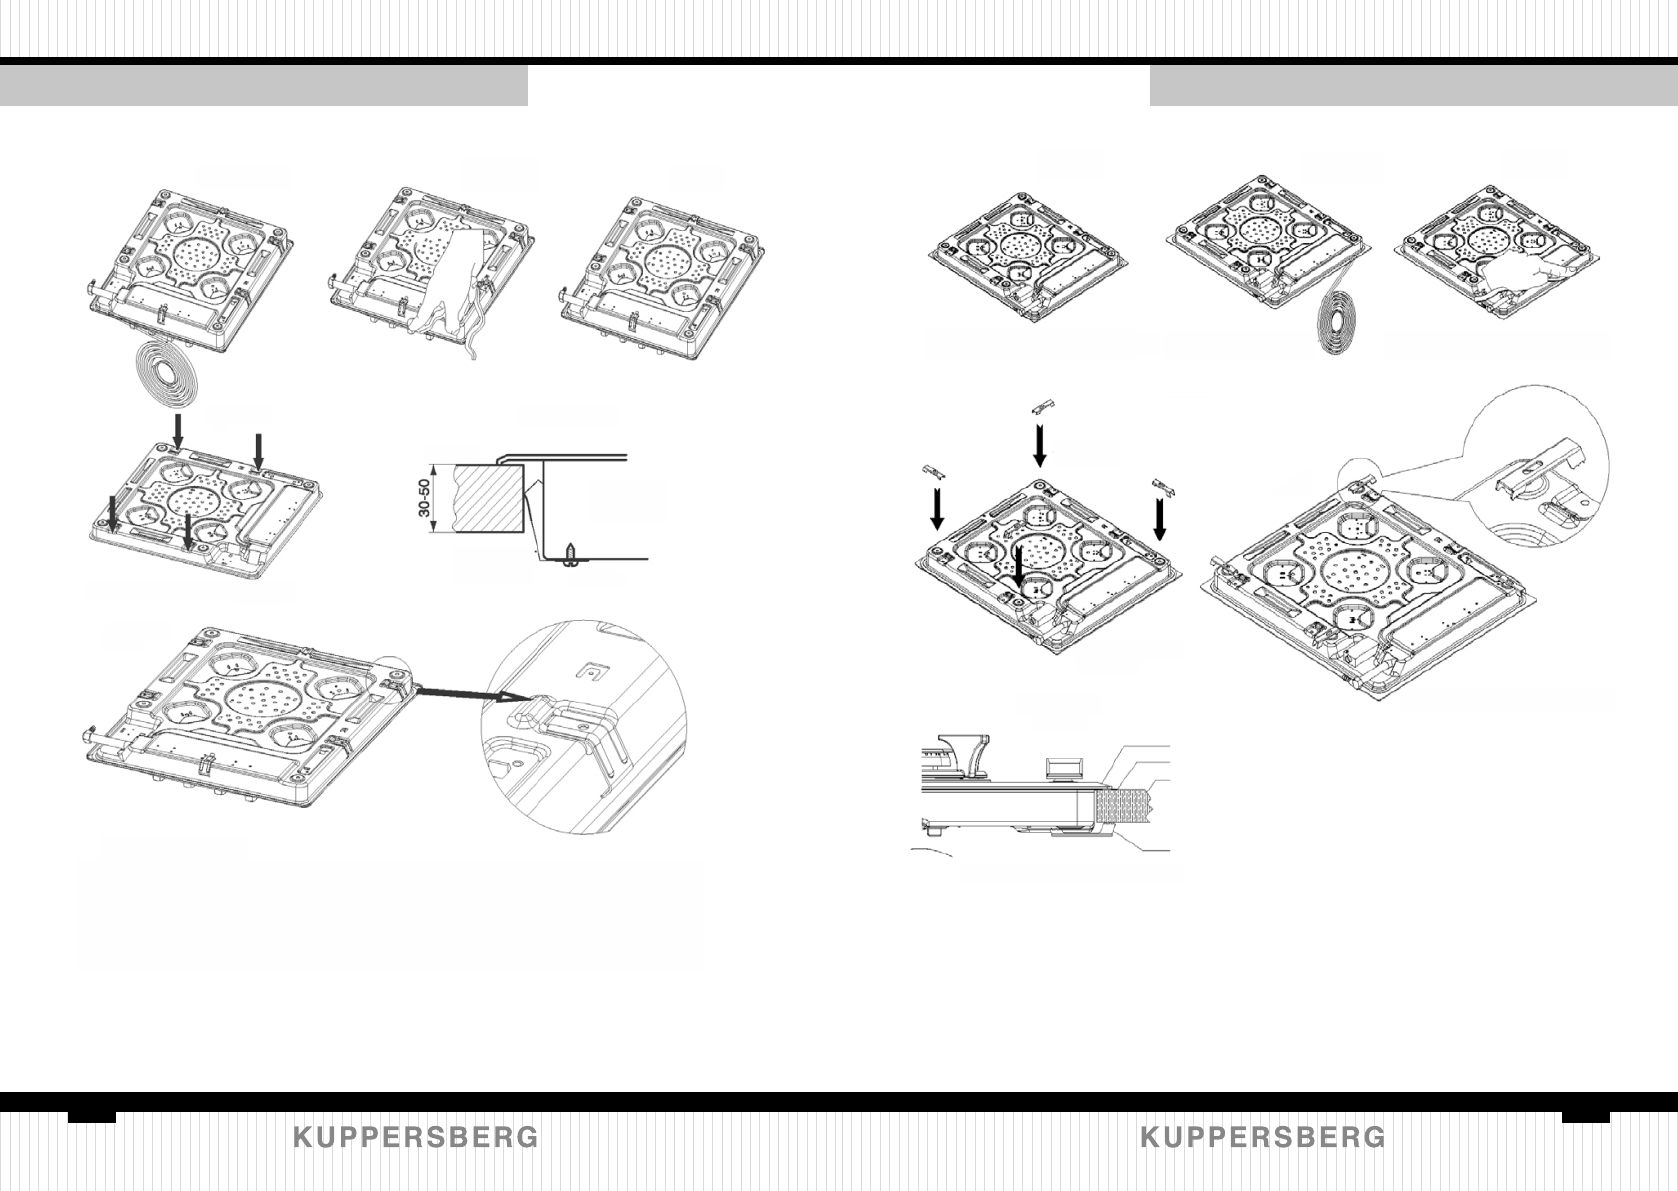
I N S TA L L AT I O N O F CO O K E R
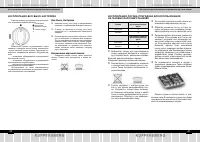
The cooker has a seal to prevent the liquids from flowing from the gaps into the cabinet.
For fixing this seal, attach it as shown in the figures above. Turn upside down the cooker and
remove the protective band of the rubber seal; both ends of it should meet perfectly. Install
the installation sheets by help of screw as shown in the figure 5. And then place the cooker
into the clearance of the worktop.
Worktop
Cooker
installation sheet
Fixing points for the installation sheet
screw
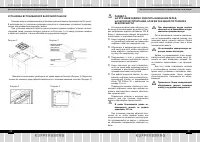
Put your cooker upside down in the
styrofoam taken from the package and
apply the silicone.
Installation foot
connection holes
Apply the silicone on
the glass surface.
Apply the supplied silicone around
the cooker as shown in the figure.
Glass
Silicone seal
Tray
Connection apparatus
The installed appearance of the
cooker should be as shown in the
figure.
PIace the installation
feet as shown in the
figure above.
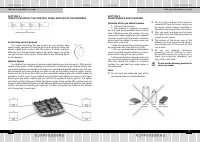
I N S TA L L AT I O N O F T H E CO O K E R
The cooker has a seal to prevent the liquids from flowing from the gaps into the cabinet.
For fixing this seal, attach it as shown in the figures ahove. Turn upside down the cooker and
remove the protective band of the rubber seal; both ends of it should meet perfectly. Install
the installation sheets by help of screw as shown in the figure 5.
And then place the cooker into the clearance of the worktop.


