Варочная панель Kuppersberg FBG 36 X - инструкция пользователя по применению, эксплуатации и установке на русском языке. Мы надеемся, она поможет вам решить возникшие у вас вопросы при эксплуатации техники.
Если остались вопросы, задайте их в комментариях после инструкции.
"Загружаем инструкцию", означает, что нужно подождать пока файл загрузится и можно будет его читать онлайн. Некоторые инструкции очень большие и время их появления зависит от вашей скорости интернета.


14
TECHNICAL PASSPORT
ENGLISH
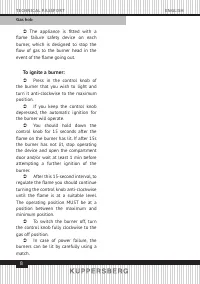
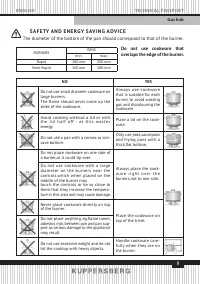
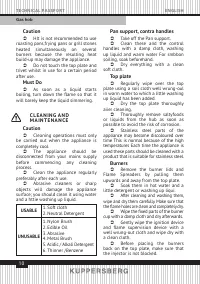
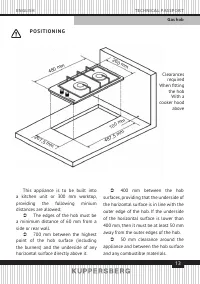
Gas hob
Â
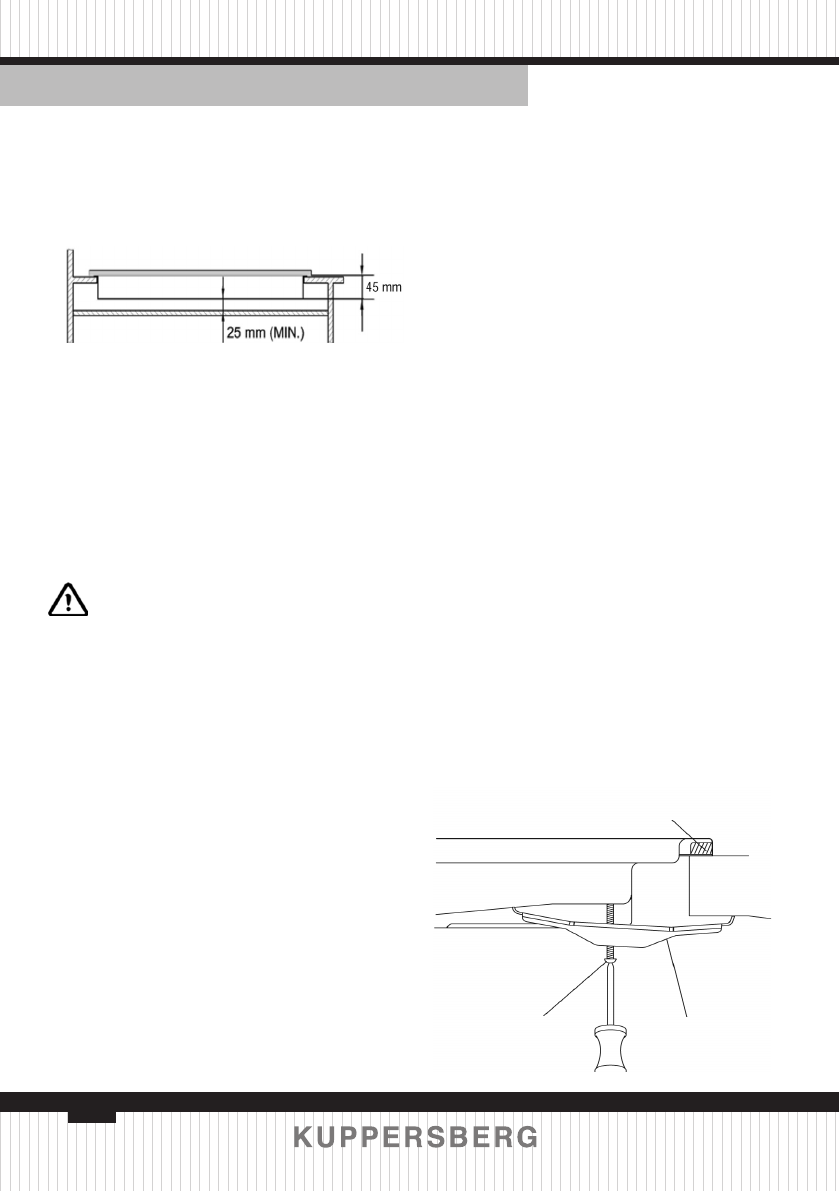
You must have a gap of at least
25 mm and at most 74 mm between the
underneath of the appliance and any
surface that is below it.
— An oven must have forced
ventilation to install a hob above it.
— Check the dimensions of the oven
in the installation manual.
— The cut out size must obey the
indication.
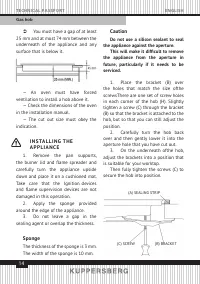
I N S TA L L I N G T H E
A P P L I A N C E
1. Remove the pan supports,
the burner lid and flame spreader and
carefully turn the appliance upside
down and place it on a cushioned mat.
Take care that the Ignition devices
and flame supervision devices are not
damaged in this operation.
2. Apply the sponge provided
around the edge of the appliance.
3. Do not leave a gap in the
sealing agent or overlap the thickness.
Sponge
The thickness of the sponge is 3 mm.
The width of the sponge is 10 mm.
Caution
Do not use a silicon sealant to seal
the appliance against the aperture.
This will make it difficult to remove
the appliance from the aperture in
future, particularly if it needs to be
serviced.
1. Place the bracket (B) over
the holes that match the size ofthe
screwsThere are one set of screw holes
in each corner of the hob (H). Slightly
tighten a screw (C) through the bracket
(B) so that the bracket is attached to the
hob, but so that you can still adjust the
position.
2. Carefully turn the hob back
over and then gently lower it into the
aperture hole that you have cut out.
3. On the underneath ofthe hob,
adjust the brackets into a position that
is suitable for your worktop.
Then fully tighten the screws (C) to
secure the hob into position.
(A) SEALING STRIP
(C) SCREW
(B) BRACKET
Содержание
- 24 УС ТА Н О В К А
- 25 Б Е З О П АС Н О С Т Ь Д Е Т Е Й И
- 27 Ч И С Т К А И
- 28 И Н Ф О Р М А Ц И Я; Порядок утилизации дан; О П И СА Н И Е П Р И Б О РА
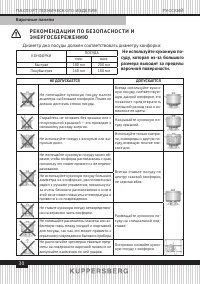
- 30 Р Е КО М Е Н Д А Ц И И П О Б Е З О П АС Н О С Т И И; Диаметр дна посуды должен соответствовать диаметру конфорки:; Не используйте кухонную по
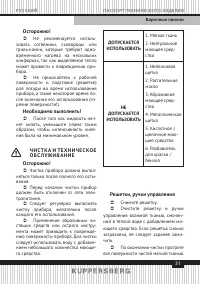
- 31 Необходимо выполнить!; ДОПУСКАЕТСЯ
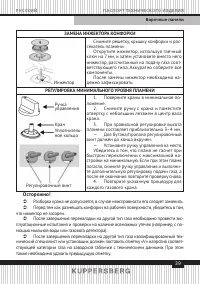
- 32 Рабочая поверхность
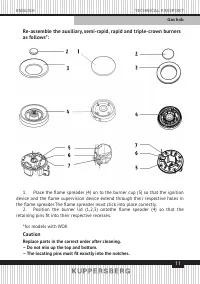
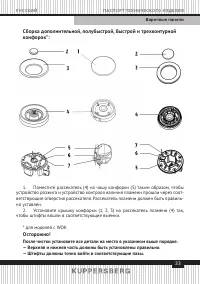
- 33 Сборка дополнительной, полубыстрой, быстрой и трехконтурной; чтобы штифты вошли в соответствующие выемки.; — Верхняя и нижняя часть должны быть установлены правильно.
- 34 У К А З А Н И Я П О
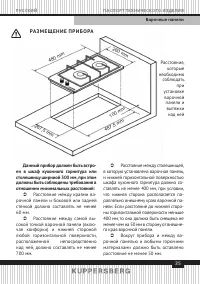
- 35 Данный прибор должен быть встро; РА З М Е Щ Е Н И Е П Р И Б О РА
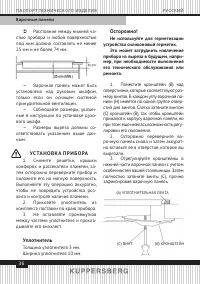
- 36 УС ТА Н О В К А П Р И Б О РА
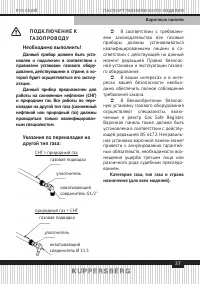
- 37 П О Д К Л Ю Ч Е Н И Е К
- 38 Х А РА КТ Е Р И С Т И К И ГА З А
- 39 ЗАМЕНА ИНЖЕКТОРА КОНФОРКИ
- 40 УС Т РА Н Е Н И Е Н Е И С П РА В Н О С Т Е Й; Ремонт должен выполняться только лицензированным техническим
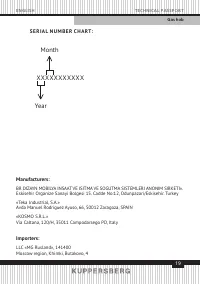
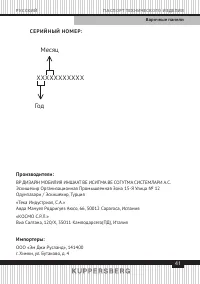
- 41 С Е Р И Й Н Ы Й Н О М Е Р:; Месяц; ВР ДИЗАЙН МОБИЛИЯ ИНШААТ ВЕ ИСИТМА ВЕ СОГУТМА СИСТЕМЛАРИ А.С.
- 46 О О О; УС ТА Н О В КА, ГА РА Н Т И Й Н О Е И П О С Т ГА РА Н Т И Й Н О Е О Б С Л УЖ И В А Н И Е; Телефон горячей линии Kuppersberg:; Полный список авторизованных сервисных центров Kuppersberg; УСЛОВИЯ ГАРАНТИИ
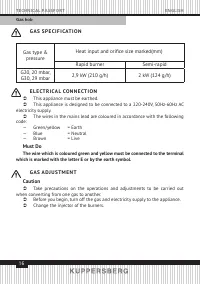
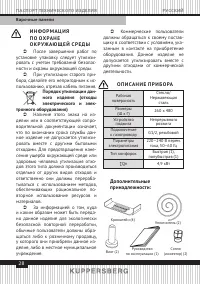
Характеристики

Остались вопросы?Не нашли свой ответ в руководстве или возникли другие проблемы? Задайте свой вопрос в форме ниже с подробным описанием вашей ситуации, чтобы другие люди и специалисты смогли дать на него ответ. Если вы знаете как решить проблему другого человека, пожалуйста, подскажите ему :)


