Варочная панель Electrolux EHG 6415 - инструкция пользователя по применению, эксплуатации и установке на русском языке. Мы надеемся, она поможет вам решить возникшие у вас вопросы при эксплуатации техники.
Если остались вопросы, задайте их в комментариях после инструкции.
"Загружаем инструкцию", означает, что нужно подождать пока файл загрузится и можно будет его читать онлайн. Некоторые инструкции очень большие и время их появления зависит от вашей скорости интернета.


electrolux
15
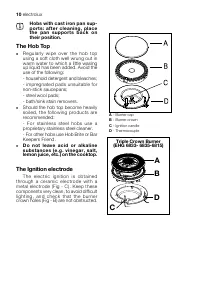
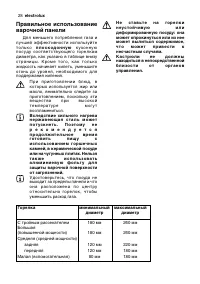
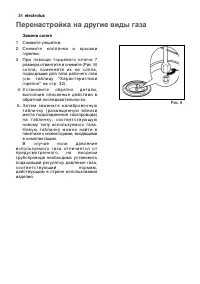
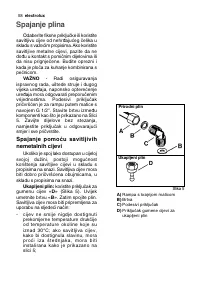
Adaptation to different types of gas
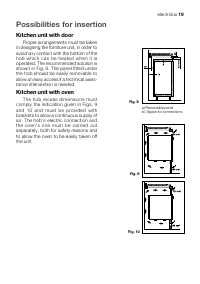
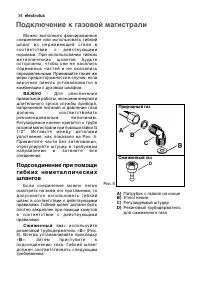
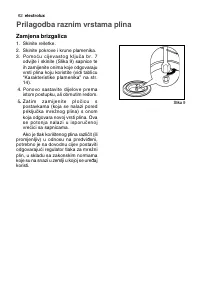
A. Injectors replacement
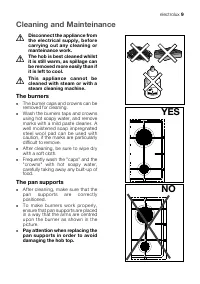
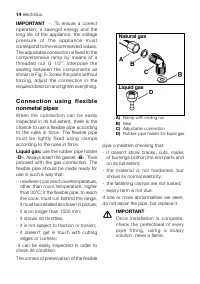
• Remove the pan supports.
• Remove the burner's caps and
crowns.
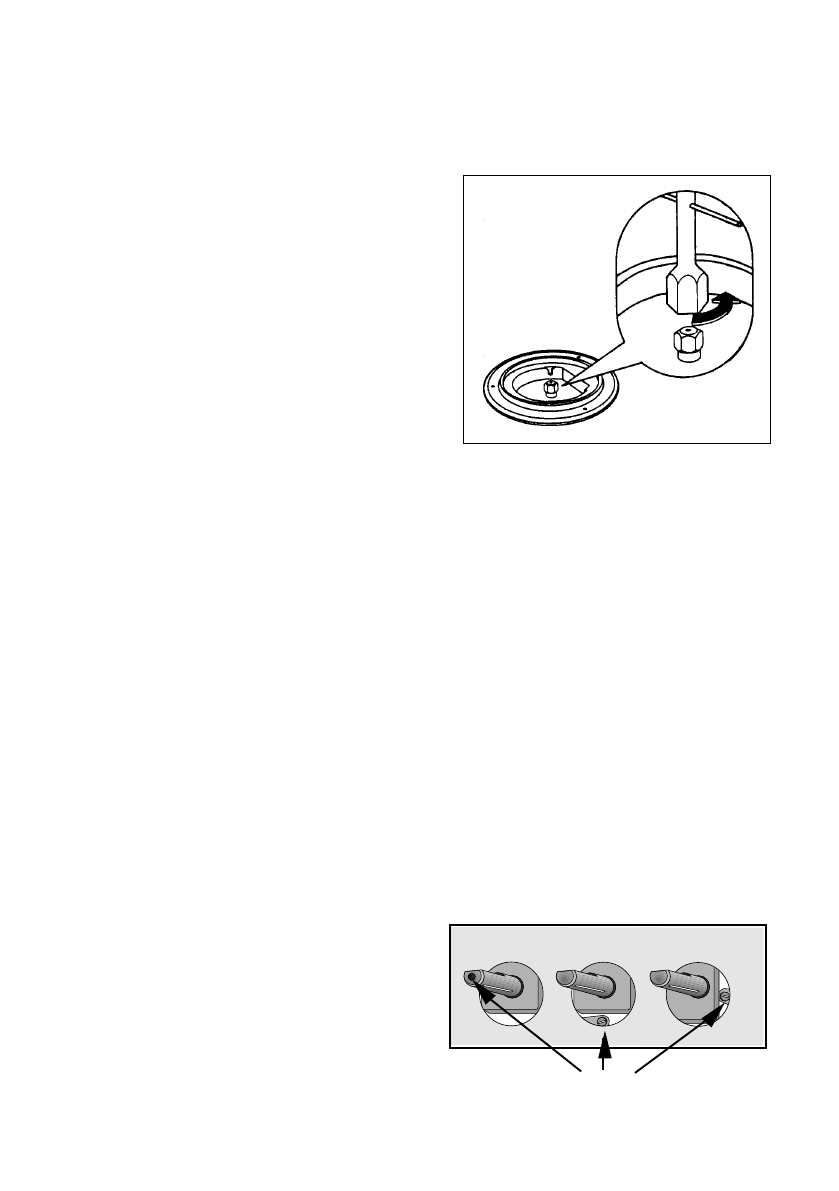
• With a socket spanner 7 unscrew
and remove the injectors (Fig. 1), and
replace them with the ones required
for the type of gas in use (see table
2).
• Reassemble the parts, following the
same procedure backwards.
• Replace the rating label (placed near
the gas supply pipe) with the relevant
one for the new type of gas supply.
You can find this label in the package
of the injectors supplied with the
appliance.
Should the feeding gas pressure be
different or variable compared with the
required pressure, an appropriate
pressure adjuster must be fitted on the
gas supply pipe, in compliance with the
rules in force.
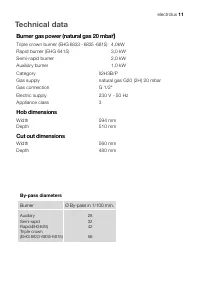
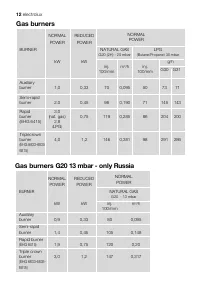
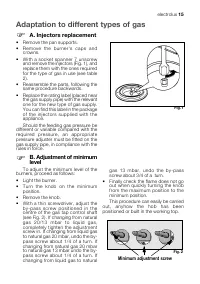
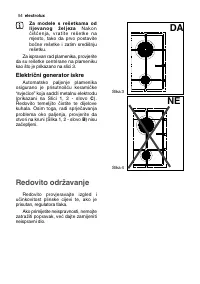
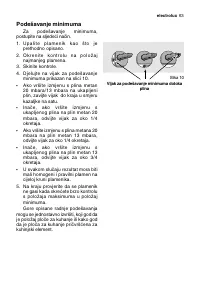
B. Adjustment of minimum
level
To adjust the minimum level of the
burners, proceed as follows:
• Light the burner.
• Turn the knob on the minimum
position.
• Remove the knob.
• With a thin screwdriver, adjust the
by-pass screw positioned in the
centre of the gas tap control shaft
(see Fig. 2). If changing from natural
gas 20/13 mbar to liquid gas,
completely tighten the adjustment
screw in. If changing from liquid gas
to natural gas 20 mbar, undo the by-
pass screw about 1/4 of a turn. If
changing from natural gas 20 mbar
to natural gas 13 mbar undo the by-
pass screw about 1/4 of a turn. If
changing from liquid gas to natural
)
)
gas 13 mbar, undo the by-pass
screw about 3/4 of a turn.
• Finally check the flame does not go
out when quickly turning the knob
from the maximum position to the
minimum position.
This procedure can easily be carried
out, anyhow the hob has been
positioned or built in the working top.
Minimum adjustment screw
Fig. 1
Fig. 2
Содержание
- 23 Указания по использованию настоящего руководства; Оглавление
- 24 Для Вашей безопасности; Установка; Безопасность людей; РУССКИЙ
- 25 При эксплуатации; Техническая поддержка
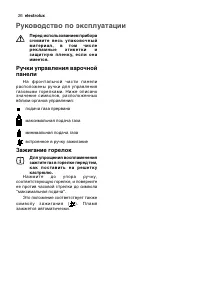
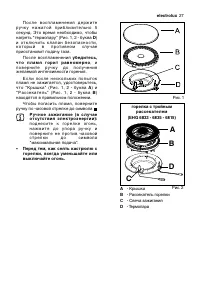
- 26 Руководство по эксплуатации; Зажигание горелок
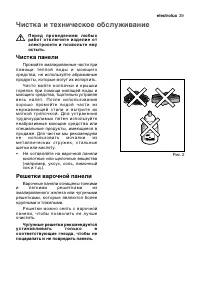
- 29 Чистка и техническое обслуживание; Чистка панели; Решетки варочной панели
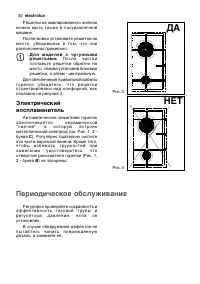
- 30 Периодическое обслуживание; ДА
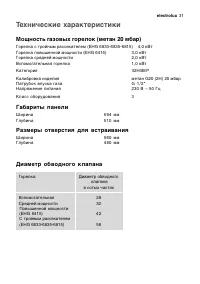
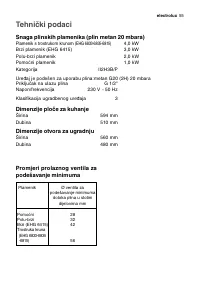
- 31 Технические характеристики; Габариты панели
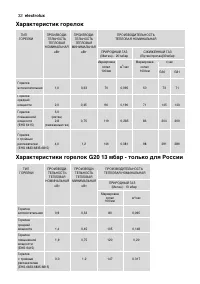
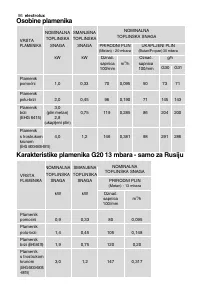
- 32 Характеристик горелок
- 34 Подключение к газовой магистрали
- 35 ВНИМАНИЕ
- 36 Подключение к сети электроснабжения
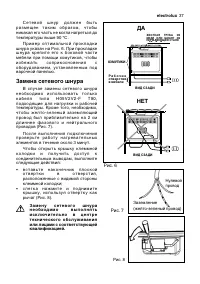
- 37 Замена сетевого шнура; НЕТ
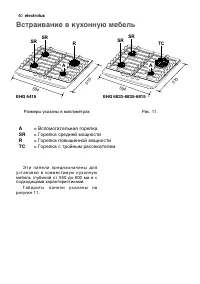
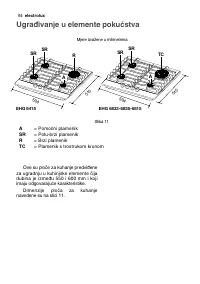
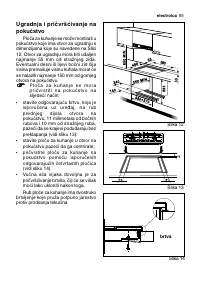
- 40 Встраивание в кухонную мебель; TC
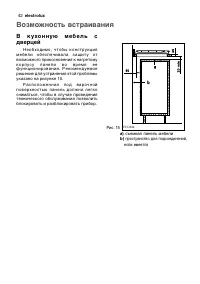
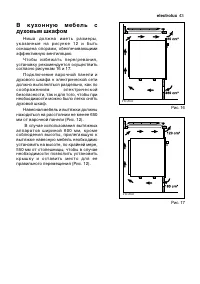
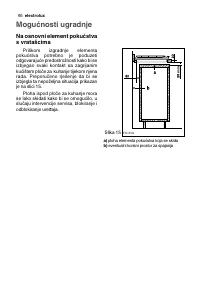
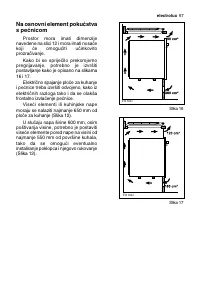
- 42 Возможность встраивания
- 45 ЕВРОПЕЙСКАЯ ГАРАНТИЯ


