
Триммеры Makita DUR189Z - инструкция пользователя по применению, эксплуатации и установке на русском языке. Мы надеемся, она поможет вам решить возникшие у вас вопросы при эксплуатации техники.
Если остались вопросы, задайте их в комментариях после инструкции.
"Загружаем инструкцию", означает, что нужно подождать пока файл загрузится и можно будет его читать онлайн. Некоторые инструкции очень большие и время их появления зависит от вашей скорости интернета.


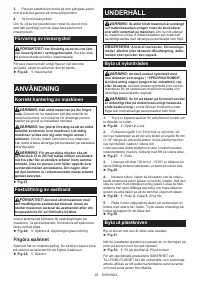


14 ENGLISH
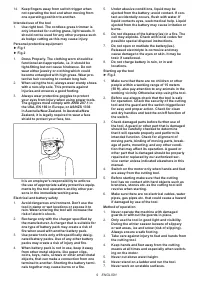
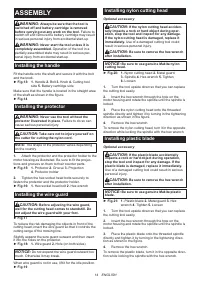
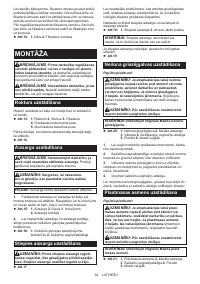
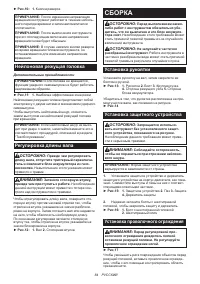
ASSEMBLY
WARNING:
Always be sure that the tool is
switched off and battery cartridge is removed
before carrying out any work on the tool.
Failure to
switch off and remove the battery cartridge may result
in serious personal injury from accidental start-up.
WARNING:
Never start the tool unless it is
completely assembled.
Operation of the tool in a
partially assembled state may result in serious per-
sonal injury from accidental start-up.
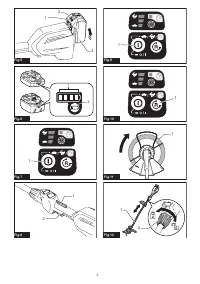
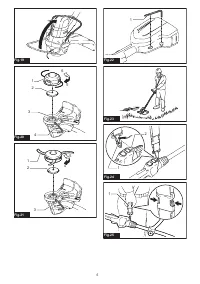
Installing the handle
Fit the handle onto the shaft and secure it with the bolt
and the knob.
►
Fig.13:
1.
Handle
2.
Bolt
3.
Knob
4.
Cutting tool
side
5.
Battery cartridge side
Make sure that the handle is located in the straight area
of the shaft as shown in the figure.
►
Fig.14
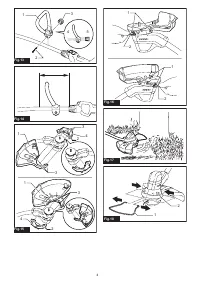
Installing the protector
WARNING:
Never use the tool without the
protector illustrated in place.
Failure to do so can
cause serious personal injury.
CAUTION:
Take care not to injure yourself on
the cutter for cutting the nylon cord.
NOTE:
The shape of the protector varies depending
on the country.
1.
Attach the protector and the protector holder to the
motor housing as illustrated. Be sure to fit the projec
-
tions and grooves on them to their counter parts.
►
Fig.15:
1.
Protector
2.
Groove
3.
Projection
4.
Protector holder
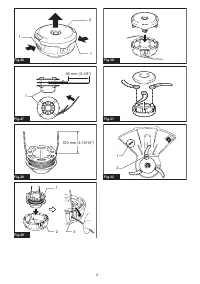
2.
Tighten the hex socket head bolts securely to
fasten the protector and the protector holder.
►
Fig.16:
1.
Hex socket head bolt
2.
Hex wrench
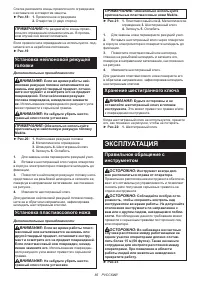
Installing the wire guard
CAUTION:
Before adjusting the wire guard,
wait for the cutting head comes to standstill. Do
not adjust the wire guard with your foot.
►
Fig.17
To reduce the risk damaging the objects in front of the
cutting head, insert the wire guard so that it controls the
cutting range of the mowing line.
Slightly expand the wire guard outward and then insert
it into the holes on the protector.
►
Fig.18:
1.
Wire guard
2.
Hole (on both sides)
NOTICE:
Do not expand the wire guard outward too
much. Otherwise it may break.
When wire guard is not in use, lift it for the idle position.
►
Fig.19
Installing nylon cutting head
Optional accessory
CAUTION:
If the nylon cutting head acciden-
tally impacts a rock or hard object during oper
-
ation, stop the tool and inspect for any damage.
If the nylon cutting head is damaged, replace it
immediately.
Use of a damaged cutting tool could
result in serious personal injury.
CAUTION:
Be sure to remove the hex wrench
after installation.
NOTICE:
Be sure to use genuine Makita nylon
cutting head.
►
Fig.20:
1.
Nylon cutting head
2.
Metal guard
3.
Spindle
4.
Hex wrench
5.
Tighten
6.
Loosen
1.
Turn the tool upside down so that you can replace
the cutting tool easily.
2.
Insert the hex wrench through the hole on the
motor housing and rotate the spindle until the spindle is
locked.
3.
Place the nylon cutting head onto the threaded
spindle directly and tighten it by turning in the tightening
direction as shown in the figure.
4.
Remove the hex wrench.
To remove the nylon cutting head, turn it in the opposite
direction while locking the spindle with the hex wrench.
Installing plastic blade
Optional accessory
CAUTION:
If the plastic blade accidentally
impacts a rock or hard object during operation,
stop the tool and inspect for any damage. If the
plastic blade is damaged, replace it immediately.
Use of a damaged cutting tool could result in serious
personal injury.
CAUTION:
Be sure to remove the hex wrench
after installation.
NOTICE:
Be sure to use genuine Makita plastic
blade.
►
Fig.21:
1.
Plastic blade
2.
Metal guard
3.
Hex
wrench
4.
Tighten
5.
Loosen
1.
Turn the tool upside down so that you can replace
the cutting tool easily.
2.
Insert the hex wrench through the hole on the
motor housing and rotate the spindle until the spindle is
locked.
3.
Place the plastic blade onto the threaded spindle
directly and tighten it by turning in the tightening direc-
tion as shown in the figure.
4.
Remove the hex wrench.
To remove the plastic blade, turn it in the opposite direc-
tion while locking the spindle with the hex wrench.
Содержание
- 78 Символы; Декларация о соответствии ЕС; МЕРЫ БЕЗОПАСНОСТИ; ВАЖНЫЕ ИНСТРУКЦИИ ПО; Сохраните брошюру с инструк
- 81 Важные правила техники; СОХРАНИТЕ ДАННЫЕ
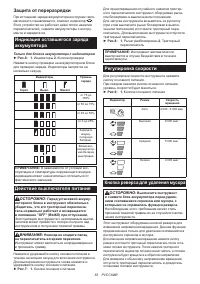
- 82 Установка или снятие блока; Защита от перегрузки
- 83 Действие выключателя питания
- 84 Нейлоновая режущая головка; Регулировка длины вала; СБОРКА; Установка рукоятки
- 85 ЭКСПЛУАТАЦИЯ
- 86 ОБСЛУЖИВАНИЕ; Замена нейлонового шнура
- 87 ПОИСК И УСТРАНЕНИЕ НЕИСПРАВНОСТЕЙ; ДОПОЛНИТЕЛЬНЫЕ
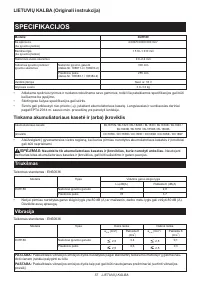
Характеристики

Остались вопросы?Не нашли свой ответ в руководстве или возникли другие проблемы? Задайте свой вопрос в форме ниже с подробным описанием вашей ситуации, чтобы другие люди и специалисты смогли дать на него ответ. Если вы знаете как решить проблему другого человека, пожалуйста, подскажите ему :)


