
Триммеры Makita DUR189Z - инструкция пользователя по применению, эксплуатации и установке на русском языке. Мы надеемся, она поможет вам решить возникшие у вас вопросы при эксплуатации техники.
Если остались вопросы, задайте их в комментариях после инструкции.
"Загружаем инструкцию", означает, что нужно подождать пока файл загрузится и можно будет его читать онлайн. Некоторые инструкции очень большие и время их появления зависит от вашей скорости интернета.


13 ENGLISH
Power switch action
WARNING:
Before installing the battery car-
tridge on the tool, always check to see that the
switch trigger actuates properly and returns to
the "OFF" position when released.
Operating a tool
with a switch that does not actuate properly can lead
to loss of control and serious personal injury.
CAUTION:
Never put your finger on the
switch when carrying.
The tool may start uninten-
tionally and cause injury.
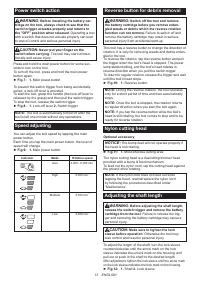
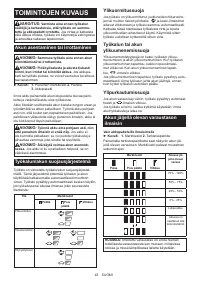
Press and hold the main power button for some sec-
onds to turn on the tool.
To turn off the tool, press and hold the main power
button again.
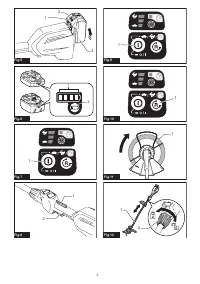
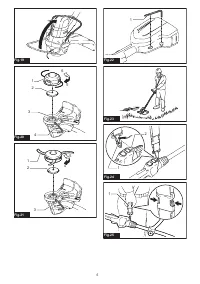
►
Fig.7:
1.
Main power button
To prevent the switch trigger from being accidentally
pulled, a lock-off lever is provided.
To start the tool, grasp the handle (the lock-off lever is
released by the grasp) and then pull the switch trigger.
To stop the tool, release the switch trigger.
►
Fig.8:
1.
Lock-off lever
2.
Switch trigger
NOTE:
The tool is automatically turned off after the
tool is left one minute without any operations.
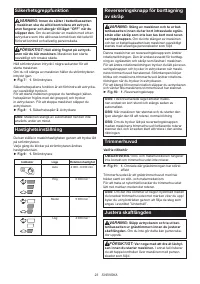
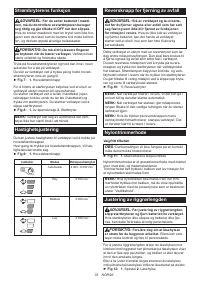
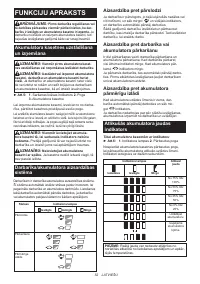
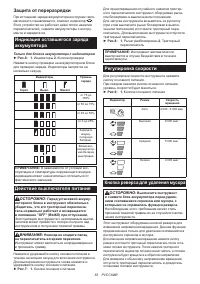
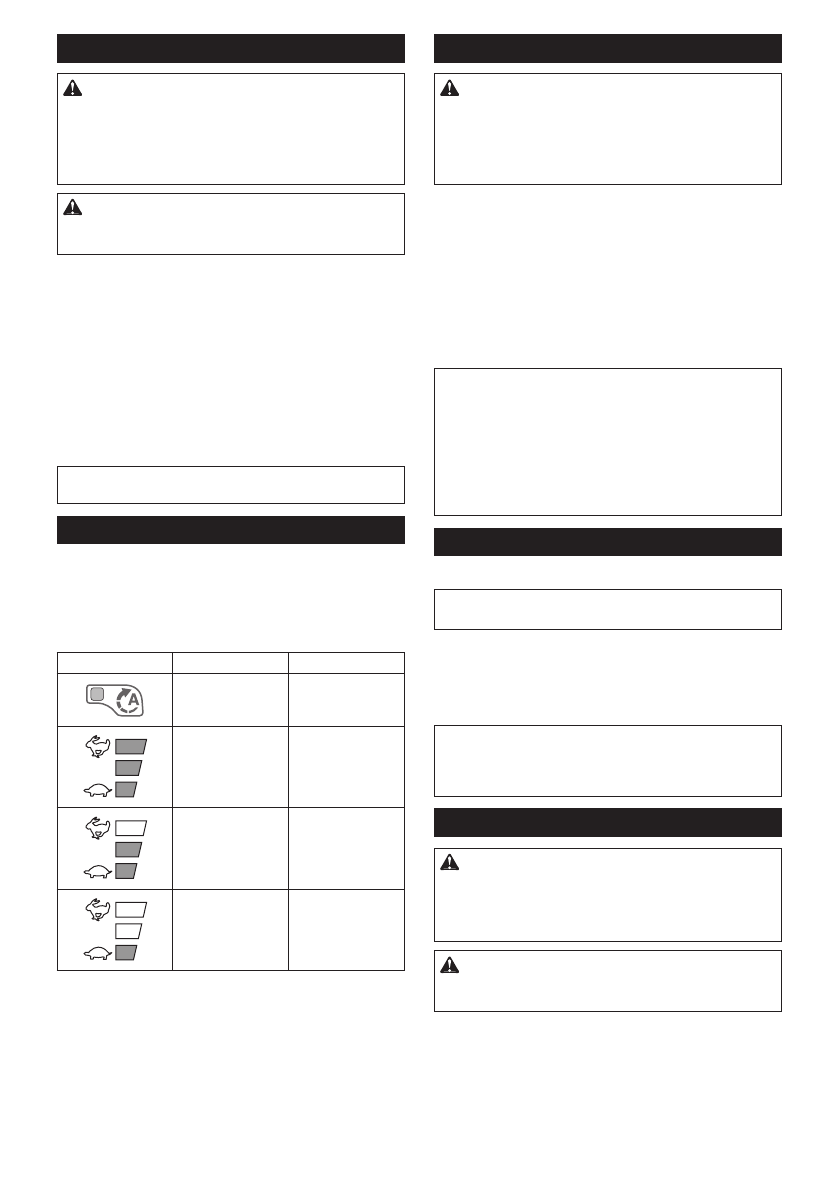
Speed adjusting
You can adjust the tool speed by tapping the main
power button.
Each time you tap the main power button, the level of
speed will change.
►
Fig.9:
1.
Main power button
Indicator
Mode
Rotation speed
Auto
4,000 - 6,000 min
-1
High
6,000 min
-1
Medium
5,000 min
-1
Low
4,000 min
-1
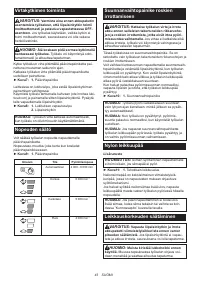
Reverse button for debris removal
WARNING:
Switch off the tool and remove
the battery cartridge before you remove entan-
gled weeds or debris which the reverse rotation
function can not remove.
Failure to switch off and
remove the battery cartridge may result in serious
personal injury from accidental start-up.
This tool has a reverse button to change the direction of
rotation. It is only for removing weeds and debris entan-
gled in the tool.
To reverse the rotation, tap the reverse button and pull
the trigger when the tool’s head is stopped. The power
lamp starts blinking, and the tool's head rotates in
reverse direction when you pull the switch trigger.
To return to regular rotation, release the trigger and wait
until the tool's head stops.
►
Fig.10:
1.
Reverse button
NOTE:
During the reverse rotation, the tool operates
only for a short period of time and then automatically
stops.
NOTE:
Once the tool is stopped, the rotation returns
to regular direction when you start the tool again.
NOTE:
If you tap the reverse button while the tool's
head is still rotating, the tool comes to stop and to be
ready for reverse rotation.
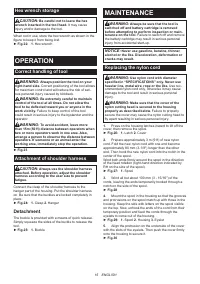
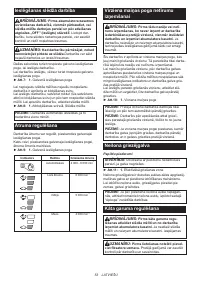
Nylon cutting head
Optional accessory
NOTICE:
The bump feed will not operate properly if
the head is not rotating.
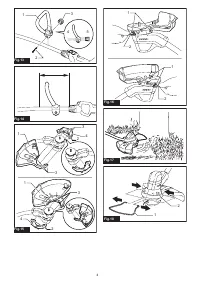
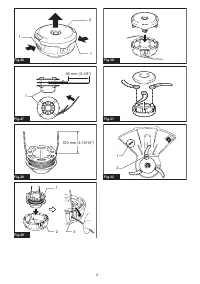
►
Fig.11:
1.
Most effective cutting area
The nylon cutting head is a dual string trimmer head
provided with a bump & feed mechanism.
To feed out the nylon cord, tap the cutting head against
the ground while rotating.
NOTE:
If the nylon cord does not feed out while
tapping the head, rewind/replace the nylon cord
by following the procedures described under
“Maintenance”.
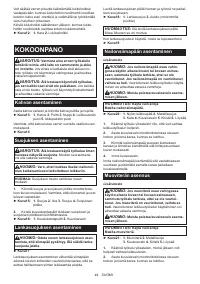
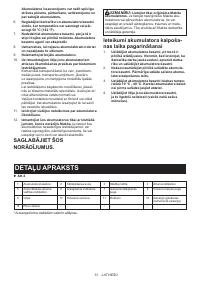
Adjusting the shaft length
WARNING:
Before adjusting the shaft length,
release the switch trigger and remove the battery
cartridge from the tool.
Failure to release the trig-
ger and removing the battery cartridge may cause a
personal injury.
CAUTION:
Make sure to tighten the lock
sleeve before operation.
Otherwise the tool may
lose control and result in personal injury.
To adjust the length of the shaft, turn the lock sleeve
counterclockwise until the arrow mark on the lock
sleeve indicates the unlock mark on the housing, and
pull out or push in the shaft to the desired length.
After adjustment, tighten the lock sleeve until the arrow mark
on the lock sleeve indicates the lock mark on the housing.
►
Fig.12:
1.
Shaft
2.
Lock sleeve
Содержание
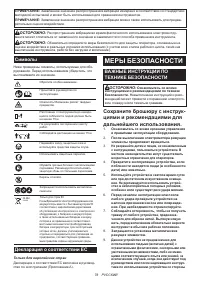
- 78 Символы; Декларация о соответствии ЕС; МЕРЫ БЕЗОПАСНОСТИ; ВАЖНЫЕ ИНСТРУКЦИИ ПО; Сохраните брошюру с инструк
- 81 Важные правила техники; СОХРАНИТЕ ДАННЫЕ
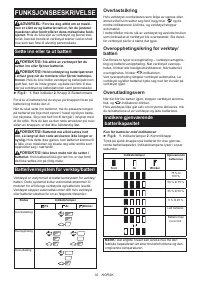
- 82 Установка или снятие блока; Защита от перегрузки
- 83 Действие выключателя питания
- 84 Нейлоновая режущая головка; Регулировка длины вала; СБОРКА; Установка рукоятки
- 85 ЭКСПЛУАТАЦИЯ
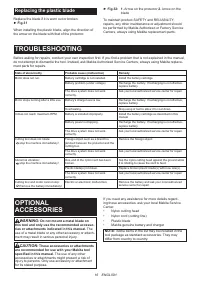
- 86 ОБСЛУЖИВАНИЕ; Замена нейлонового шнура
- 87 ПОИСК И УСТРАНЕНИЕ НЕИСПРАВНОСТЕЙ; ДОПОЛНИТЕЛЬНЫЕ
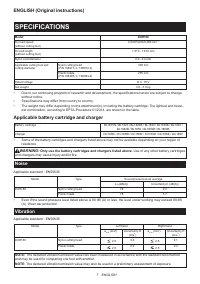
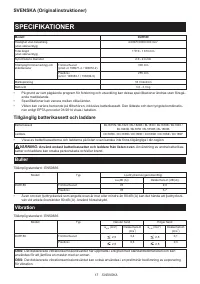
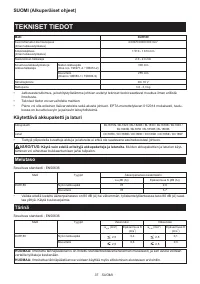
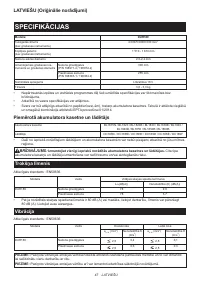
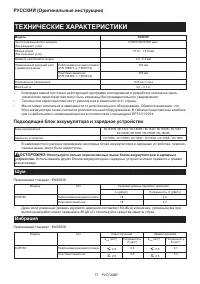
Характеристики

Остались вопросы?Не нашли свой ответ в руководстве или возникли другие проблемы? Задайте свой вопрос в форме ниже с подробным описанием вашей ситуации, чтобы другие люди и специалисты смогли дать на него ответ. Если вы знаете как решить проблему другого человека, пожалуйста, подскажите ему :)


