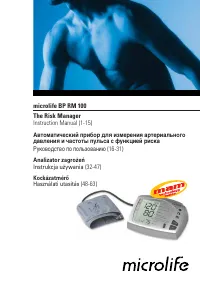
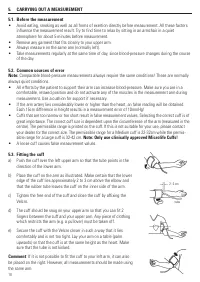
Тонометры Microlife BP RM 100 - инструкция пользователя по применению, эксплуатации и установке на русском языке. Мы надеемся, она поможет вам решить возникшие у вас вопросы при эксплуатации техники.
Если остались вопросы, задайте их в комментариях после инструкции.
"Загружаем инструкцию", означает, что нужно подождать пока файл загрузится и можно будет его читать онлайн. Некоторые инструкции очень большие и время их появления зависит от вашей скорости интернета.


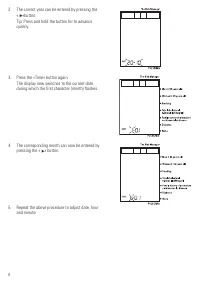
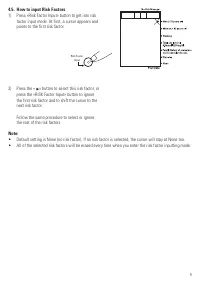


11
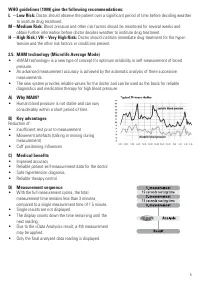
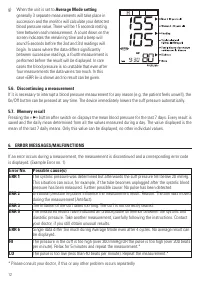
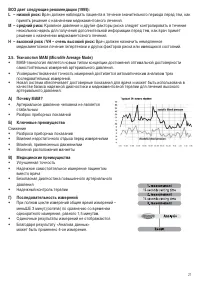
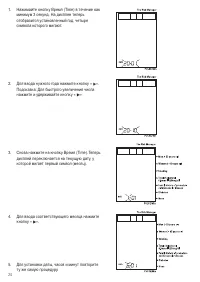
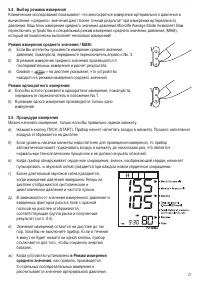
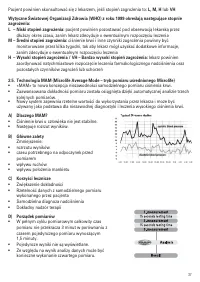
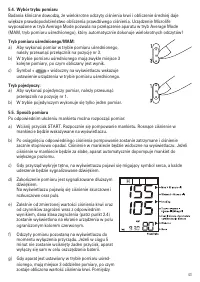
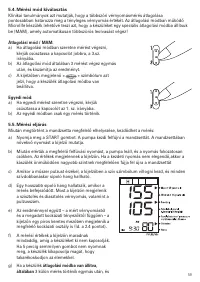
5.4. Measurement mode selection
Clinical studies demonstrate taking multiple blood pressure readings and calculating an «average» is more
likely to determine your true blood pressure. Your Microlife Average Mode unit allows you to switch the
unit to a special Average Mode setting (MAM) that automatically takes multiple readings!
Average Mode / MAM:
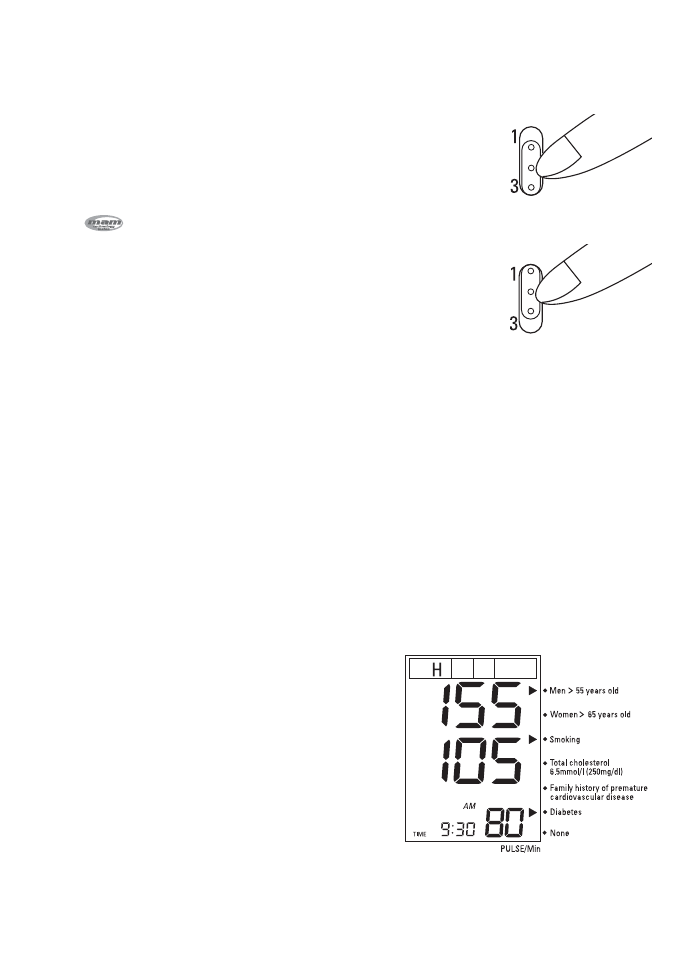
a)
If you would like to take an Average Mode measurement,
please slide the switch to position «3».
b)
Average Mode takes generally 3 measurements in succession
and calculates the result.
c)
An «
» symbol in the display indicates that the unit is set
to the Average Mode.
Single mode:
a) If you would like to take single measurement, please slide the
switch to position «1».
b) Single mode only takes 1 measurement.
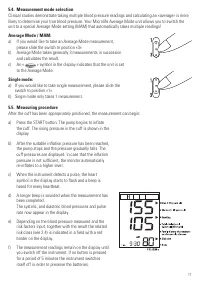
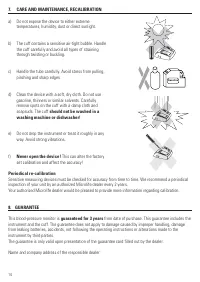
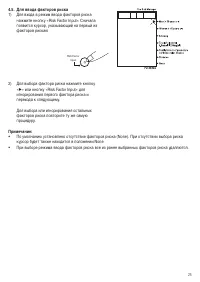
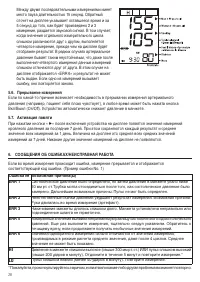
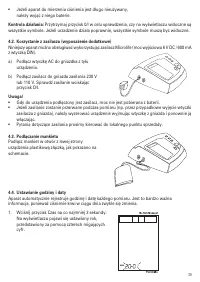
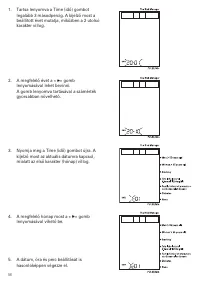
5.5. Measuring procedure
After the cuff has been appropriately positioned, the measurement can begin:
a) Press the START button. The pump begins to inflate
the cuff. The rising pressure in the cuff is shown in the
display.
b) After the suitable inflation pressure has been reached,
the pump stops and the pressure gradually falls. The
cuff pressures are displayed. In case that the inflation
pressure is not sufficient, the monitor automatically
re-inflates to a higher level.
c)
When the instrument detects a pulse, the heart
symbol in the display starts to flash and a beep is
heard for every heartbeat.
d) A longer beep is sounded when the measurement has
been completed.
The systolic, and diastolic blood pressures and pulse
rate now appear in the display.
e) Depending on the blood pressure measured and the
risk factors input, together with the result the related
risk class (see 2.4) is indicated in a field with a red
border on the display.
f)
The measurement readings remain on the display until
you switch off the instrument. If no button is pressed
for a period of 5 minutes the instrument switches
itself off in order to preserve the batteries.
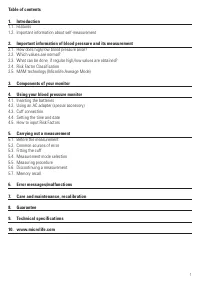
Содержание
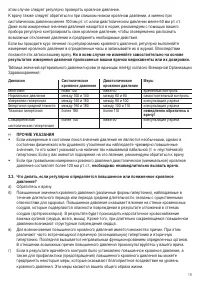
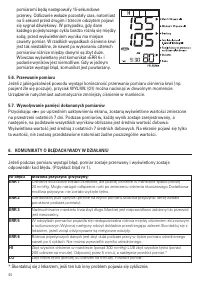
- 21 Индикатор пульса; не; предназначен для контроля частоты сердечного ритма!; Электромагнитные помехи:
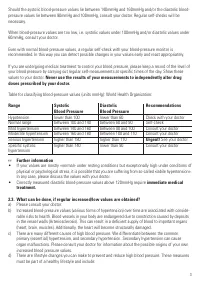
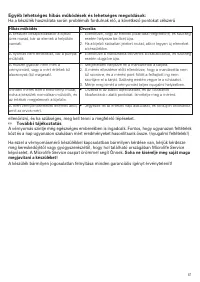
- 22 этом случае следует регулярно проверять кровяное давление.; Ни в коем случае не изменяйте самостоятельно на основе; Диапазон; ПРОЧИЕ УКАЗАНИЯ
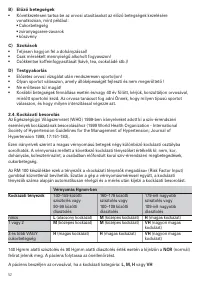
- 23 отсутствуют; и более ИЛИ диабет; VH; NOR
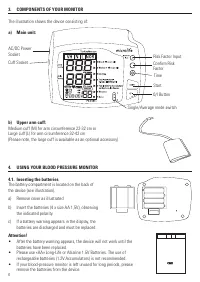
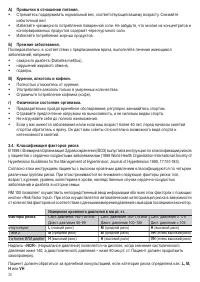
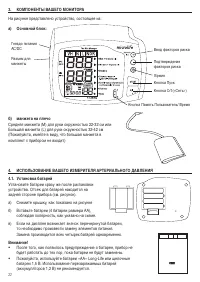
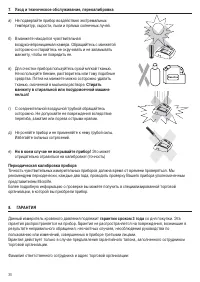
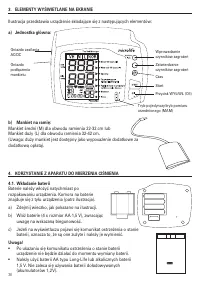
- 25 КОМПОНЕНТЫ ВАШЕГО МОНИТОРА; На рисунке представлено устройство, состоящее из:; ИСПОЛЬЗОВАНИЕ ВАШЕГО ИЗМЕРИТЕЛЯ АРТЕРИАЛЬНОГО ДАВЛЕНИЯ; Снимите крышку, как показано на рисунке
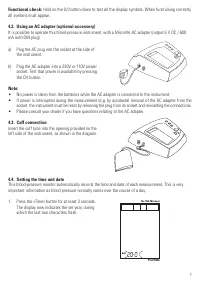
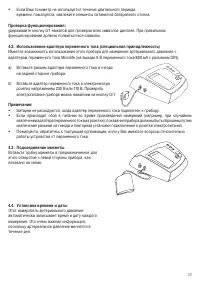
- 26 Проверка функционирования:
- 29 ИЗМЕРЕНИЙ; Снимите любую одежду, которая плотно прилегает к плечу.; Примечание: Используйте; Если манжету невозможно надеть на правую руку, ее
- 31 СООБЩЕНИЯ ОБ ОШИБКАХ/НЕИСПРАВНАЯ РАБОТА; LO
- 32 Другие возможные неисправности и их причины; Дальнейшая информация; Неисправность

