Телевизоры Philips 24HFL2849T - инструкция пользователя по применению, эксплуатации и установке на русском языке. Мы надеемся, она поможет вам решить возникшие у вас вопросы при эксплуатации техники.
Если остались вопросы, задайте их в комментариях после инструкции.
"Загружаем инструкцию", означает, что нужно подождать пока файл загрузится и можно будет его читать онлайн. Некоторые инструкции очень большие и время их появления зависит от вашей скорости интернета.


English
- 8 -
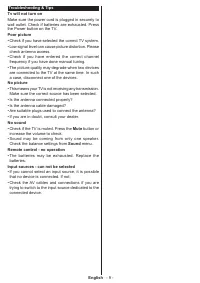
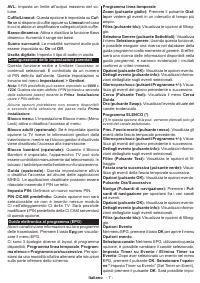
Child lock (optional):
When Child Lock is set, the
TV can only be controlled by the remote control. In
this case the control panel buttons will not work.
Guidance (optional):
This setting enables or
disables access some of the MHEG applications.
Disabled applications can be released by entering
the right PIN.
Set PIN:
Defines a new PIN number.
Default CICAM PIN:
This option will appear as
greyed out if no CI module is inserted into the CI slot
of the TV. You can change the default PIN of the CI
CAM using this option.
Electronic program guide (EPG)
Some channels send information about their
broadcast schedules. Press the
Epg
button to view
the EPG menu.
There are 3 different types of schedule layouts
available,
Timeline Schedule
,
List Schedule
and
Now/Next Schedule
. To switch between them follow
the instructions on the bottom of the screen.
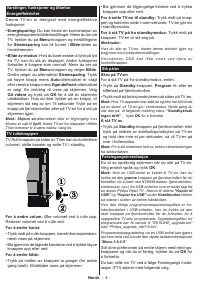
Timeline Schedule
Zoom (Yellow button):
Press the
Yellow
button to
see events in a wider time interval.
Filter (Blue button):
Views filtering options.
Select Genre (Subtitles button):
Displays
Select
Genre
menu. Using this feature, you can search
the program guide database in accordance with the
genre. Info available in the program guide will be
searched and results matching your criteria will be
highlighted.
Options (OK button):
Displays event options.
Event Details (Info button):
Displays detailed
information about selected events.
Next/Prev Day (Program +/- buttons):
Displays the
events of previous or next day.
Search (Text button):
Displays
Guide Search
menu.
Now (Swap button):
Displays current event of the
highlighted channel.
List Schedule(*)
(*)
In this layout option, only the events of the highlighted
channel will be listed.
Prev. Time Slice (Red button):
Displays the events
of previous time slice.
Next/Prev Day (Program +/- buttons):
Displays the
events of previous or next day.
Event Details (Info button):
Displays detailed
information about selected events.
Filter (Text button):
Views filtering options.
Next Time Slice (Green button):
Displays the
events of next time slice.
Options (OK button):
Displays event options.
Now/Next Schedule
N a v i g a t e ( D i r e c t i o n a l b u t t o n s ) :
P r e s s t h e
Directional buttons
to navigate through the
channels and events.
Options (OK button):
Displays event options.
Event Details (Info button):
Displays detailed
information about selected events.
Filter (Blue button):
Views filtering options.
Event Options
In EPG menu, press the
OK
button to open the
Event
Options
menu.
Select Channel:
In EPG menu, using this option,
you can switch to the selected channel.
Set Timer on Event / Delete Timer on Event:
After
you have selected an event in the EPG menu, press
the
OK
button. Select the
Set Timer on Event
option
and press the
OK
button. You can set a timer for future
events. To cancel an already set timer, highlight that
event and press the
OK
button. Then select
Delete
Timer
on Event
option. The timer will be cancelled.
Update your TV
Navigate on your main menu, choose
Settings>More
,
the version of the current software is displayed.
CAUTION:
Do not install a lower version of software than
the current version installed on your product. TP Vision
cannot be held liable or be made responsible for problems
caused by a software downgrade.
Update with USB
Before you update the software, make sure that you
have:
• A USB storage device that has at least 256
megabytes of storage space, is FAT32 or DOS
formatted and has its write protection disabled.
• Access to a computer with a USB connector and
Internet access.
N a v i g a t e t o w w w. p h i l i p s . c o m / s u p p o r t , a n d
follow the software update instructions.
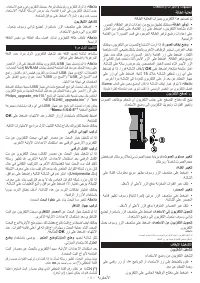
Automatic update from digital broadcast
While the TV is connected to an aerial signal. If
Automatic scanning
in the
Upgrade options
menu
is
Enabled
, the TV wakes up at 03:00 and searches
broadcast channels for new software upgrades. If
new software is found and downloaded successfully,
the next time the TV powers up , it will have the new
software version. To open the
Upgrade options
menu, enter the
Settings>More
menu, highlight
Software upgrade
and press the
OK
button.
Note:
Do not unplug the power cord while led is blinking
during the reboot process. If the TV fails to come on after
the upgrade unplug the TV for 2 minutes and plug in again.


