Телескопы Levenhuk Skyline 130х900 EQ - инструкция пользователя по применению, эксплуатации и установке на русском языке. Мы надеемся, она поможет вам решить возникшие у вас вопросы при эксплуатации техники.
Если остались вопросы, задайте их в комментариях после инструкции.
"Загружаем инструкцию", означает, что нужно подождать пока файл загрузится и можно будет его читать онлайн. Некоторые инструкции очень большие и время их появления зависит от вашей скорости интернета.


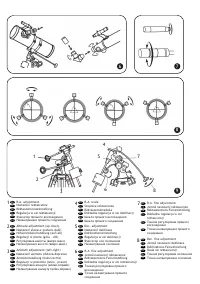
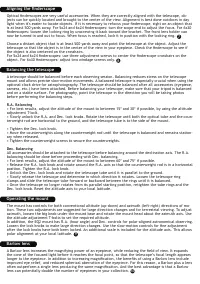


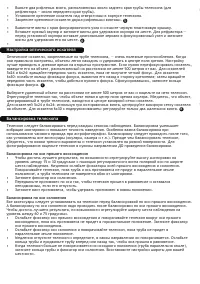


Aligning the finderscope
Optical finderscopes are very useful accessories. When they are correctly aligned with the telescope, ob-
jects can be quickly located and brought to the center of the view. Alignment is best done outdoors in day
light when it's easier to locate objects. If it is necessary to refocus your finderscope, sight on an object that
is at least 500 yards away. For 5x24 and 6x24 finderscopes: turn the scope end to adjust the focus. For 6x30
finderscopes: loosen the locking ring by unscrewing it back toward the bracket. The front lens holder can
now be turned in and out to focus. When focus is reached, lock it in position with the locking ring.
Choose a distant object that is at least 500 yards away and point the telescope at the object. Adjust the
telescope so that the object is in the center of the view in your eyepiece. Check the finderscope to see if
the object is also centered on the crosshairs.
For 5x24 and 6x24 finderscopes: use three adjustment screws to center the finderscope crosshairs on the
object. For 6x30 finderscopes: adjust two windage screws only.
7
8
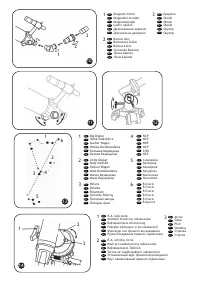
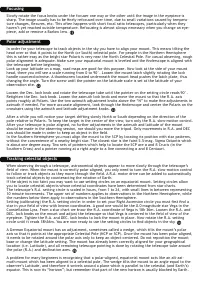
Balancing the telescope
A telescope should be balanced before each observing session. Balancing reduces stress on the telescope
mount and allows precise slow-motion movements. A balanced telescope is especially crucial when using the
optional clock drive for astrophotography. The telescope should be balanced after all accessories (eyepiece,
camera, etc.) have been attached. Before balancing your telescope, make sure that your tripod is balanced
and on a stable surface. For photography, point the telescope in the direction you will be taking photos
before performing the balancing steps.
R.A. Balancing
• For best results, adjust the altitude of the mount to between 15º and 30º if possible, by using the altitude
adjustment T-bolt.
• Slowly unlock the R.A. and Dec. lock knobs. Rotate the telescope until both the optical tube and the coun-
terweight rod are horizontal to the ground, and the telescope tube is to the side of the mount.
• Tighten the Dec. lock knob.
• Move the counterweights along the counterweight rod until the telescope is balanced and remains station-
ary when released.
• Tighten the counterweight screws to secure the counterweights.
Dec. Balancing
All accessories should be attached to the telescope before balancing around the declination axis. The R.A.
balancing should be done before proceeding with Dec. balancing.
• For best results, adjust the altitude of the mount to between 60º and 75º if possible.
• Release the R.A. lock knob and rotate around the R.A. axis so that the counterweight rod is in a horizontal
position. Tighten the R.A. lock knob.
• Unlock the Dec. lock knob and rotate the telescope tube until it is parallel to the ground.
• Slowly release the telescope and determine in which direction it rotates. Loosen the telescope ring
clamps and slide the telescope tube forward or backward between the rings until it is balanced.
• Once the telescope no longer rotates from its parallel starting position, retighten the tube rings and the
Dec. lock knob. Reset the altitude axis to your local latitude.
Operating the mount
The mount has controls for both conventional altitude (up-down) and azimuth (left-right) directions of mo-
tion. These two adjustments are suggested for large direction changes and for terrestrial viewing. To adjust
azimuth, loosen the big knob under the mount base and rotate the mount head about the azimuth axis. Use
the altitude adjustment T-bolts to set the required altitude.
In addition, the EQ2 mount has R.A. (hour angle) and Dec. controls for polar-aligned astronomical observing.
Loosen the lock knobs to make large direction changes. Use the slow-motion controls for fine adjustment
after the lock knobs have both been locked. An additional scale is included for the altitude axis. This allows
polar alignment at your local latitude.
9
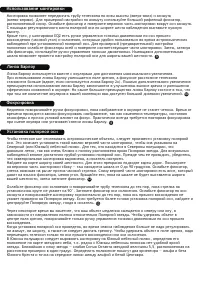
Barlow lens
A Barlow lens increases the magnifying power of an eyepiece, while reducing the field of view. It expands
the cone of the focused light before it reaches the focal point, so that the telescope’s focal length appears
longer to the eyepiece. In addition to increasing magnification, the benefits of using a Barlow lens include
improved eye relief, and reduced spherical aberration of the eyepiece. For this reason, a Barlow plus a lens
often outperform a single lens producing the same magnification. And the best advantage is that a Barlow
lens can potentially double the number of eyepieces in your collection.
10
Содержание
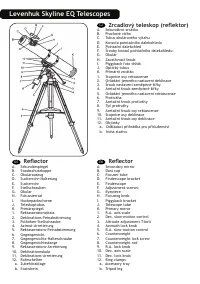
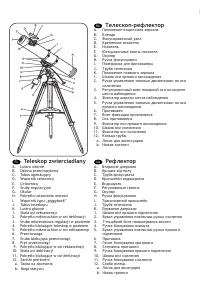
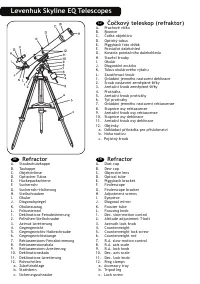
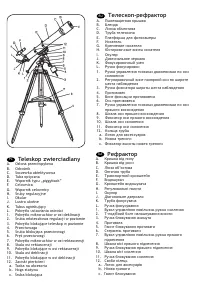
- 6 Teleskop zwierciadlany; Рефрактор
- 35 Телескопы Levenhuk Skyline EQ; Сборка телескопа
- 36 Балансировка по оси прямого восхождения
- 37 при смене окуляра или установке/снятии линзы Барлоу.; Установка полярной оси; что экваториальная монтировка выровнена, а искатель настроен.
- 38 Отслеживание небесных тел
- 39 Адаптер для камеры; любой другой сменный объектив.; Технические характеристики; Использование элементов питания; воспламениться или взорваться.; Уход и хранение; И МОЖЕТ ПРИВЕСТИ К СЛЕПОТЕ!
- 40 Международная гарантия
- 48 Levenhuk® is a registered trademark of Levenhuk, Inc.


