
Строительные пылесосы Makita DCL281FZ - инструкция пользователя по применению, эксплуатации и установке на русском языке. Мы надеемся, она поможет вам решить возникшие у вас вопросы при эксплуатации техники.
Если остались вопросы, задайте их в комментариях после инструкции.
"Загружаем инструкцию", означает, что нужно подождать пока файл загрузится и можно будет его читать онлайн. Некоторые инструкции очень большие и время их появления зависит от вашей скорости интернета.


12 ENGLISH
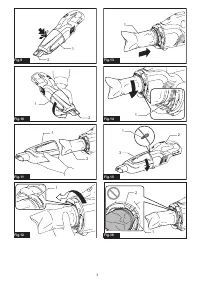
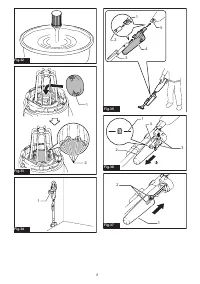
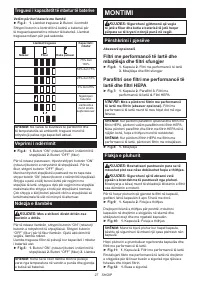
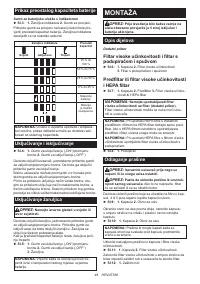
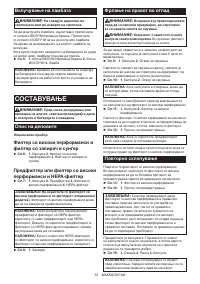
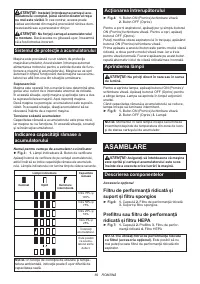
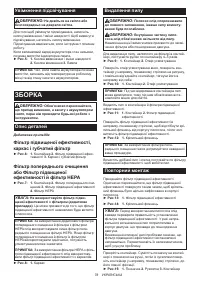
Reassembly
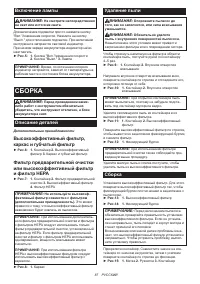
Connect high performance filter. At this time, make sure
to twist high performance filter so that securing lip is
firmly locked into the cleaner unit.
►
Fig.13:
1.
High performance filter
►
Fig.14:
1.
Securing lip
NOTICE:
Always be sure to check that high perfor-
mance filter is loaded correctly prior to using cleaner.
If they are not loaded correctly, dust will get into the
motor housing, and cause motor failure.
If the problem as described later occurs, high per-
formance filter is not loaded correctly. Reload them
correctly to rectify problem.
Attach the capsule. Align the mark on capsule with the
mark on the handle and then firmly twist capsule in the
direction of arrow until it is secured.
►
Fig.15:
1.
Mark
2.
Handle
3.
Capsule
NOTE:
Always remove dust ahead of time, as suction
power will be reduced if there is too much dust in
cleaner.
Problem Examples
The securing lip of high performance filter is not firmly
locked into groove of cleaner housing.
►
Fig.16:
1.
Securing lip
2.
Groove of cleaner housing
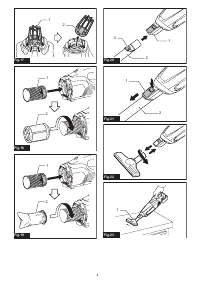
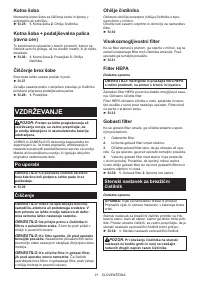
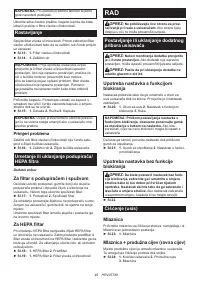
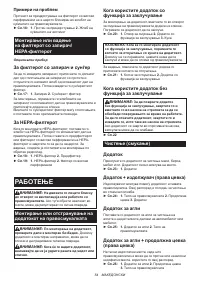
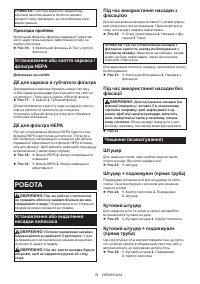
Installing or removing stay / HEPA
filter
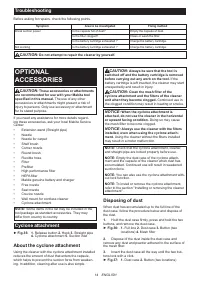
Optional accessory
For the stay and sponge filter
To remove the stay, push up the bottom part of pillars
of the stay with your fingers and release its groove from
the protrusion on the cleaner. After that, remove the
sponge filter.
►
Fig.17:
1.
Stay
2.
Sponge filter
To install, align the grooves on the stay with the protru-
sion on the cleaner and push until it clicks.
Insert the sponge filter between the pillars and set it in
the original position.
For the HEPA filter
When installing the HEPA filter, fit the groove of the
HEPA filter with the protrusion on the cleaner. Then, put
the prefilter or the high performance filter on the HEPA
filter and twist it to secure. To remove, follow the instal
-
lation procedure in reverse.
►
Fig.18:
1.
HEPA filter
2.
Prefilter
►
Fig.19:
1.
HEPA filter
2.
High performance filter
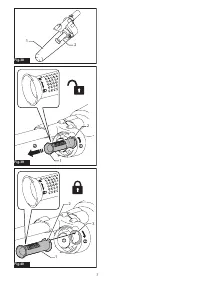
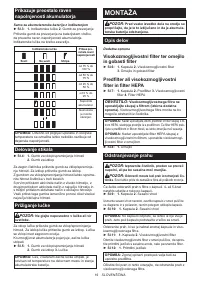
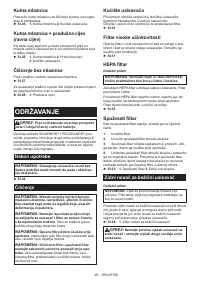
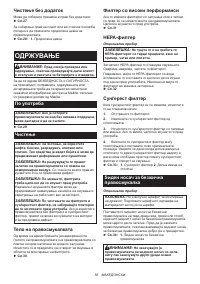
OPERATION
CAUTION:
Do not move your face close to
the air vent when operating the cleaner.
If foreign
objects are blown into eyes, it may result in personal
injury.
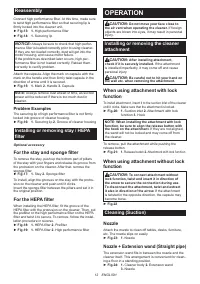
Installing or removing the cleaner
attachment
CAUTION:
After installing attachment,
check if it is securely installed.
If the attachment
is installed imperfectly, it may come off and cause
personal injury.
CAUTION:
Be careful not to hit your hand on
the wall etc. when removing the attachment.
When using attachment with lock
function
To install attachment, insert it to the suction inlet of the cleaner
until it clicks. Make sure that the attachment is locked.
►
Fig.20:
1.
Suction inlet
2.
Attachment with lock
function
3.
Hook
NOTE:
When installing the attachment with lock
function, be sure to align the release button with
the hook on the attachment.
If they are not aligned,
the wand will not be locked and may come off from
the cleaner.
To remove, pull the attachment while pushing the
release button.
►
Fig.21:
1.
Release button
2.
Attachment with lock function
When using attachment without lock
function
CAUTION:
To connect attachment without
lock function, twist and insert it in direction of
the arrow to secure the connection during use.
To disconnect the attachment, twist and extract
it also in direction of the arrow.
If the attachment
is twisted in the opposite direction, the capsule may
become loose.
►
Fig.22
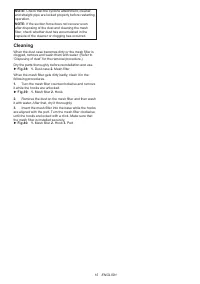
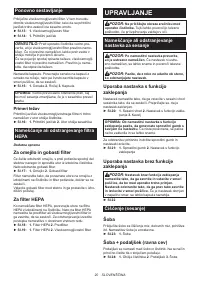
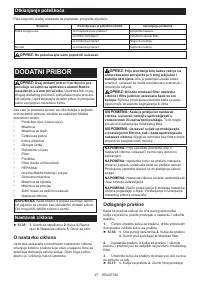
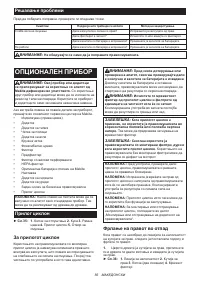
Cleaning (Suction)
Nozzle
Attach the nozzle to clean off tables, desks, furniture,
etc. The nozzle slips on easily.
►
Fig.23:
1.
Nozzle
Nozzle + Extension wand (Straight pipe)
The extension wand fits in between the nozzle and the
cleaner itself. This arrangement is convenient for clean-
ing a floor in a standing position.
►
Fig.24:
1.
Cleaner body
2.
Extension wand
3.
Nozzle
Содержание
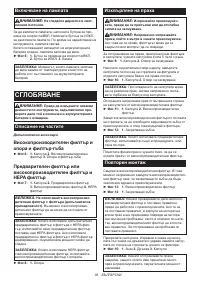
- 84 Назначение; МЕРЫ БЕЗОПАСНОСТИ; Правила техники безопасности; СОХРАНИТЕ ДАННЫЕ
- 85 Важные правила техники
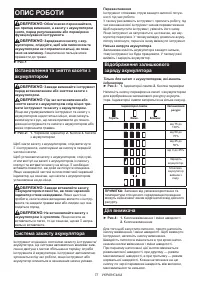
- 86 ОПИСАНИЕ РАБОТЫ
- 87 Включение лампы; СБОРКА; Описание деталей; Высокоэффективный фильтр,
- 88 Примеры проблем; Установка и демонтаж каркаса /; ЭКСПЛУАТАЦИЯ; Установка или удаление насадки
- 89 Чистка без насадки; ОБСЛУЖИВАНИЕ; После использования; Губчатый фильтр
- 90 Устранение неполадок; ДОПОЛНИТЕЛЬНЫЕ; Циклонный фильтр
Характеристики

Остались вопросы?Не нашли свой ответ в руководстве или возникли другие проблемы? Задайте свой вопрос в форме ниже с подробным описанием вашей ситуации, чтобы другие люди и специалисты смогли дать на него ответ. Если вы знаете как решить проблему другого человека, пожалуйста, подскажите ему :)


