Строительные пылесосы Einhell GE-LB 36/230 Li E - инструкция пользователя по применению, эксплуатации и установке на русском языке. Мы надеемся, она поможет вам решить возникшие у вас вопросы при эксплуатации техники.
Если остались вопросы, задайте их в комментариях после инструкции.
"Загружаем инструкцию", означает, что нужно подождать пока файл загрузится и можно будет его читать онлайн. Некоторые инструкции очень большие и время их появления зависит от вашей скорости интернета.


GB
- 22 -
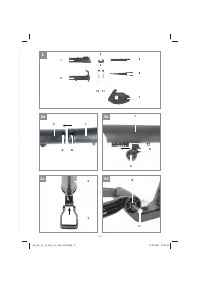
5.6 Charging the battery (Fig. 7-8)
1. Take the battery pack out of the equipment.
To do so, press the pushlock button (Fig. 8/
Item C).
2. Check that your mains voltage is the same as
that marked on the rating plate of the battery
charger. Insert the power plug of the charger
into the socket outlet. The green LED will then
begin to
fl
ash.
3. Insert the battery pack into the charger.
4. In the section entitled „Charger indicator“ you
will
fi
nd a table with an explanation of the LED
indicator on the charger.
The rechargeable battery can become a little
warm during the charging. This is normal.
If the battery pack fails to charge, check:
•
whether there is voltage at the socket outlet
•
whether there is good contact at the charging
contacts
If the battery pack still fails to charge, send
•
the charger
•
and the battery pack
to our customer service center.
To ensure that items are properly packaged
and delivered when you send them to us,
please contact our customer service or the
point of sale at which the equipment was
purchased.
When shipping or disposing of batteries and
cordless tools, always ensure that they are
packed individually in plastic bags to prevent
short circuits and
fi
res.
To ensure that the battery pack provides long ser-
vice, you should take care to recharge it promptly.
You must recharge the battery pack when you
notice that the performance of the device drops.
Never allow the battery pack to become fully di-
scharged. This will cause it to develop a defect.
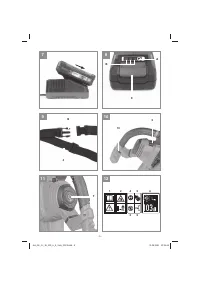
Battery capacity indicator (Fig. 8)
Press the button for the battery capacity indicator
(Item A). The battery capacity indicator (Item B)
shows the charge status of the battery using 3
LEDs.
All 3 LEDs are lit:
The battery is fully charged.
2 or 1 LED(s) are lit:
The battery has an adequate remaining charge.
1 LED
fl
ashes:
The battery is empty, recharge the battery.
All LEDs blink:
The battery temperature is too low. Remove the
battery from the equipment, keep it at room tem-
perature for one day. If the fault reoccurs, this me-
ans that the rechargeable battery has undergone
exhaustive discharge and is defective. Remove
the battery from the equipment. Never use or
charge a defective battery.
6. Operation
Danger!
Start up the equipment only when fully assem-
bled.
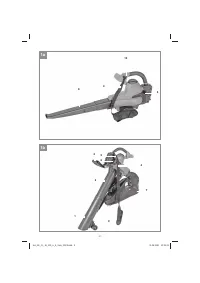
6.1 Sizing the strap
Slip the harness over your shoulder and adjust
the length of the harness so that you can handle
the equipment comfortably.
Caution: Wear the harness in such a way that
the snap fastener is always close to hand. In
an emergency you can always remove the
equipment quickly by opening the snap fas-
tener (Fig. 9 / Item B).
6.2 Switching on the equipment (Fig. 10)
•
To switch on, push the On/Off (5) switch to
the “I” position
•
To switch off, push the On/Off switch to the “0”
position
6.3 Mode of operation
Caution!
Search the surface for concealed ob-
jects (e.g. small animals or hard foreign bodies)
before starting to use the equipment.
6.3.1 Blowing foliage
Caution!
If you point the air
fl
ow towards other people, ani-
mals or objects (e.g. windows), this could cause
injuries and damage.
•
Point the air flow away from yourself.
•
Never point the air flow towards other people,
animals or objects.
•
Do not blow away any hard objects such as
stones or twigs.
•
Fit the prepared blower tube and harness
(see section 5.2) to the motor housing.
•
Check that all the components are correctly
fastened (see section 5.4).
Anl_GE_CL_36_230_Li_E_Solo_SPK9.indb 22
Anl_GE_CL_36_230_Li_E_Solo_SPK9.indb 22
31.08.2021 07:35:02
31.08.2021 07:35:02
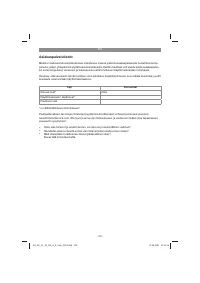
Характеристики

Остались вопросы?Не нашли свой ответ в руководстве или возникли другие проблемы? Задайте свой вопрос в форме ниже с подробным описанием вашей ситуации, чтобы другие люди и специалисты смогли дать на него ответ. Если вы знаете как решить проблему другого человека, пожалуйста, подскажите ему :)


