Строительные пылесосы Einhell GE-LB 36/230 Li E - инструкция пользователя по применению, эксплуатации и установке на русском языке. Мы надеемся, она поможет вам решить возникшие у вас вопросы при эксплуатации техники.
Если остались вопросы, задайте их в комментариях после инструкции.
"Загружаем инструкцию", означает, что нужно подождать пока файл загрузится и можно будет его читать онлайн. Некоторые инструкции очень большие и время их появления зависит от вашей скорости интернета.


GB
- 21 -
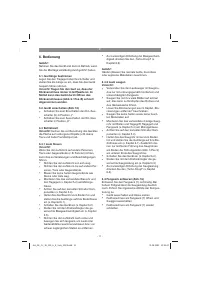
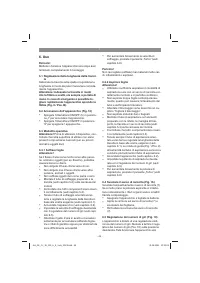
5. Before using the equipment
The equipment is supplied without batteries
and without a charger.
Warning!
Always remove the batteries before making
adjustments to the equipment.
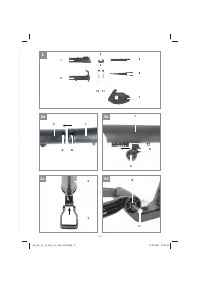
5.1 Preparations (Fig. 3a-3f)
5.1.1 Suction tube
Connect the top suction tube (Fig. 3a/Item 2) and
the bottom suction tube (Fig. 3a/Item 1) together.
Make sure that the guide lug (Fig. 3a/Item A) is in-
serted into the corresponding recess (Fig. 3a/Item
B) when you do this. Make sure that it latches in
place correctly as well. Use the suction tube only
if it is fully assembled.
Push the guide wheels (Fig. 3b/Item 9) onto the
bottom suction tube (Fig. 3b/Item 1), as shown in
Fig. 3b, with the lock pressed (Fig. 3b/Item A) and
let it snap into place at the desired position. The
position can be changed at any time by pressing
the lock again. Make sure that it snaps into place
correctly.
Fit the additional handle (Fig. 3c/Item 3) to the
mount on the top suction tube (Fig. 3c/ Item 2).
Using the screw (Fig. 3d/Item 11) and the star nut
(Fig. 3e/Item 12), secure the additional handle
in the desired position. When
fi
tting the screw,
make sure that you insert it from the side with the
hexagon lock (Fig. 3d/Item A). The position can
be changed at any time by undoing the star nut.
Make sure that the parts are fastened securely.
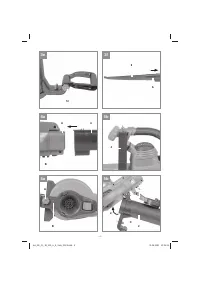
5.1.2 Blower tube
Pull the sleeve (Fig. 3f/Item A) to the top end of
the blower tube (Fig. 3f/Item 8) as shown in Fig.
3f. Make sure that it snaps in place correctly on
both sides.
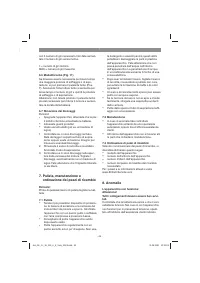
5.2 Assembly in blower mode (Fig. 4a/4b)
Insert the blower tube (Fig. 4a/Item 8), which was
prepared in 5.1, into the mount (Fig. 4a/Item A)
on the motor housing. Make sure that it latches in
place correctly.
Attach the harness (Item 4) to the motor housing
as shown in Fig. 4b.
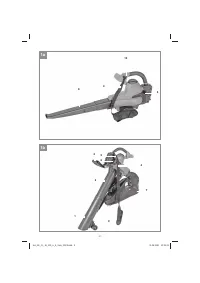
The device has now been assembled in blower
mode (Fig. 1a). To dismantle, proceed in reverse
order. To remove the blower tube, press the button
(Fig. 4a/Item B) and pull o
ff
the blower tube.
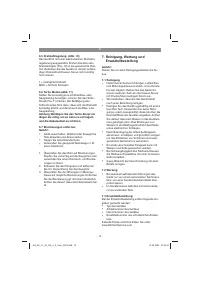
5.3 Assembly in vacuum mode (Fig. 5a-5f)
Undo the star screw (Fig. 5a/Item A) and pull
open the cover (Fig. 5a/Item B). Attach the vacu-
um tube (Fig. 5b/Item 2), which was prepared in
5.1.1, to the motor housing and snap it onto the
motor housing as shown in Fig. 5b. Now secure it
with the thumb screw (Fig. 5c/Item C).
Attach the harness (Item 4) to the motor housing
as shown in Fig. 5d.
Connect the catch bag (Fig. 5e/Item 7) to the
mount (Fig. 5e/Item A) on the motor housing.
Make sure that it latches in place correctly. Secu-
re the catch bag by the two hooks on the vacuum
tube as shown in Fig. 5f.
The device has now been assembled in vacuum
mode (Fig. 1b).
To remove the catch bag, press the button (Fig.
5e/Item B) and pull o
ff
the catch bag. To dismantle
the rest, proceed in reverse order to assembly.
Start up the equipment only when fully assem-
bled.
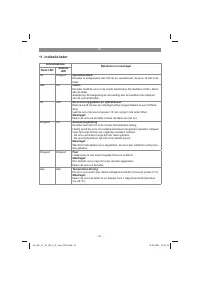
5.4 Safety switch
There are a number of safety switches for preven-
ting the unsafe operation of the equipment. Make
sure, therefore, that the following components are
correctly fastened, otherwise it will not be possib-
le to switch on the machine.
•
In blower mode: Blower tube (Fig. 4a/Item 8)
and cover (Fig. 5a/Item B).
•
In vacuum mode: Suction tube (Fig. 5c/Item
2) and catch bag (Fig. 5e/Item 7)
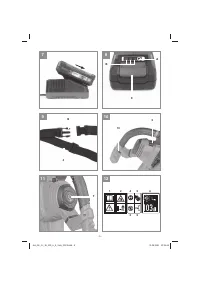
5.5 Fitting the battery (Fig. 6a/6b)
Press the pushlock button (Fig. 8/Item C) of the
rechargeable battery as shown in Fig. 8 and push
the battery into the battery mount provided until it
latches in place. Fig. 6b shows the rechargeable
batteries when
fi
tted. To remove the battery pack,
proceed in reverse order.
Important!
Use only batteries which are charged to the same
level. Never combine full and half-full batteries.
Always charge the two batteries simultaneously.
The equipment‘s operating time depends on the
battery with the lower charge level. The two batte-
ries must always be fully charged before use.
Anl_GE_CL_36_230_Li_E_Solo_SPK9.indb 21
Anl_GE_CL_36_230_Li_E_Solo_SPK9.indb 21
31.08.2021 07:35:02
31.08.2021 07:35:02
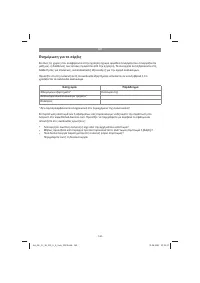
Характеристики

Остались вопросы?Не нашли свой ответ в руководстве или возникли другие проблемы? Задайте свой вопрос в форме ниже с подробным описанием вашей ситуации, чтобы другие люди и специалисты смогли дать на него ответ. Если вы знаете как решить проблему другого человека, пожалуйста, подскажите ему :)


