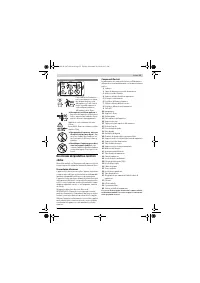
Строительные пылесосы Bosch GAS 55 M AFC - инструкция пользователя по применению, эксплуатации и установке на русском языке. Мы надеемся, она поможет вам решить возникшие у вас вопросы при эксплуатации техники.
Если остались вопросы, задайте их в комментариях после инструкции.
"Загружаем инструкцию", означает, что нужно подождать пока файл загрузится и можно будет его читать онлайн. Некоторые инструкции очень большие и время их появления зависит от вашей скорости интернета.


22
| English
1 609 92A 0XF | (30.9.14)
Bosch Power Tools
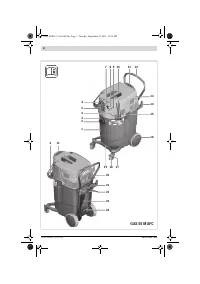
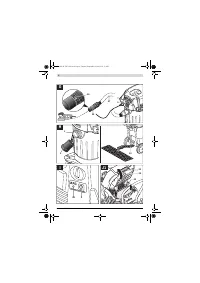
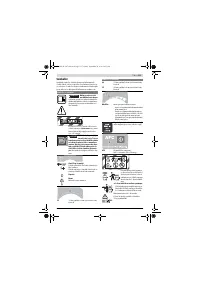
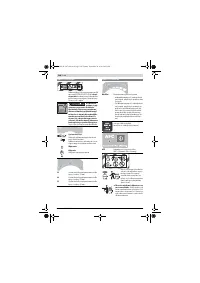
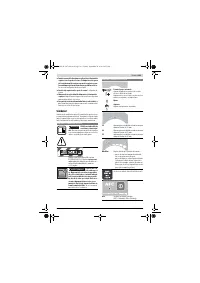
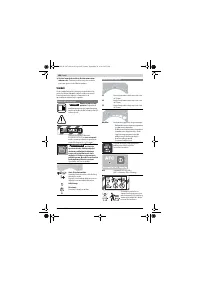
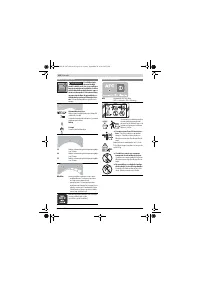
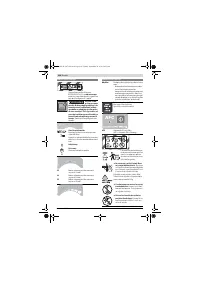
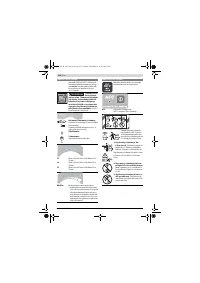
Replacing/Inserting the Dust Bag (Accessory)
– Unlock the latches
15
and remove the vacuum lid
13
.
– Pull off the full dust bag from the connection flange toward
the rear. Close the opening of the dust bag by folding down
the lid. Remove the closed dust bag from the vacuum
cleaner.
– Work the new dust bag over the connection flange of the
vacuum cleaner. Make sure that the dust bag faces com-
pletely against the interior sides of the container
1
over its
full length.
– Reattach the vacuum lid
13
again and lock the latches
15
.
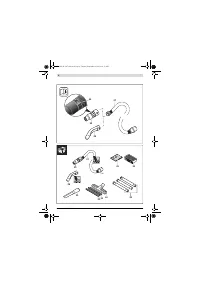
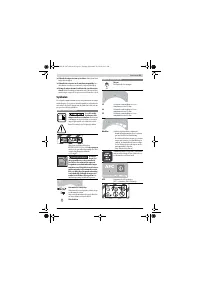
Inserting the Rubber Lip (Wet Vacuuming)
(see figure E)
Note:
The requirements for the ingress degree (dust category
M) have only been proven for dry vacuuming.
– Carefully pry the brush inserts
33
out of the floor nozzle
34
using a suitable tool.
– Insert the rubber lips
32
into the floor nozzle
34
.
Note:
The structured side of the rubber lips must face out-
ward.
Attaching an L-Boxx (see figure F)
For transport of the vacuum cleaner and for place-saving stor-
age of VAC accessories and/or power tools, an L-Boxx can be
mounted on the vacuum cleaner lid.
– Mount the L-Boxx onto the retainers
11
.
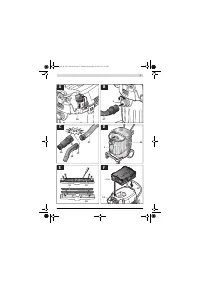
Do not vacuum with an L-Boxx mounted.
The centre of
gravity of the vacuum cleaner shifts upward. The vacuum
cleaner can tip over. Danger of injury and causing damage.
Do not carry the vacuum cleaner by the carrying handle
of the mounted L-Boxx.
The vacuum cleaner is too heavy
for the carrying handle of the L-Boxx. Danger of injury and
causing damage.
Operation
Starting Operation
Observe correct mains voltage! The voltage of the pow-
er source must agree with the voltage specified on the
nameplate of the vacuum cleaner. Equipment marked
with 230 V can also be operated with 220 V.
Please inform yourself about the valid regula-
tions/laws for your country concerning the handling of
materials that are hazardous to one’s health.
The vacuum cleaner is suitable for vacuuming and extracting
the following materials:
– Dusts with an exposition limit value ≥ 0.1 mg/m
3
The vacuum cleaner may generally not be used in rooms
where the danger of an explosion exists.
To save energy, only switch the vacuum cleaner on when us-
ing it.
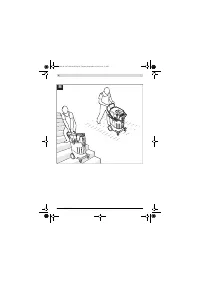
To ensure optimal vacuuming performance, always complete-
ly unwind the vacuum hose
27
from the vacuum cleaner lid
13
.
Dry Vacuuming
Vacuuming of deposited dusts
– Set the airflow regulator
6
to the hose diameter being
used.
– To switch the vacuum cleaner
on
, set the mode
selector switch
7
to the “vacuuming” symbol.
– To switch the vacuum cleaner
off
, set the mode
selector switch
7
to the “Off” symbol.
The vacuum cleaner is fitted with airflow monitoring. In the
“vacuuming” mode, the airflow monitoring is fixed on a value
of 20 m/s, irrespective of the setting of the airflow regulator
6
.
If the value falls below this, e.g. due to accumulated dirt in the
suction hose, a full dust bag or a clogged flat-fold filter, an au-
dible alarm signal will sound.In this case, switch off the vacu-
um cleaner and check it as stated in the section “Correction of
Malfunctions”.
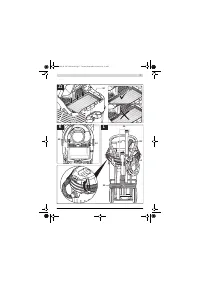
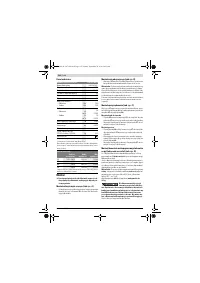
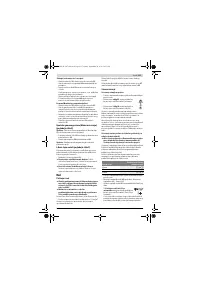
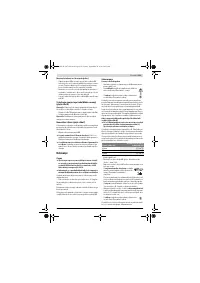
Extraction of dusts resulting from running power tools
(see figure G)
An adequate ventilation rate (L) must be provided for
when the outgoing air is circulated. Observe the re-
spective national regulations.
A socket outlet with earthing contact
5
is integrated in the
vacuum cleaner. An external power tool can be connected
there. Observe the maximal allowable load of the connected
power tool.
To ensure sufficient dust transport at the vacuum location,
the minimum airflow for the power tool connected must not
be fallen below.
– Set the airflow regulator
6
to the hose diameter being
used.
– Mount the tool sleeve
25
(see “Mounting the Tool Sleeve”,
page 21).
– Insert the tool sleeve
25
into the vacuum connection of the
power tool.
– To start the vacuum cleaner’s
automatic
Start/Stop feature
, set the mode selector
switch
7
to the “Automatic Start/Stop” sym-
bol.
In this operating mode, the airflow is electronically moni-
tored according to the setting of the airflow regulator
6
.
Sufficient dust transport is ensured when the setting is
correctly selected.
– To
start the operation
of the vac, switch on the power tool
connected to the socket
5
. The vacuum cleaner starts au-
tomatically.
– Switch the power tool off to
end
the
vacuuming
.
The delayed action shutdown of the Automatic Start/Stop
continues to run for up to 15 seconds in order to extract re-
sidual dust from the vacuum hose.
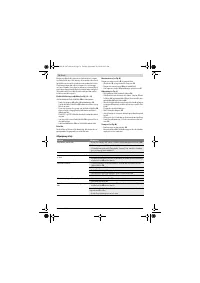
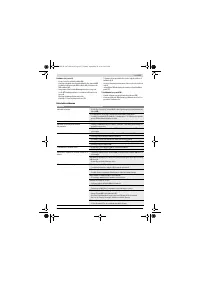
Hose Diameter
Airflow Setting Value
35 mm
57.9 m
3
/h
22 mm
41.2 m
3
/h
15 mm
12.7 m
3
/h
OBJ_BUCH-1747-003.book Page 22 Tuesday, September 30, 2014 10:13 AM
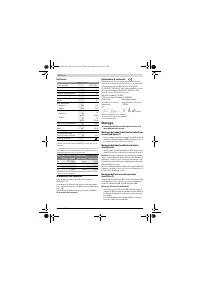
Характеристики

Остались вопросы?Не нашли свой ответ в руководстве или возникли другие проблемы? Задайте свой вопрос в форме ниже с подробным описанием вашей ситуации, чтобы другие люди и специалисты смогли дать на него ответ. Если вы знаете как решить проблему другого человека, пожалуйста, подскажите ему :)


