
Стиральная машина Kraft KF-LX 7101 BW - инструкция пользователя по применению, эксплуатации и установке на русском языке. Мы надеемся, она поможет вам решить возникшие у вас вопросы при эксплуатации техники.
Если остались вопросы, задайте их в комментариях после инструкции.
"Загружаем инструкцию", означает, что нужно подождать пока файл загрузится и можно будет его читать онлайн. Некоторые инструкции очень большие и время их появления зависит от вашей скорости интернета.


32
СТИРАЛЬНАЯ МАШИНА АВТОМАТ
AUTOMATIC WASHING MACHINE
ИНСТРУКЦИЯ ПО ЭКСПЛУАТАЦИИ • USEr GUIdE
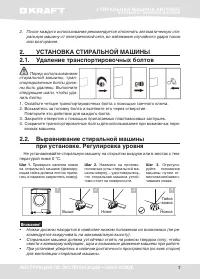
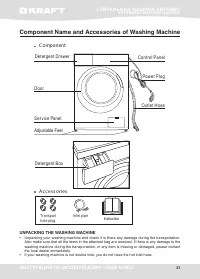
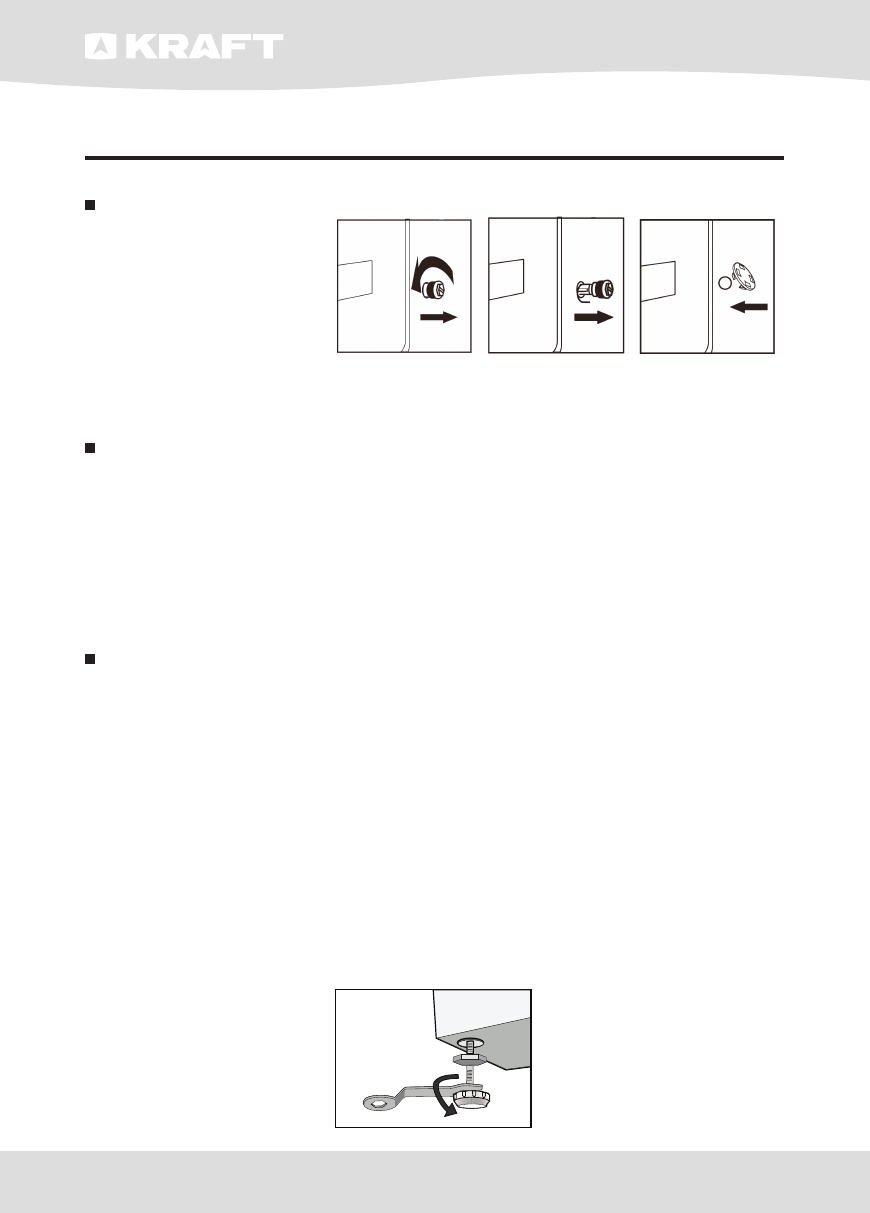
Install Washing Machine
Remove transit bolts
Before using this washing
machine, transit bolts
must be removed from the
backside of this machine.
Please take the following
steps to remove the bolts:
1. Loosen all bolts with spanner and then remove them.
2. Stop the holes with transport hole plugs.
3. Keep the transport bolts properly for future use.
Select the location
Before installing the washing machine, the location characterized as follows shall be selected:
• Rigid, dry, and level surface (if not level, please make it level with reference to the following figure
“Adjust Leg”)
• Avoid direct sunlight
• Sufficient ventilation
• Room temperature is above 0 C
• Keep far away from the heat resources such as coal or gas.
• Make sure that the washing machine will not stand on power cord.
• Do not install the washing machine on the carpet floor.
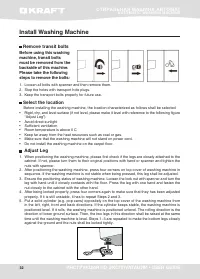
Adjust Leg
1. When positioning the washing machine, please first check if the legs are closely attached to the
cabinet. If not, please turn them to their original positions with hand or spanner and tighten the
nuts with spanner.
2. After positioning the washing machine, press four corners on top cover of washing machine in
sequence. If the washing machine is not stable when being pressed, this leg shall be adjusted.
3. Ensure the positioning status of washing machine. Loosen the lock nut with spanner and turn the
leg with hand until it closely contacts with the floor. Press the leg with one hand and fasten the
nut closely to the cabinet with the other hand.
4. After being locked properly, press four corners again to make sure that they has been adjusted
properly. If it is still unstable, it has to repeat Steps 2 and 3.
5. Put a solid cylinder (e.g. pop cans) oppositely on the top cover of the washing machine from
in the left, right, front and back directions. If the cylinder keeps stable, the washing machine is
positioned level. If it rolls, the washing machine is positioned unlevel. The rolling direction is the
direction of lower ground surface. Then, the two legs in this direction shall be raised at the same
time until the washing machine is level. Steps 1~3 are repeated to make the bottom legs closely
against the ground and the nuts shall be locked tightly.
Содержание
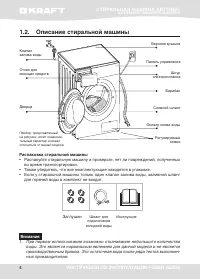
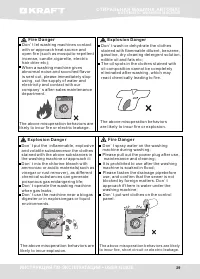
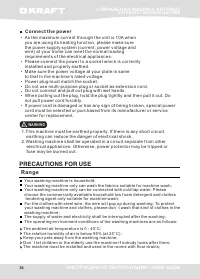
- 3 Меры безопасности и описание стиральной машины; Использование детьми и недееспособными людьми; только специалистами сервисных центров.
- 4 ПОЖАРООПАСНОСТЬ; Нарушения вышеперечисленных правил могут привести; ВЗРЫВООПАСНОСТЬ
- 5 ОПАСНОСТЬ ОЖОГА; ждению машины или белья.
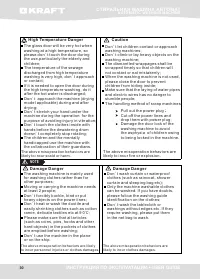
- 6 во время транспортировки.
- 7 УСТАНОВКА СТИРАЛЬНОЙ МАШИНЫ; Перед использованием; при установке. Регулировка уровня; комендуется выкручивать на максимальную высоту).
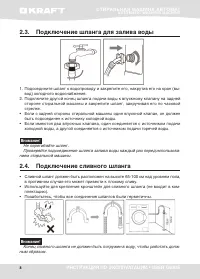
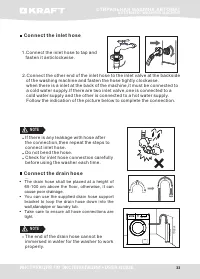
- 8 Подключение шланга для залива воды; быть подсоединен к источнику холодной воды.
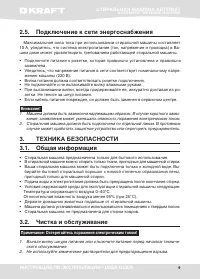
- 9 Подключение к сети энергоснабжения; Примечание: Остерегайтесь поражения электрическим током!
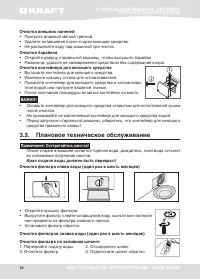
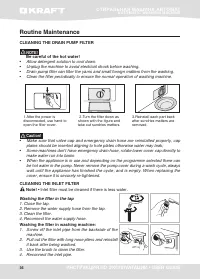
- 10 теля водой или протрите влажной тканью.; Очистка фильтра слива воды (один раз в шесть месяцев); ние предметы из фильтра сливного насоса.; Очистка фильтров залива воды (один раз в шесть месяцев)
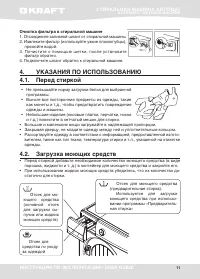
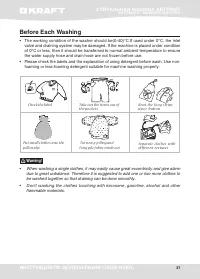
- 11 УКАЗАНИЯ ПО ИСПОЛЬЗОВАНИЮ
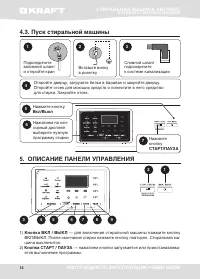
- 12 ОПИСАНИЕ ПАНЕЛИ УПРАВЛЕНИЯ; ) Кнопка ВКЛ / ВЫКЛ — для включения стиральной машины нажмите кнопку; ется выполнение программы.
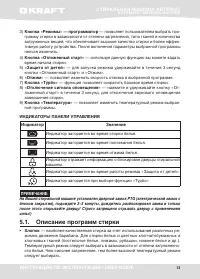
- 13 кнопки «Отложенный старт» и «Отжим».; ИНДИКАТОРЫ ПАНЕЛИ УПРАВЛЕНИЯ; Индикатор загорается во время стирки белья.
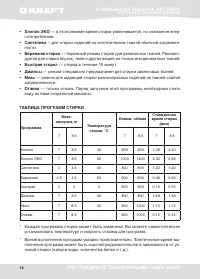
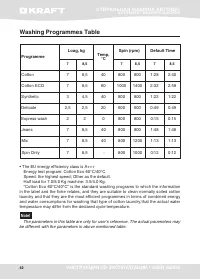
- 14 воду из бака стиральной машины.; ТАБЛИЦА ПРОГРАММ СТИРКИ; устанавливать температуру и скорость отжима для программ.
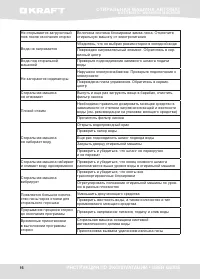
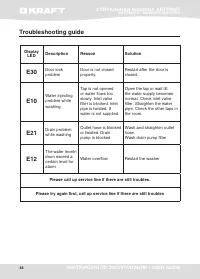
- 15 ДОПОЛНИТЕЛЬНЫЕ ФУНКЦИИ; жительность выполнения программы стирки.; РЕШЕНИЕ ПРОБЛЕМ, ВОЗНИКШИХ В ХОДЕ
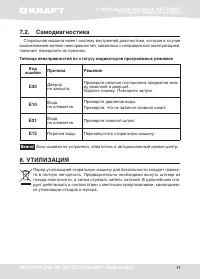
- 17 Код
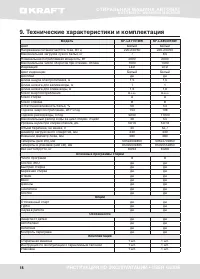
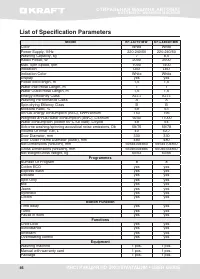
- 18 Технические характеристики и комплектация
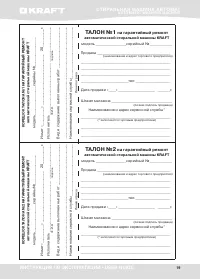
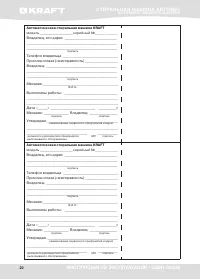
- 19 на гарантийный ремонт; на гарантийный ремонт
- 21 ТАЛОН No3; ТАЛОН No4
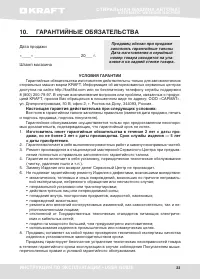
- 23 ГАРАНТИЙНЫЕ ОБЯЗАТЕЛЬСТВА; Дата продажи; УСЛОВИЯ ГАРАНТИИ; Настоящая гарантия действительна при следующих условиях:
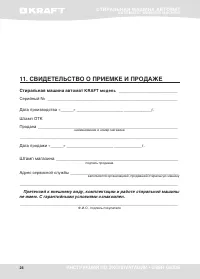
- 24 СВИДЕТЕЛЬСТВО О ПРИЕМКЕ И ПРОДАЖЕ; Стиральная машина автомат; KRAFT модель; не имею. С гарантийными условиями ознакомлен.
- 26 Contents
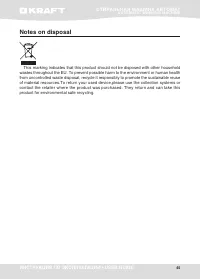
- 45 Notes on disposal


