
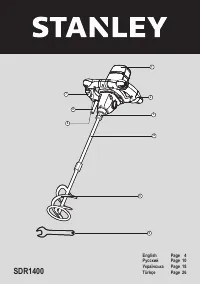
Шуруповерты Stanley SDR1400 - инструкция пользователя по применению, эксплуатации и установке на русском языке. Мы надеемся, она поможет вам решить возникшие у вас вопросы при эксплуатации техники.
Если остались вопросы, задайте их в комментариях после инструкции.
"Загружаем инструкцию", означает, что нужно подождать пока файл загрузится и можно будет его читать онлайн. Некоторые инструкции очень большие и время их появления зависит от вашей скорости интернета.


ENGLISH
(Original instructions)
6
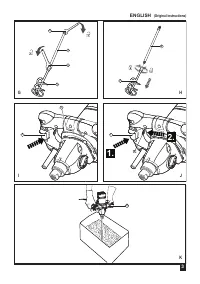
Position of data barcode (Fig.I)
The data barcode (10), including the year of manufacturing,
is printed on tool housing.
E.g.:
2015 XX ZY
Year of manufacturing
Package Content
1 stirrer
2 wrenches
1 instruction manual
Electrical safety
This tool is double insulated; therefore no earth
wire is required. Always check that the power
supply corresponds to the voltage on the rating
plate.
♦ Inspect tool cords periodically. If the supply cord is
damaged, it must be replaced by the manufacturer or
an authorised Stanley Fat Max Service Centre in order
to avoid a hazard.
Voltage drops
Inrush currents cause short-time voltage drops. Under
unfavourable power supply conditions, other equipment
may be affected. If the system impedance of the power
supply is lower than 0.34 Ω, disturbances are unlikely to
occur.
Using an extension cable
♦ Always use an approved extension cable suitable for
the power input of this tool (see technical data). Before
use, inspect the extension cable for signs of damage,
wear and ageing.
♦ Replace the extension cable if damaged or defective.
When using a cable reel, always unwind the cable
completely. Use of an extension cable not suitable
for the power input of the tool or which is damaged or
defective may result in a risk of fire and electric shock
Features
This tool includes some or all of the following features.
1. Air vents
2. Handle (left & right)
3. Socket
4. Shaft
5. Stirrer
6. lock-on button
7. Variable speed switch
8. Power cord with plug
9. Mounting spanner 22mm (x 2)
Assembly.
Unpacking.
♦ Unpack all parts and lay them on a flat, stable surface
♦ Remove all packing materials and shipping devices, if
applicable.
♦ Make sure the delivery contents are complete and
free of any damage. If you find that parts are missing
or show damage do not use the product but contact
your dealer. Using an incomplete or damaged product
represents a hazard to people and property.Ensure
that you have all the accessories and tools needed for
assembly and operation. This also includes suitable
personal protective equipment.
Warning!
The product and the packaging are not children’s
toys! Children must not play with plastic bags, sheets and
small parts! There is a danger of choking and suffocation!
Setup
Warning!
The product must be fully assembled before
operation! Do not use a product that is only partly
assembled or assembled with damaged parts! Follow the
assembly instructions step-by-step and use the pictures
provided as a visual guide to easily assemble the product!
Do not connect the product to power supply before it is
completely assembled!
Stirrer
Warning!
Stirrers are available in different types and with
different shape and diameters. Always use the correct
stirrer according to the intended use! Observe the technical
requirements of this product (see section “Technical
specifications”) when purchasing and using stirrer! Stirrer
becomes hot during use! Handle them carefully! Wear
protective gloves when handling stirrer in order to avoid
injuries like burns and cuts!
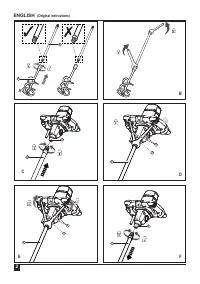
Attaching (Fig.A, Fig.B, Fig.
♦ Align the stirrer (5) with the shaft (4). Screw the stirrer
(5) clockwise onto the lower end
♦ Lock the welded nut of the shaft (4) with one mounting
spanner (9) and secure the stirrer (5) clockwise with the
other (9) gripping the welded nut (Fig. B).
Note!
Tighten the connection hand tight at first, before
using the spanners.
♦ Align the shaft (4) with the socket (3). Screw the shaft
end with welded nut clockwise into the socket (3) (Fig.
C).
♦ Lock the socket (3) with one mounting spanner (9) and
secure the shaft (4) clockwise with another mounting
spanner (9) gripping the welded nut (Fig. D).
Note!
Tighten the connection hand tight at first, before
using the spanners.
Removing/Replacing (Fig.E, Fig.F)
♦ Lock the socket (3) with one mounting spanner (9)
and loosen the shaft (4) anticlockwise with another


