
Шуруповерты Rebir IE 1305 А-16/1300 ЕR 07.001.00010 - инструкция пользователя по применению, эксплуатации и установке на русском языке. Мы надеемся, она поможет вам решить возникшие у вас вопросы при эксплуатации техники.
Если остались вопросы, задайте их в комментариях после инструкции.
"Загружаем инструкцию", означает, что нужно подождать пока файл загрузится и можно будет его читать онлайн. Некоторые инструкции очень большие и время их появления зависит от вашей скорости интернета.


1305 07.201
1
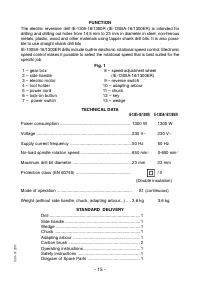
DRILLING
Proper operation and care is necessary for a long trouble-free service life of your tool.
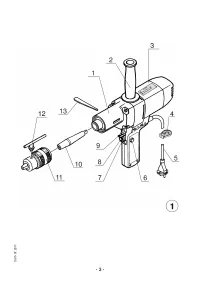
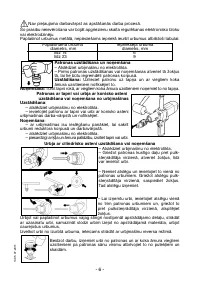
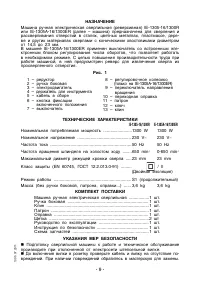
Use a side handle
2
(Fig. 1) provided for easy and safe work of the drill. Fasten the
side handle to the drill before starting the work.
For IE-1305A-16/1300ER rotation speed is adjusted by the movement the power
switch
7
(Fig. 1). It is equipped with built-in electronic variable speed adjustment.
Maximum speed is only recommended for drilling holes. Maximum speed is possible
with the adjusting wheel
8
set to «+» and the power switch depressed completely.
If it is not necessary to run the tool at full load (when carrying out some easy work,
e.g. preliminary centre-drilling), you can preselect a lower rotation speed. Set the
adjusting wheel to a position between «+» and «–». The drill will work at the speed
you have selected when you press the power switch completely on.
The drill is equipped with a reverse switch
9
. To change the rotational direction, slide
the reverse switch lever to the right or to the left. The left spindle rotation direction is
used to remove or back-out screws as well as to remove the drill bit from the hole.
Turn the drill off before changing the rotational direction.
Do not allow the drill to block stop during operation. Otherwise the electronic con-
trol and electric motor may be damaged.
Prior to drilling out a hole in metal it is necessary first to drill a hole of smaller diam-
eter and then drill out the lager hole diameter (see the table below).
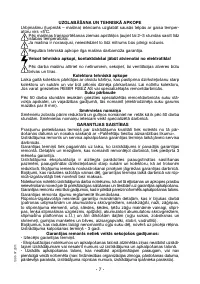
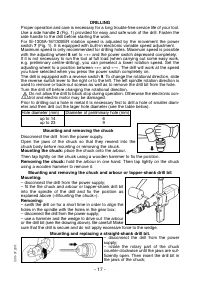
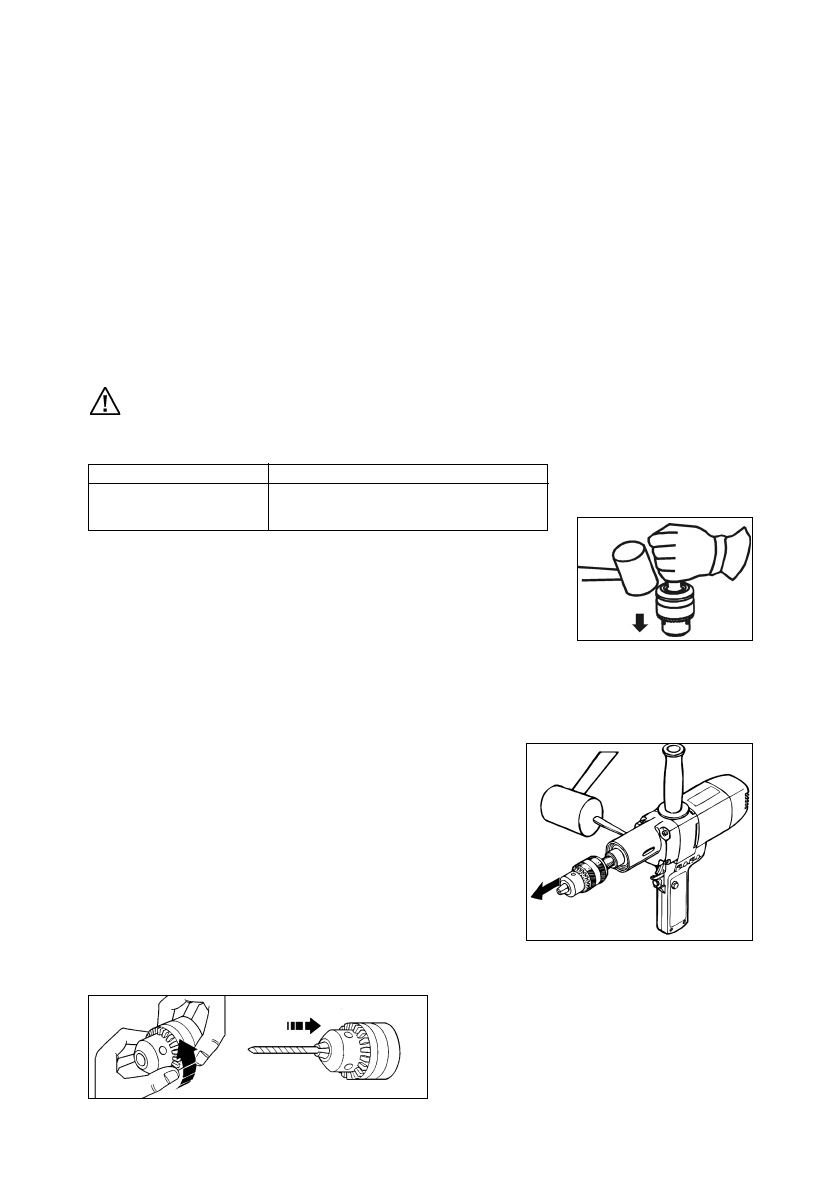
Mounting and removing the chuck
Disconnect the drill from the power supply.
Open the jaws of the chuck so that they resend into the
chuck body before mounting or removing the chuck.
Mounting the chuck:
place the chuck onto the arbour.
Then tap lightly on the chuck using a wooden hammer to fix the position.
Removing the chuck:
hold the arbour in one hand. Then tap lightly on the chuck
using a wooden hammer to remove it.
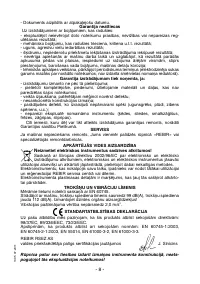
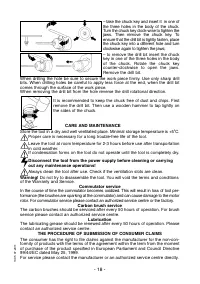
Mounting and removing the chuck and arbour or tapper-shank drill bit
Mounting:
– disconnect the drill from the power supply;
– fit the the chuck and arbour or tapper-shank drill bit
into the spindle of the drill and fix the position as
explaned above («Mounting the chuck»).
Removing:
– swith the drill on for a short time in order to align the
holes in the spindle with the holes in the gear box;
– disconnect the drill from the power supply;
– use a hammer and the wedge to drive out the arbour
or the drill bit (see the drawing above). Be careful! Make
sure that the drill is secure and do not apply excessive force to the wedge.
Mounting and replacing a straight-shank drill bit.
– disconnect the drill from the power
supply;
– rotate the rotary part of the chuck
counter-clockwise until the jaws are suf-
ficiently open. Then insert the drill bit in
the jaws of the chuck;
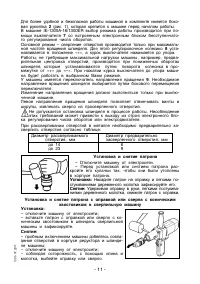
Hole diameter (mm)
Diameter of preliminary hole (mm)
up to 14
6
up to 23
9
- 17 -
Характеристики

Остались вопросы?Не нашли свой ответ в руководстве или возникли другие проблемы? Задайте свой вопрос в форме ниже с подробным описанием вашей ситуации, чтобы другие люди и специалисты смогли дать на него ответ. Если вы знаете как решить проблему другого человека, пожалуйста, подскажите ему :)


