
Шуруповерты Makita DTS141Z - инструкция пользователя по применению, эксплуатации и установке на русском языке. Мы надеемся, она поможет вам решить возникшие у вас вопросы при эксплуатации техники.
Если остались вопросы, задайте их в комментариях после инструкции.
"Загружаем инструкцию", означает, что нужно подождать пока файл загрузится и можно будет его читать онлайн. Некоторые инструкции очень большие и время их появления зависит от вашей скорости интернета.
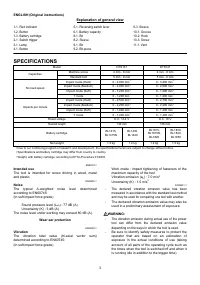


7
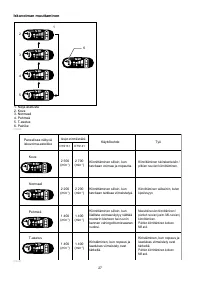
The impact force can be changed in four steps: hard,
medium, soft, and T mode.
This allows a tightening suitable to the work.
Every time the button
is pressed, the number of blows
changes in four steps.
For approximately one minute after releasing the switch
trigger, the impact force can be changed.
"T" is a special mode for fastening self drilling screws
and bolts. In this mode, the tool starts to drive a screw
with faster rotation, which is suited for drilling with the
self-drilling -screw tip. Once the tool starts to tighten the
screw, it impacts in soft force grade.
NOTE:
•
When all lamps on the switch panel go out, the tool is
turned off to save the battery power. The impact force
grade can be checked by pulling the switch trigger to
the extent that the tool does not operate.
•
While pulling the switch trigger, the impact force
grade cannot be changed.
•
The tool automatically stops to prevent the
damages on the parts during heavy load operation
with hard or medium impact force grade. In that
case select the soft or T mode impact force grade.
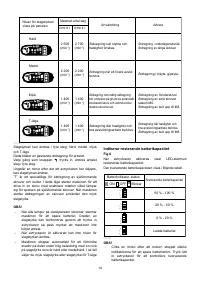
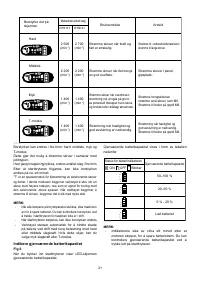
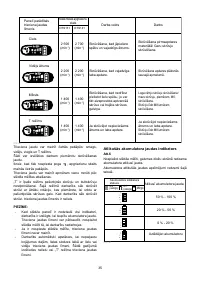
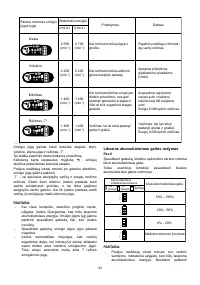
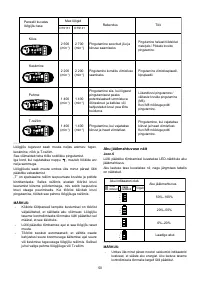
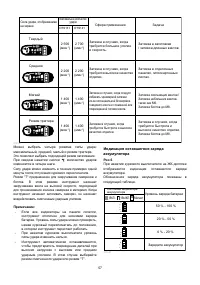
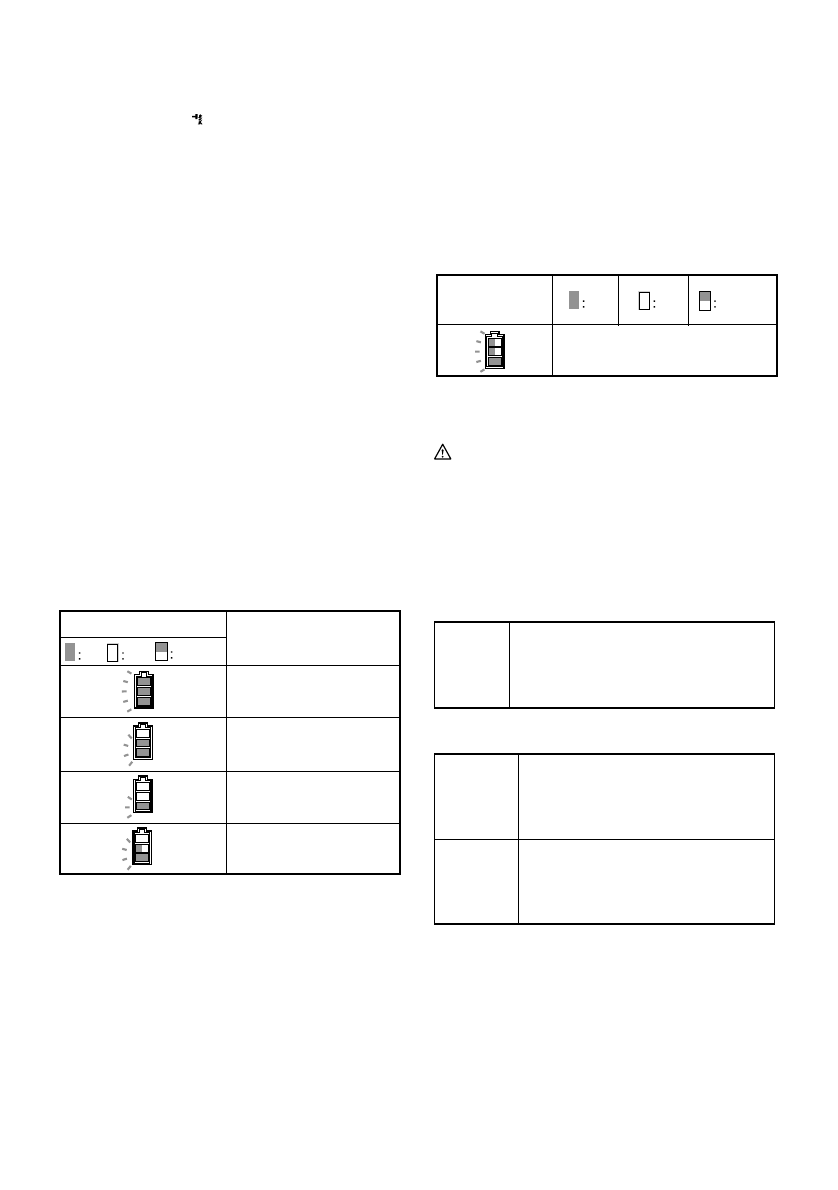
Indicating the remaining battery capacity
Fig.6
When you pull the switch trigger, the LED display shows
the remaining battery capacity.
The remaining battery capacity is shown as the following table.
B
attery
i
nd
i
cator
status
R
ema
i
n
i
ng
battery
capac
i
ty
50
% -
100
%
20
% -
50
%
0
% -
20
%
C
harge
the
battery
O
n
O
ff
Bli
nk
i
ng
015191
NOTE:
•
Approximately one minute after the motor stops, the
indicators go off to save the battery power. To check the
remaining battery capacity, slightly pull the switch trigger.
Tool / battery protection system
The tool is equipped with a tool/battery protection
system. This system automatically cuts off power to the
motor to extend tool and battery life.
The tool will automatically stop during operation if the
tool or battery are placed under one of the following
conditions. In some conditions, the indicator lights up.
Overload protection
When the tool is operated in a manner that causes it to
draw an abnormally high current, the tool automatically
stops without any indications. In this situation, turn the
tool off and stop the application that caused the tool to
become overloaded. Then turn the tool on to restart.
Overheat protection for tool
When the tool is overheated, the tool stops
automatically and the battery indicator shows following
state. In this situation, let the tool cool before turning the
tool on again.
B
attery
i
nd
i
cator
T
oo
l i
s
overheated
O
n
O
ff
Bli
nk
i
ng
015192
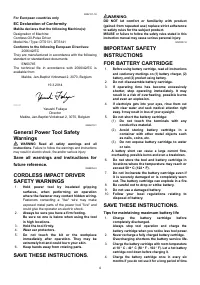
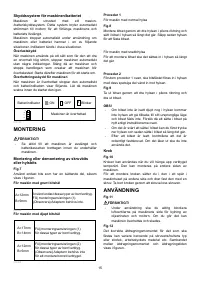
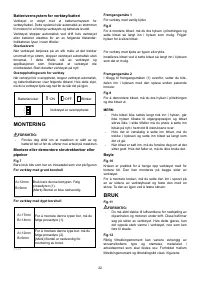
ASSEMBLY
CAUTION:
•
Always be sure that the tool is switched off and the
battery cartridge is removed before carrying out
any work on the tool.
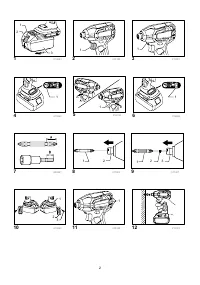
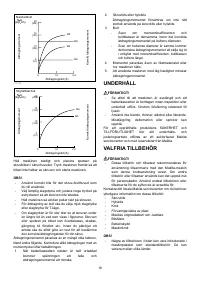
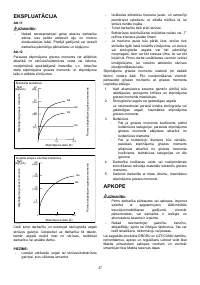
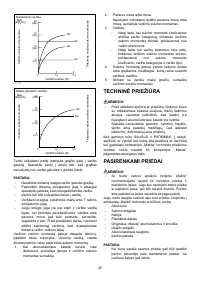
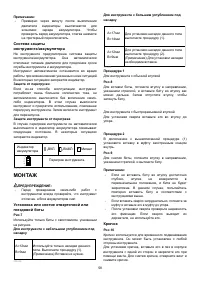
Installing or removing driver bit or socket bit
Fig.7
Use only bits that has inserting portion shown in the figure.
For tool with shallow bit hole
A
=
12mm
B=9
mm
U
se
on
l
y
these
type
of
b
i
t
. F
o
ll
ow
the
procedure
(1)
.
(
N
ote)
Bi
t
-
p
i
ece
i
s
not
necessary
.
006348
For tool with deep bit hole
T
o
i
nsta
ll
these
types
of
b
i
ts,
fo
ll
ow
the
procedure
(1)
.
T
o
i
nsta
ll
these
types
of
b
i
ts,
fo
ll
ow
the
procedure
(2)
.
(
N
ote)
Bi
t
-
p
i
ece
i
s
necessary
for
i
nsta
lli
ng
the
b
i
t
.
A
=
17mm
B=
1
4
mm
A
=
12mm
B=9
mm
011405
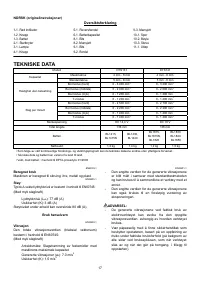
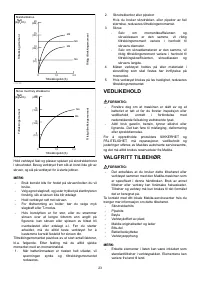
Procedure 1
For tool with normal sleeve
Fig.8
To install the bit, pull the sleeve in the direction of the
arrow and insert the bit into the sleeve as far as it will go.
Then release the sleeve to secure the bit.


