
Шуруповерты Makita DTD157RTJ - инструкция пользователя по применению, эксплуатации и установке на русском языке. Мы надеемся, она поможет вам решить возникшие у вас вопросы при эксплуатации техники.
Если остались вопросы, задайте их в комментариях после инструкции.
"Загружаем инструкцию", означает, что нужно подождать пока файл загрузится и можно будет его читать онлайн. Некоторые инструкции очень большие и время их появления зависит от вашей скорости интернета.


8 ENGLISH
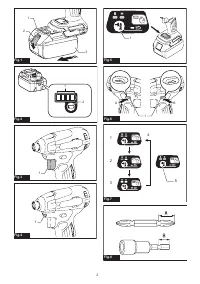
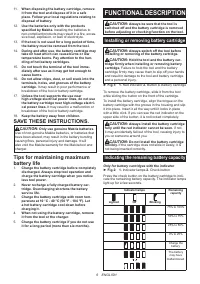
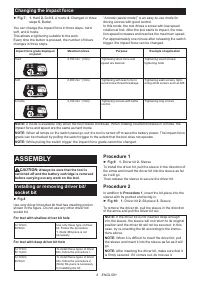
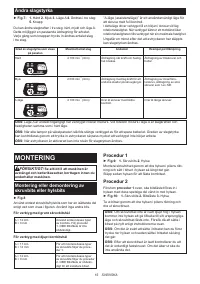
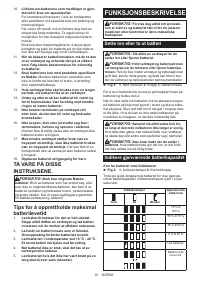
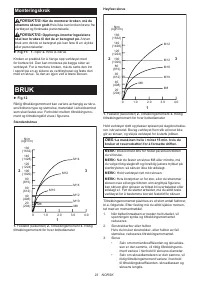
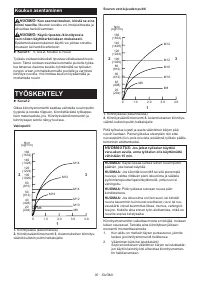
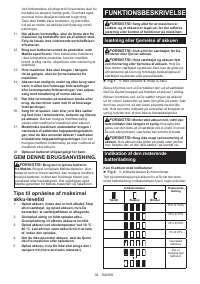
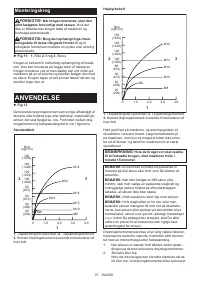
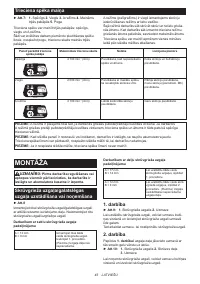
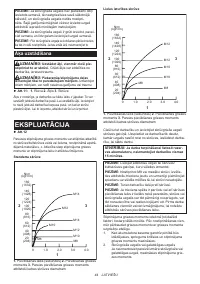
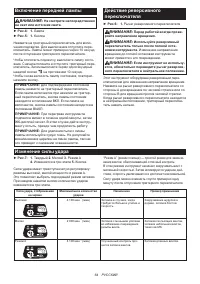
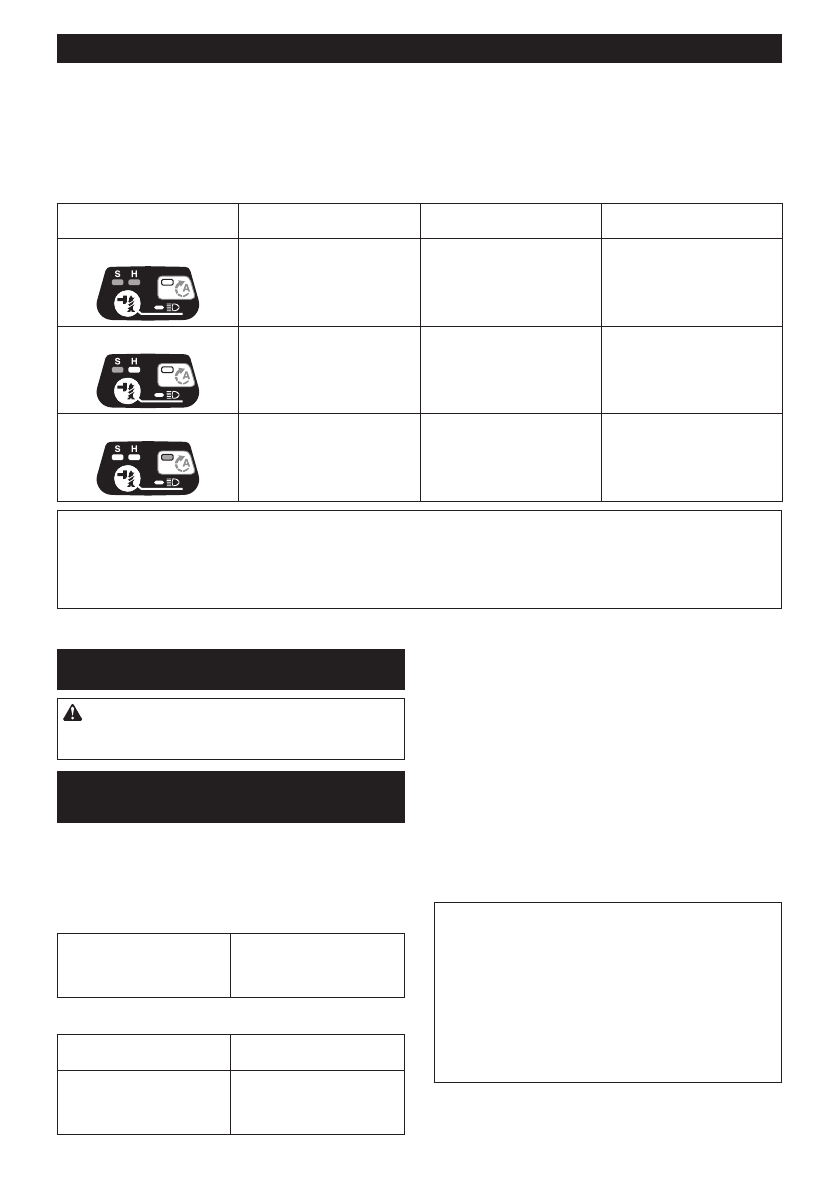
Changing the impact force
►
Fig.7:
1.
Hard
2.
Soft
3.
A mode
4.
Changed in three
steps
5.
Button
You can change the impact force in three steps: hard,
soft, and A mode.
This allows a tightening suitable to the work.
Every time the button is pressed, the number of blows
changes in three steps.
“A mode (assist mode)” is an easy-to-use mode for
driving screws with good control.
In this mode, the tool drives a screw with low-speed
rotation at first. After the tool starts to impact, the rota
-
tion speed increases and reaches the maximum speed.
For approximately one minute after releasing the switch
trigger, the impact force can be changed.
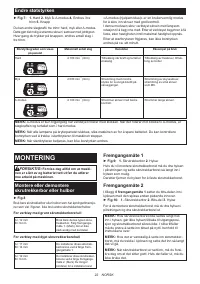
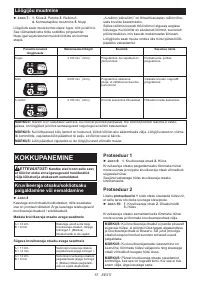
Impact force grade displayed
on panel
Maximum blows
Purpose
Example of application
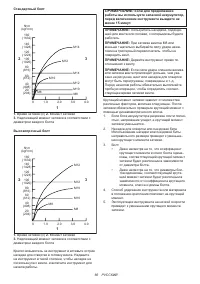
Hard
4,100 min
-1
(/min)
Tightening when force and
speed are desired.
Tightening wood screws,
tightening bolts.
Soft
2,000 min
-1
(/min)
Tightening with less force to
avoid screw thread breakage.
Tightening sash screws, tight-
ening small screws such as M6.
A mode
4,100 min
-1
(/min)
Tightening screws with better
control.
Tightening long screws.
NOTE:
A mode is available only when the tool rotates clockwise. When rotating counterclockwise in A mode, the
impact force and speed are the same as hard mode.
NOTE:
When all lamps on the switch panel go out, the tool is turned off to save the battery power. The impact force
grade can be checked by pulling the switch trigger to the extent that the tool does not operate.
NOTE:
While pulling the switch trigger, the impact force grade cannot be changed.
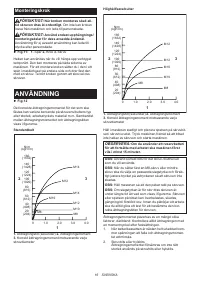
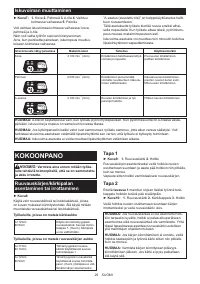
ASSEMBLY
CAUTION:
Always be sure that the tool is
switched off and the battery cartridge is removed
before carrying out any work on the tool.
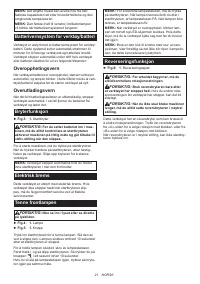
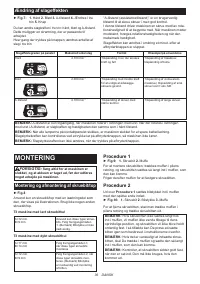
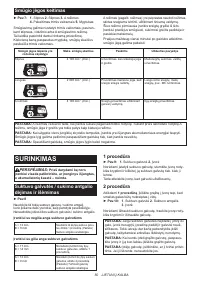
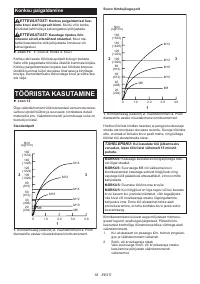
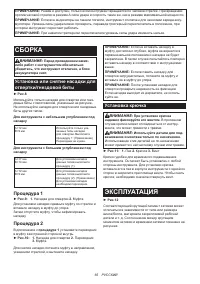
Installing or removing driver bit/
socket bit
►
Fig.8
Use only driver bit/socket bit that has inserting portion
shown in the figure. Do not use any other driver bit/
socket bit.
For tool with shallow driver bit hole
A=12mm
B=9mm
Use only these type of driver
bit. Follow the procedure
1. (Note) Bit-piece is not
necessary.
For tool with deep driver bit hole
A=17mm
B=14mm
To install these types of driver
bits, follow the procedure 1.
A=12mm
B=9mm
To install these types of driver
bits, follow the procedure 2.
(Note) Bit-piece is necessary
for installing the bit.
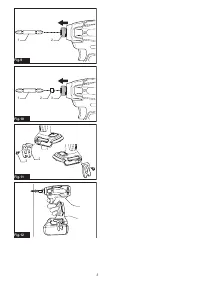
Procedure 1
►
Fig.9:
1.
Driver bit
2.
Sleeve
To install the driver bit, pull the sleeve in the direction of
the arrow and insert the driver bit into the sleeve as far
as it will go.
Then release the sleeve to secure the driver bit.
Procedure 2
In addition to
Procedure 1
, insert the bit-piece into the
sleeve with its pointed end facing in.
►
Fig.10:
1.
Driver bit
2.
Bit-piece
3.
Sleeve
To remove the driver bit, pull the sleeve in the direction
of the arrow and pull the driver bit out.
NOTE:
If the driver bit is not inserted deep enough
into the sleeve, the sleeve will not return to its original
position and the driver bit will not be secured. In this
case, try re-inserting the bit according to the instruc
-
tions above.
NOTE:
When it is difficult to insert the driver bit, pull
the sleeve and insert it into the sleeve as far as it will
go.
NOTE:
After inserting the driver bit, make sure that it
is firmly secured. If it comes out, do not use it.
Содержание
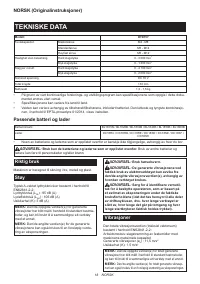
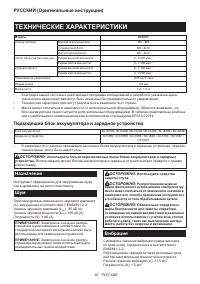
- 60 ТЕХНИЧЕСКИЕ ХАРАКТЕРИСТИКИ; Подходящий блок аккумулятора и зарядное устройство; Вибрация
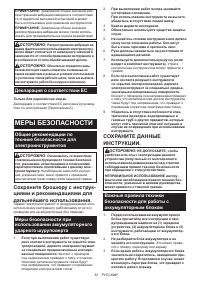
- 61 МЕРЫ БЕЗОПАСНОСТИ; Сохраните брошюру с инструк
- 62 СОХРАНИТЕ ДАННЫЕ
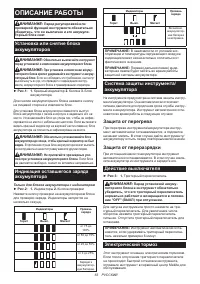
- 63 ОПИСАНИЕ РАБОТЫ; Защита от перегрева
- 64 Включение передней лампы
- 65 СБОРКА; Установка или снятие насадки для; ЭКСПЛУАТАЦИЯ
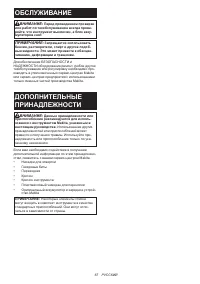
- 67 ОБСЛУЖИВАНИЕ
Характеристики

Остались вопросы?Не нашли свой ответ в руководстве или возникли другие проблемы? Задайте свой вопрос в форме ниже с подробным описанием вашей ситуации, чтобы другие люди и специалисты смогли дать на него ответ. Если вы знаете как решить проблему другого человека, пожалуйста, подскажите ему :)


