
Шуруповерты Makita DHP481RTE - инструкция пользователя по применению, эксплуатации и установке на русском языке. Мы надеемся, она поможет вам решить возникшие у вас вопросы при эксплуатации техники.
Если остались вопросы, задайте их в комментариях после инструкции.
"Загружаем инструкцию", означает, что нужно подождать пока файл загрузится и можно будет его читать онлайн. Некоторые инструкции очень большие и время их появления зависит от вашей скорости интернета.


7
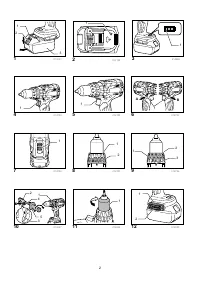
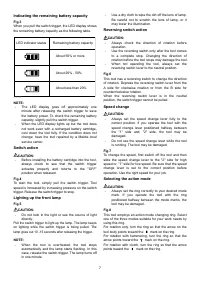
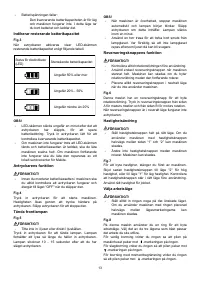
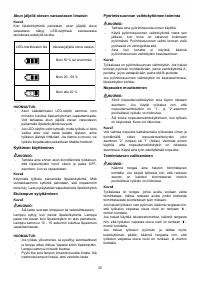
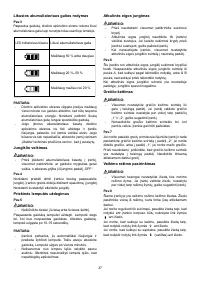
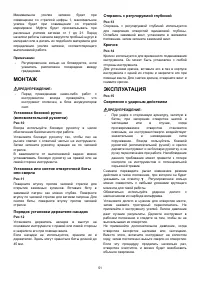
Indicating the remaining battery capacity
Fig.3
When you pull the switch trigger, the LED display shows
the remaining battery capacity as the following table.
LED indicator status
Remaining battery capacity
About 50% or more
About 20% - 50%
About less than 20%
013980
NOTE:
•
The LED display goes off approximately one
minute after releasing the switch trigger to save
the battery power. To check the remaining battery
capacity, slightly pull the switch trigger.
•
When the LED display lights up but the tool does
not work even with a recharged battery cartridge,
cool down the tool fully. If the condition does not
change, have the tool repaired by a Makita local
service center.
Switch action
CAUTION:
•
Before installing the battery cartridge into the tool,
always check to see that the switch trigger
actuates properly and returns to the "OFF"
position when released.
Fig.4
To start the tool, simply pull the switch trigger. Tool
speed is increased by increasing pressure on the switch
trigger. Release the switch trigger to stop.
Lighting up the front lamp
Fig.5
CAUTION:
•
Do not look in the light or see the source of light
directly.
Pull the switch trigger to light up the lamp. The lamp keeps
on lighting while the switch trigger is being pulled. The
lamp goes out 10 -15 seconds after releasing the trigger.
NOTE:
•
When the tool is overheated, the tool stops
automatically and the lamp starts flashing. In this
case, release the switch trigger. The lamp turns off
in one minute.
•
Use a dry cloth to wipe the dirt off the lens of lamp.
Be careful not to scratch the lens of lamp, or it
may lower the illumination.
Reversing switch action
CAUTION:
•
Always check the direction of rotation before
operation.
•
Use the reversing switch only after the tool comes
to a complete stop. Changing the direction of
rotation before the tool stops may damage the tool.
•
When not operating the tool, always set the
reversing switch lever to the neutral position.
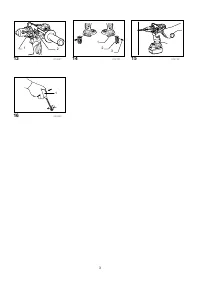
Fig.6
This tool has a reversing switch to change the direction
of rotation. Depress the reversing switch lever from the
A side for clockwise rotation or from the B side for
counterclockwise rotation.
When the reversing switch lever is in the neutral
position, the switch trigger cannot be pulled.
Speed change
CAUTION:
•
Always set the speed change lever fully to the
correct position. If you operate the tool with the
speed change lever positioned halfway between
the "1" side and, "2" side, the tool may be
damaged.
•
Do not use the speed change lever while the tool
is running. The tool may be damaged.
Fig.7
To change the speed, first switch off the tool and then
slide the speed change lever to the "2" side for high
speed or, "1" side for low speed. Be sure that the speed
change lever is set to the correct position before
operation. Use the right speed for your job.
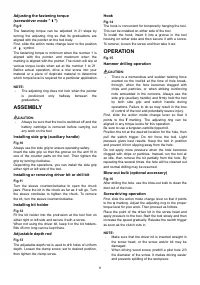
Selecting the action mode
CAUTION:
•
Always set the ring correctly to your desired mode
mark. If you operate the tool with the ring
positioned halfway between the mode marks, the
tool may be damaged.
Fig.8
This tool employs an action mode changing ring. Select
one of the three modes suitable for your work needs by
using this ring.
For rotation only, turn the ring so that the arrow on the
tool body points toward the
mark on the ring.
For rotation with hammering, turn the ring so that the
arrow points toward the
mark on the ring.
For rotation with clutch, turn the ring so that the arrow
points toward the
mark on the ring.
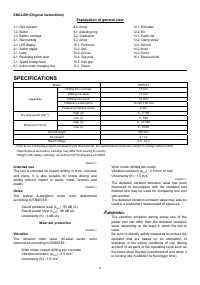
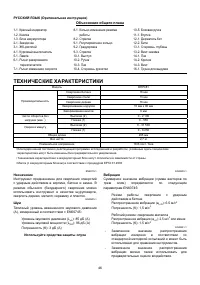
Характеристики

Остались вопросы?Не нашли свой ответ в руководстве или возникли другие проблемы? Задайте свой вопрос в форме ниже с подробным описанием вашей ситуации, чтобы другие люди и специалисты смогли дать на него ответ. Если вы знаете как решить проблему другого человека, пожалуйста, подскажите ему :)


