
Шуруповерты Festool DWC 18-4500 Li Basic 574747 - инструкция пользователя по применению, эксплуатации и установке на русском языке. Мы надеемся, она поможет вам решить возникшие у вас вопросы при эксплуатации техники.
Если остались вопросы, задайте их в комментариях после инструкции.
"Загружаем инструкцию", означает, что нужно подождать пока файл загрузится и можно будет его читать онлайн. Некоторые инструкции очень большие и время их появления зависит от вашей скорости интернета.


18
D U R A D R I V E
GB
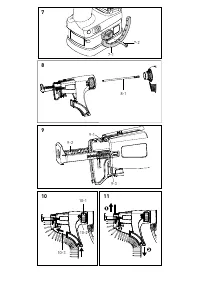
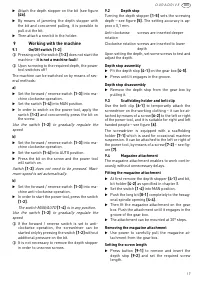
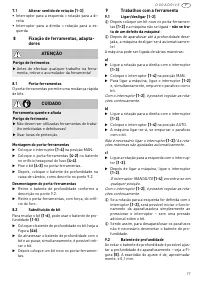
Read the set screw length on the depth stop sides
[9-3]
.
Inserting collated screw strips
Pull the collated screws
[10-3]
through the bot-
tom guiding of the attachment, then push the
strip through the second guiding until it engag-
es in the working position.
Pull the belt slightly to make sure that it is safe-
ly fitted.
Make sure that the first screw is in the screwing
axes – see figure
[10]
.
Use the wheel
[10-1]
to set the required screw-
ing depth.
Turn to the right for inserting the screws deeper,
and to the left to screw to lower depth. The ac-
tual setting position is visible on the presetting
indicator
[10-2]
.
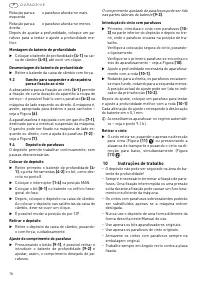
Upon setting, set some screws for testing and use
the wheel
[10-1]
to adjust the depth, if required.
Each setting change complies with the stop shift o
± 0.1 mm.
We recommend to screw in automatic mode –
see point 9.1 b).
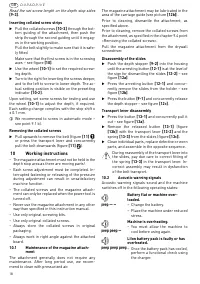
Removing the collated screws
Pull upwards to remove the belt (figure
[11]
)
or press the transport lever and concurrently
pull the belt downwards (figure
[11]
).
10
Working instructions
– The magazine attachment must not be held in the
depth stop area as there are moving parts!
– Each screw adjustment must be completed. In-
terrupted fastening or releasing of the pressure
during adjustment can result in unsatisfactory
machine function.
– The collated screws and the magazine attach-
ment can only be replaced when the power tool is
turned off.
– Never use the magazine attachment in any other
way than specified in this instruction manual.
– Use only original screwing bits.
– Use only original collated screws.
– Always store the collated screws in original
packaging.
– Always work in right angle against the attached
board.
10.1
Maintenance of the magazine attach-
ment
The attachment generally does not require any
maintenance. After long period use, we recom-
mend to clean with pressurized air.
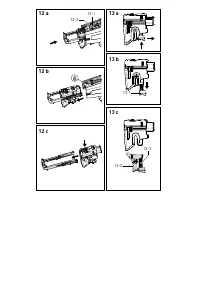
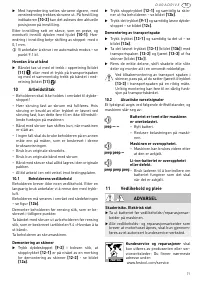
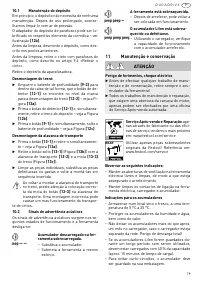
The magazine attachment may be lubricated in the
area of the carriage guide (see picture
[12b]
).
Prior to cleaning, dismantle the attachment, as
specified above.
Prior to cleaning, remove the collated screws from
the attachment, as specified in the chapter 9.4 point
<Removing the collated screws>.
Pull the magazine attachment from the drywall
screwdriver.
Disassembly of the slides
Push the depth stopper
[9-2]
into the housing
until the arresting button
[12-1]
is at the level of
the sign for dismantling the slides
[12-2]
– see
figure
[12a]
.
Press the arresting button
[12-1]
and concur-
rently remove the slides from the holder – see
figure
[12b]
.
Press the button
[9-1]
and concurrently release
the depth stopper – see figure
[12c]
.
Transport lever disassembly
Press the button
[13-1]
and concurrently pull it
out – see figure
[13a]
.
Remove the released button
[13-1]
(figure
[13b]
) with the transport lever
[13-2]
and the
spring
[13-3]
from the slides (figure
[13c]
).
Clean individual parts, replace defective or worn
parts, and assemble in the opposite sequence.
During reassembly of the transport lever into
the slides, pay due care to correct fitting of
the spring
[13-3]
in the transport lever. In-
correct assembly may result in dysfunction
of the belt transport.
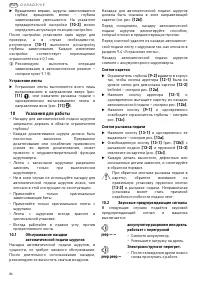
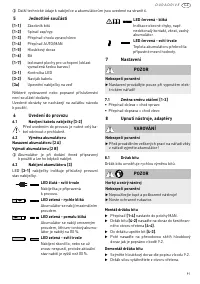
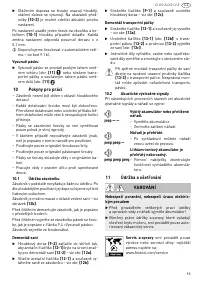
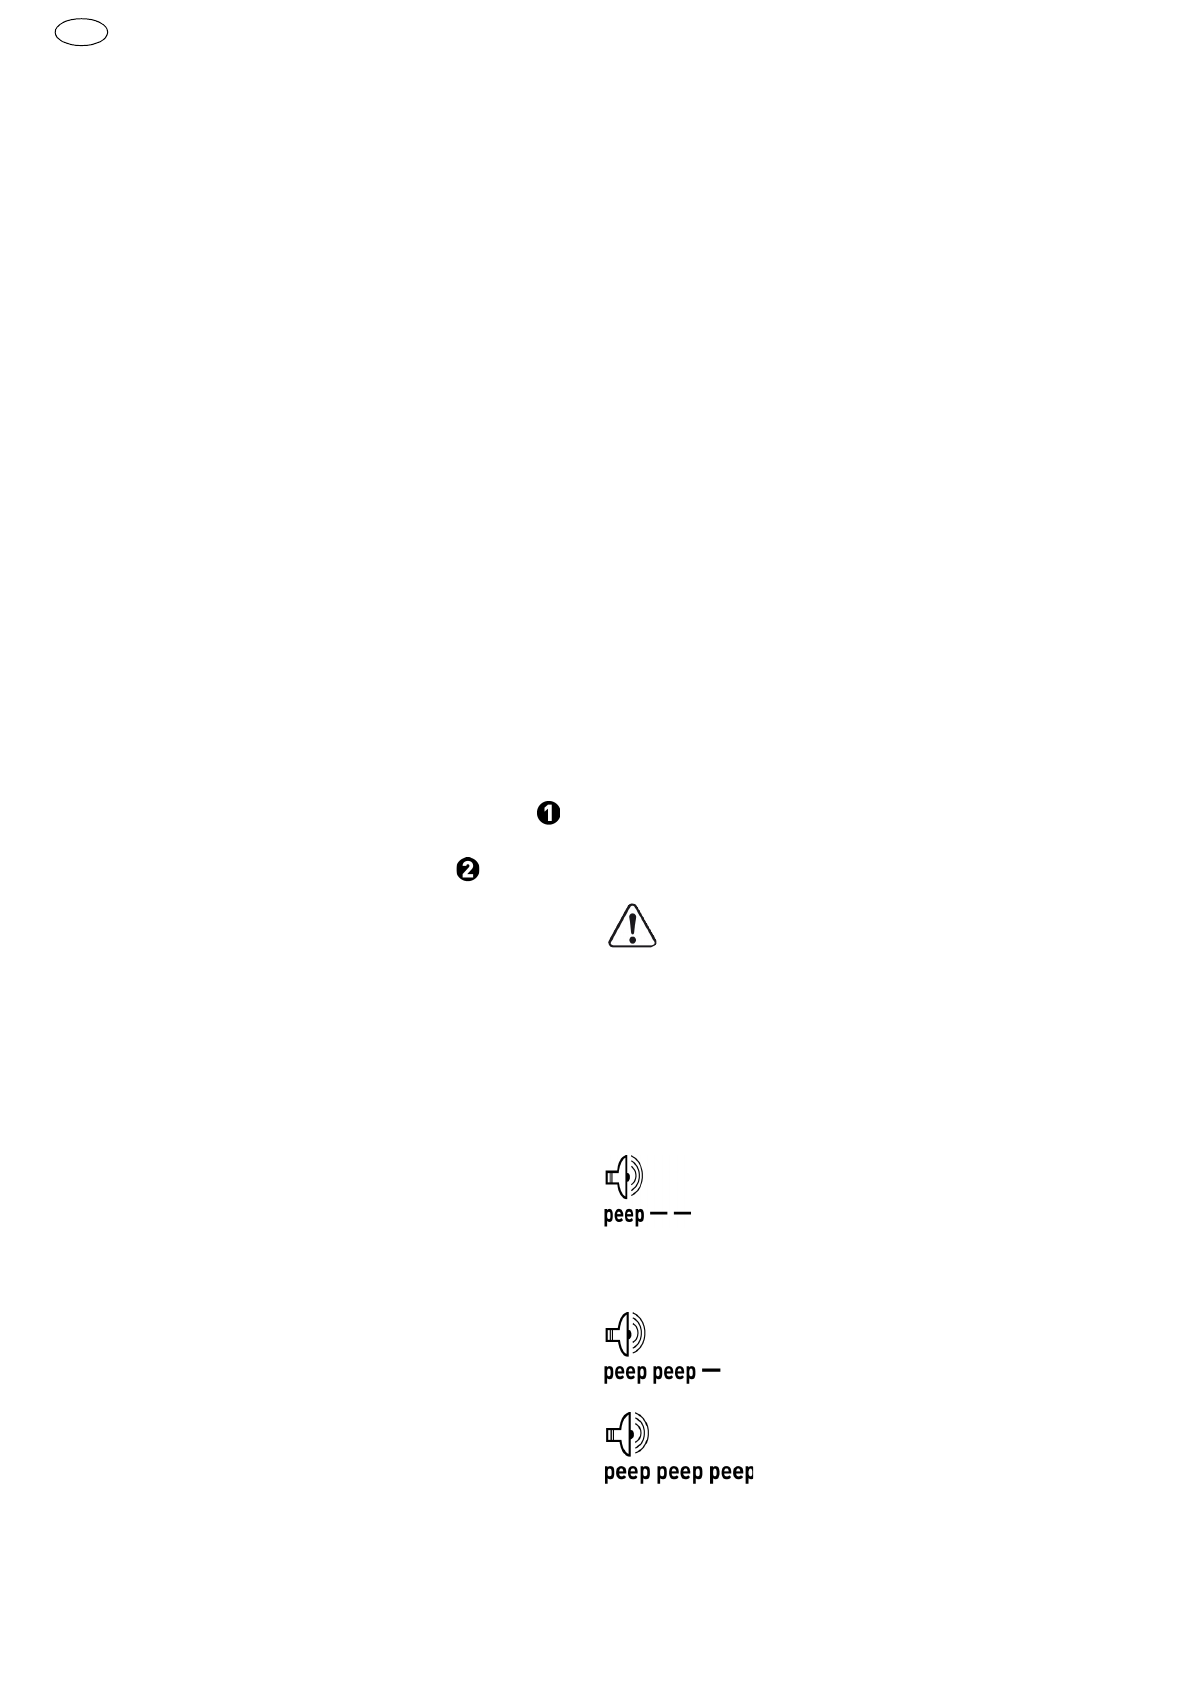
10.2
Acoustic warning signals
Acoustic warning signals sound and the machine
switches off in the following operating states:
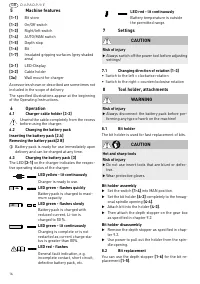
Battery flat or machine over-
loaded.
– Change the battery.
– Place the machine under reduced
stress.
Machine is overheating.
– You must allow the machine to
cool before using again.
LiIon battery pack is faulty or has
overheated.
– Once the battery pack has cooled,
perform a functional check using
the charger.


