
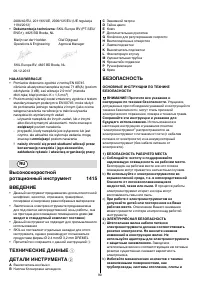
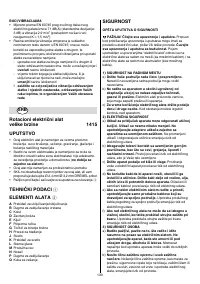
Шлифмашины Skil 1415LC - инструкция пользователя по применению, эксплуатации и установке на русском языке. Мы надеемся, она поможет вам решить возникшие у вас вопросы при эксплуатации техники.
Если остались вопросы, задайте их в комментариях после инструкции.
"Загружаем инструкцию", означает, что нужно подождать пока файл загрузится и можно будет его читать онлайн. Некоторые инструкции очень большие и время их появления зависит от вашей скорости интернета.


11
! before switching off the tool, you should lift it
from the workpiece
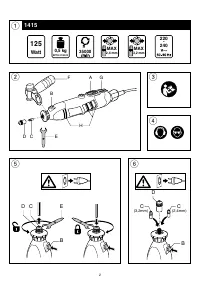
• Speed control
8
For optimal results on different materials
- select speed with wheel G (also while tool is running)
- use table
9
as reference for determining the right
speed
- before starting a job, find the optimal speed by testing
out on spare material
! after longer periods of working at low speed, allow
the tool to cool down by running it for
approximately 3 minutes at high speed with no load
• Holding and guiding the tool
0
- pencil grip for precision work (engraving)
- one-hand grip for less precise work (grinding)
- support grip for additional control/comfort
- do not apply too much pressure on the tool; let the
speed do the work for you
• Support grip
!
- can be adjusted as illustrated
- can be mounted in 4 different positions
• Spot light (
not standard included
)
@
Switch on/off spotlight J by turning knob K counter-
clockwise/clockwise
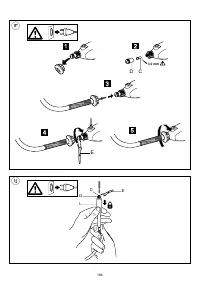
• Flexible shaft (
not standard included
)
#
- mount flexible shaft as illustrated
- use flexible shaft for hard-to-reach places
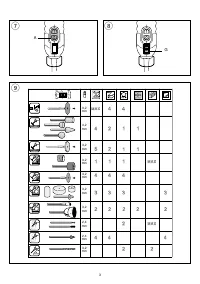
Changing accessories when using flexible shaft
$
- pull sleeve L down (= lock spindle) and hold it while
you turn collet nut D by hand until the spindle lock
prevents further rotation and loosen collet nut D with
wrench E
- insert an accessory in collet C
- pull sleeve L down (= lock spindle) and hold it while
you tighten collet nut D with wrench E
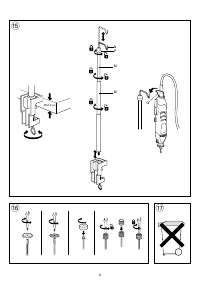
• Mounting stand (
not standard included
)
%
- mount stand on a workbench or table-top with a
maximum thickness of 60 mm
- adjust height of stand by turning tubes M counter-
clockwise, pulling them to desired height, and turning
them clockwise
- adjust height of suspension bracket N by loosening
knob P, adjusting suspension bracket to desired
height, and tightening knob P
- attach tool to suspension bracket with hook Q
• Assembly of specific accessories
^
MAINTENANCE / SERVICE
• This tool is not intended for professional use
• Always keep tool and cord clean (especially ventilation
slots H
2
)
! disconnect the plug before cleaning
• If the tool should fail despite the care taken in
manufacturing and testing procedures, repair should be
carried out by an after-sales service centre for SKIL
power tools
- send the tool
undismantled
together with proof of
purchase to your dealer or the nearest SKIL service
station (addresses as well as the service diagram of
the tool are listed on www.skil.com)
ENVIRONMENT
•
Do not dispose of electric tools, accessories and
packaging together with household waste material
(only for EU countries)
- in observance of European Directive 2012/19/EC on
waste of electric and electronic equipment and its
implementation in accordance with national law,
electric tools that have reached the end of their life
must be collected separately and returned to an
environmentally compatible recycling facility
- symbol
&
will remind you of this when the need for
disposing occurs
DECLARATION OF CONFORMITY
• We declare under our sole responsibility that the product
described under “Technical data” is in conformity with the
following standards or standardization documents: EN
60745, EN 61000, EN 55014, in accordance with the
provisions of the directives 2004/108/EC, 2006/42/EC,
2011/65/EU, 2009/125/EC (EU regulation 1194/2012)
•
Technical file at
: SKIL Europe BV (PT-SEU/ENG1),
4825 BD Breda, NL
¹ÊÁÂÆιƼ½ÊÇǾ¼½Æ
ȽʹÌÁÇÆËŵÆ¿Áƽ½ÊÁÆ¿
ÍÊÇȽƓˁ˅ʿ˂ ʽ¼¹Ɠ
Ĺ¾ ÁÂÿʹ¹¾
ÈÈÊÇιĹƹ¿½Ê
09.12.2013
NOISE/VIBRATION
• Measured in accordance with EN 60745 the sound
pressure level of this tool is 71 dB(A) (standard deviation:
3 dB) and the vibration 2.9 m/s² (hand-arm method;
uncertainty K = 1.5 m/s²)
• The vibration emission level has been measured in
accordance with a standardised test given in EN 60745; it
may be used to compare one tool with another and as a
preliminary assessment of exposure to vibration when
using the tool for the applications mentioned
- using the tool for different applications, or with different
or poorly maintained accessories, may significantly
increase
the exposure level
- the times when the tool is switched off or when it is
running but not actually doing the job, may significantly
reduce
the exposure level
! protect yourself against the effects of vibration
by maintaining the tool and its accessories,
keeping your hands warm, and organizing your
work patterns
Характеристики

Остались вопросы?Не нашли свой ответ в руководстве или возникли другие проблемы? Задайте свой вопрос в форме ниже с подробным описанием вашей ситуации, чтобы другие люди и специалисты смогли дать на него ответ. Если вы знаете как решить проблему другого человека, пожалуйста, подскажите ему :)


