
Шлифмашины Makita GA5021C - инструкция пользователя по применению, эксплуатации и установке на русском языке. Мы надеемся, она поможет вам решить возникшие у вас вопросы при эксплуатации техники.
Если остались вопросы, задайте их в комментариях после инструкции.
"Загружаем инструкцию", означает, что нужно подождать пока файл загрузится и можно будет его читать онлайн. Некоторые инструкции очень большие и время их появления зависит от вашей скорости интернета.


9
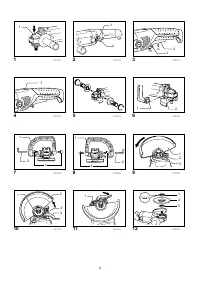
Switch action
CAUTION:
•
Before plugging in the tool, always check to see
that the switch trigger actuates properly and
returns to the "OFF" position when released.
For tool with type A switch trigger
Fig.2
For tool without lock button and lock-off button
To start the tool, simply pull the switch trigger. Release
the switch trigger to stop.
For tool with lock button
To start the tool, simply pull the switch trigger. Release
the switch trigger to stop.
For continuous operation, pull the switch trigger and
then push in the lock button.
To stop the tool from the locked position, pull the switch
trigger fully, then release it.
For tool with lock-off button
To prevent the switch trigger from being accidentally
pulled, a lock-off button is provided.
To start the tool, depress the lock-off button and pull the
switch trigger. Release the switch trigger to stop.
For tool with typeB switch trigger
Fig.3
For tool with the lock-on switch
To start the tool, simply pull the switch trigger (A).
Release the switch trigger to stop. For continuous
operation, pull the switch trigger (A) and then push in the
lock lever (B). To stop the tool from the locked position,
pull the switch trigger (A) fully, then release it.
For tool with the lock-off switch
To prevent the switch trigger from accidentally pulled, a
lock lever is provided. To start the tool, push in the lock
lever (B) and then pull the switch trigger (A). Release the
switch trigger to stop.
For tool with the lock on and lock-off switch
To prevent the switch trigger from accidentally pulled, a
lock lever is provided. To start the tool, push in the lock
lever (B) and then pull the switch trigger (A). Release the
switch trigger to stop. For continuous operation, push in
the lock lever (B), pull the switch trigger and then push
the lock lever further in (B). To stop the tool from the
locked position, pull the switch trigger (A) fully, then
release it.
Electronic function
Constant speed control (For models
GA5020C,GA5021C,GA6020C,GA6021C)
•
Possible to get fine finish, because the rotating
speed is kept constantly even under the loaded
condition.
•
Additionally, when the load on the tool exceeds
admissible levels, power to the motor is reduced to
protect the motor from overheating. When the load
returns to admissible levels, the tool will operate as
normal.
Soft start feature
•
Soft start because of suppressed starting shock.
Indication lamp
Fig.4
The indication lamp lights up green when the tool is
plugged. If the indication lamp does not light up, the
mains cord or the controller may be defective. The
indication lamp is lit but the tool does not start even if the
tool is switched on, the carbon brushes may be worn out,
or the controller, the motor or the ON/OFF switch may be
defective.
Unintentional restart proof
Even locking lever keeping the switch trigger depressed
(Lock-on position) does not allow the tool to restart even
when the tool is plugged.
At this time, the indication lamp flickers red and shows
the unintentional restart proof device is on function.
To cancel the unintentional restart proof, pull the switch
trigger fully, then release it.
ASSEMBLY
CAUTION:
•
Always be sure that the tool is switched off and
unplugged before carrying out any work on the
tool.
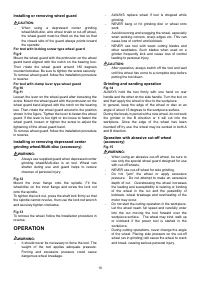
Installing side grip (handle)
CAUTION:
•
Always be sure that the side grip is installed
securely before operation.
Fig.5
Screw the side grip securely on the position of the tool
as shown in the figure.
Installing loop handle (Accessory)
CAUTION:
•
Always be sure that the loop handle is installed
securely before operation.
Fig.6
Always install the loop handle on the tool before
operation. Hold the tool's switch handle and the loop
handle firmly with both hands during operation.
Install the loop handle so that its protrusion will fit into
the matching hole in the gear housing.
Install the bolts and tighten them with the hex wrench.
The loop handle can be installed in two different
directions as shown in the figures whichever is
convenient for your work.
Fig.7
Fig.8
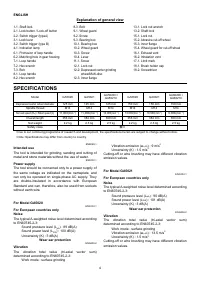
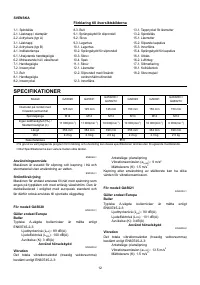
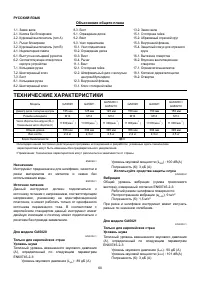
Характеристики

Остались вопросы?Не нашли свой ответ в руководстве или возникли другие проблемы? Задайте свой вопрос в форме ниже с подробным описанием вашей ситуации, чтобы другие люди и специалисты смогли дать на него ответ. Если вы знаете как решить проблему другого человека, пожалуйста, подскажите ему :)


