
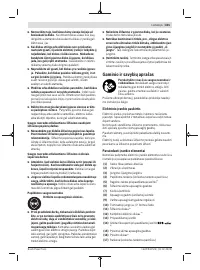
Шлифмашины Bosch GWS 22-230 LVI - инструкция пользователя по применению, эксплуатации и установке на русском языке. Мы надеемся, она поможет вам решить возникшие у вас вопросы при эксплуатации техники.
Если остались вопросы, задайте их в комментариях после инструкции.
"Загружаем инструкцию", означает, что нужно подождать пока файл загрузится и можно будет его читать онлайн. Некоторые инструкции очень большие и время их появления зависит от вашей скорости интернета.


22
| English
ent applications, with different application tools or poorly
maintained, the vibration level may differ. This can signific-
antly increase the exposure to vibration over the total work-
ing period.
To estimate the exposure to vibration accurately, the times
when the tool is switched off or when it is running but not ac-
tually being used should also be taken into account. This can
significantly reduce the exposure to vibration over the total
working period.
Implement additional safety measures to protect the oper-
ator from the effects of vibration, such as servicing the
power tool and application tools, keeping the hands warm,
and organising workflows correctly.
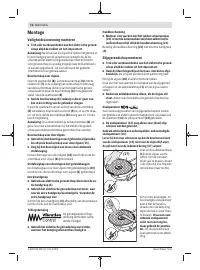
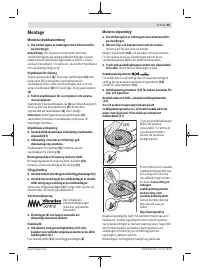
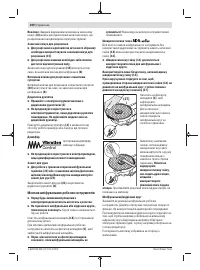
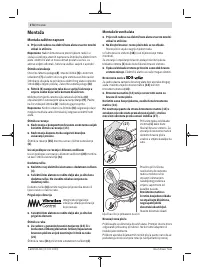
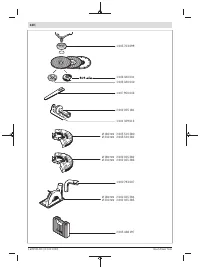
Fitting
Fitting protective equipment
u
Pull the plug out of the socket before carrying out any
work on the power tool.
Note:
If the grinding disc breaks during operation or the
holding fixtures on the protective guard/power tool become
damaged, the power tool must be sent to the after-sales ser-
vice immediately; see the "After-Sales Service and Applica-
tion Service" section for addresses.
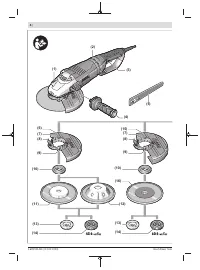
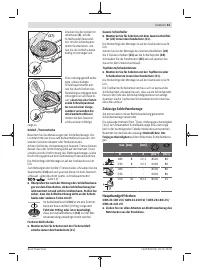
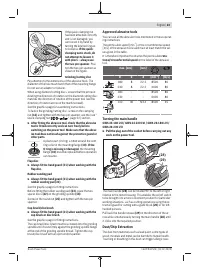
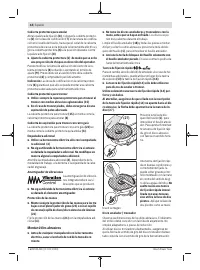
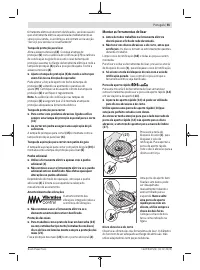
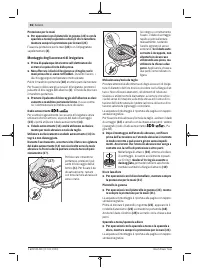
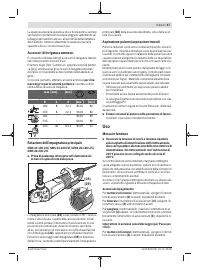
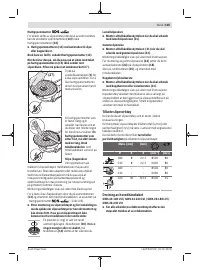
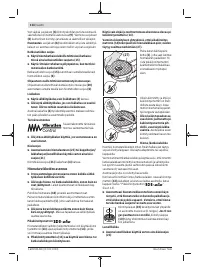
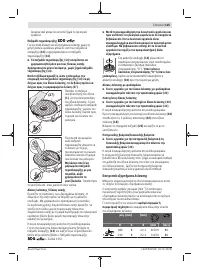
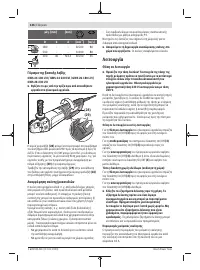
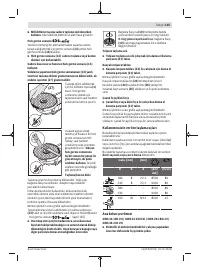
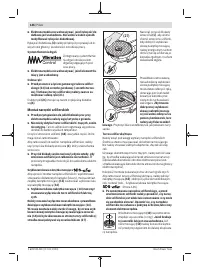
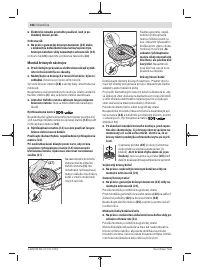
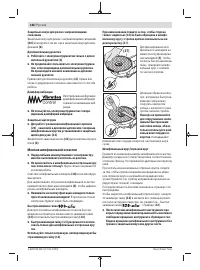
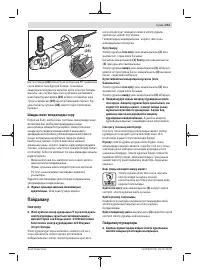
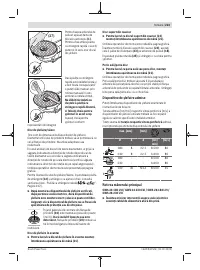
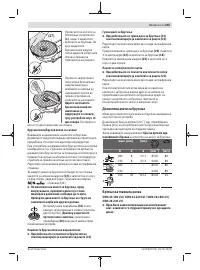
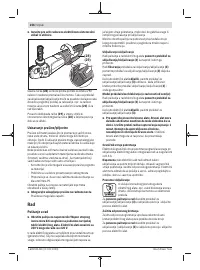
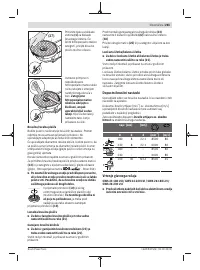
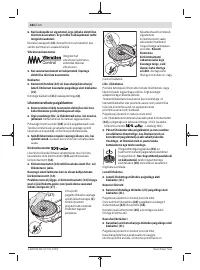
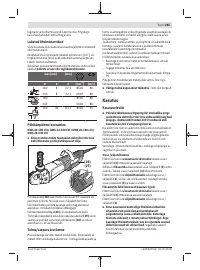
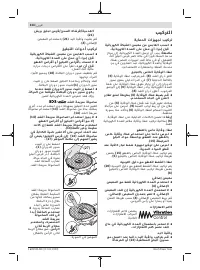
Protective Guard for Grinding
Open the clamping lever
(8)
. Place the protective guard
(6)
with the coding cam
(7)
engaging into the coding groove on
the spindle collar until the shoulder of the protective guard is
seated against the flange of the power tool, and turn the pro-
tective guard
(6)
to the required position. Close the clamp-
ing lever
(8)
.
u
Adjust the protective guard
(6)
such that sparking in
the direction of the operator is prevented.
The tensioning force of the clamp from the protective
guard
(6)
can be changed by loosening or tightening the ad-
justment screw
(9)
. Ensure that protective guard
(6)
is fitted
securely and check it regularly.
Note:
The coding cams on the protective guard
(6)
ensure
that only a protective guard that is suitable for the power
tool can be fitted.
Protective guard for cutting
u
Always use the protective guard for cutting (15) when
cutting bonded abrasives.
u
Provide sufficient dust extraction when cutting stone.
The protective guard for cutting
(15)
is fitted in the same
way as the protective guard for grinding
(6)
.
Extraction guard for cutting with a guide block
The extraction guard for cutting with a guide block
(20)
is fit-
ted in the same way as the protective guard for grinding
(6)
.
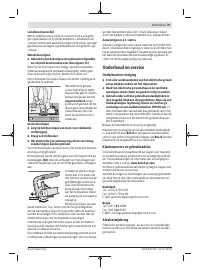
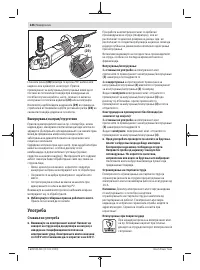
Side handle
u
Do not operate your power tool without the side
handle
(4)
.
u
Do not continue to use the power tool if the auxiliary
handle is damaged. Do not make any alterations to the
auxiliary handle.
Screw the side handle
(4)
on the left or right of the machine
head depending on how your are working.
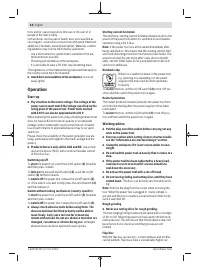
Vibration Damping
The integrated vibration
damping function reduces
the generated vibration.
u
Do not continue to use the power tool if the damping
element is damaged.
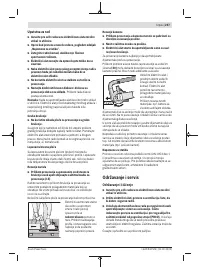
Hand guard
u
Always fit the hand guard (21)
when working with the
rubber sanding plate
(23)
or with the cup brush/disc
brush/flap disc.
Attach the hand guard
(21)
to the side handle
(4)
.
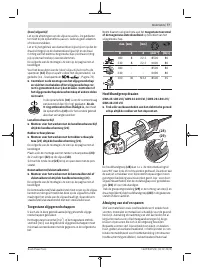
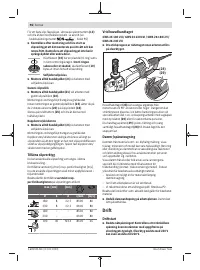
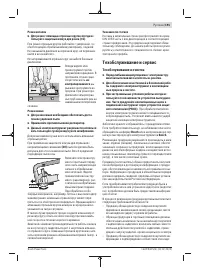
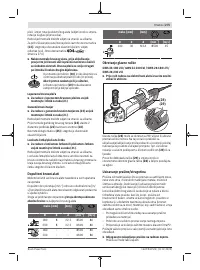
Fitting the abrasive tools
u
Pull the plug out of the socket before carrying out any
work on the power tool.
u
Do not touch grinding and cutting discs until they have
cooled down.
The discs can become very hot while work-
ing.
Clean the grinding spindle
(18)
and all the parts to be fitted.
Lock the grinding spindle with the spindle lock button
(1)
before clamping and releasing the abrasive tools.
u
Do not press the spindle lock button while the grind-
ing spindle is moving.
The power tool may become dam-
aged if you do this.
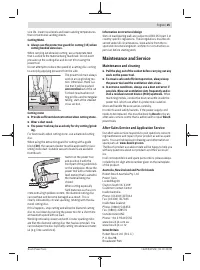
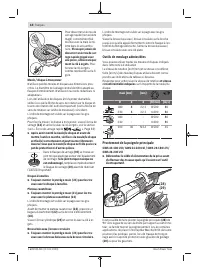
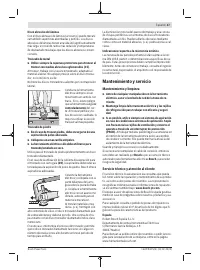
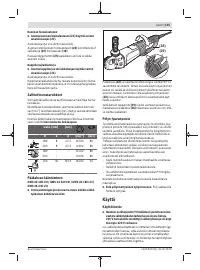
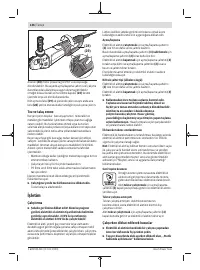
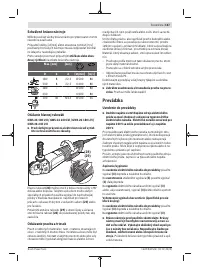
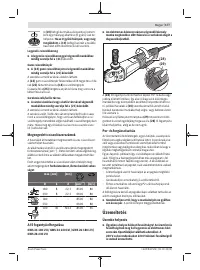
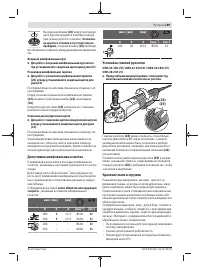
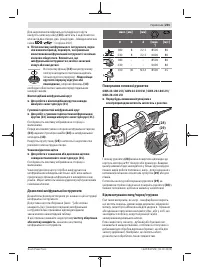
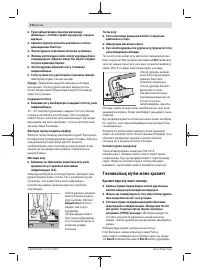
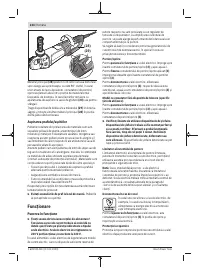
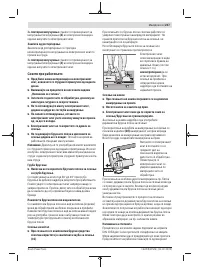
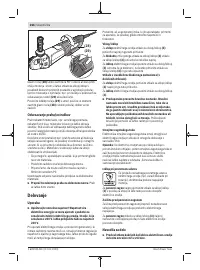
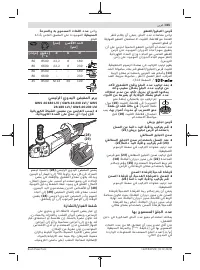
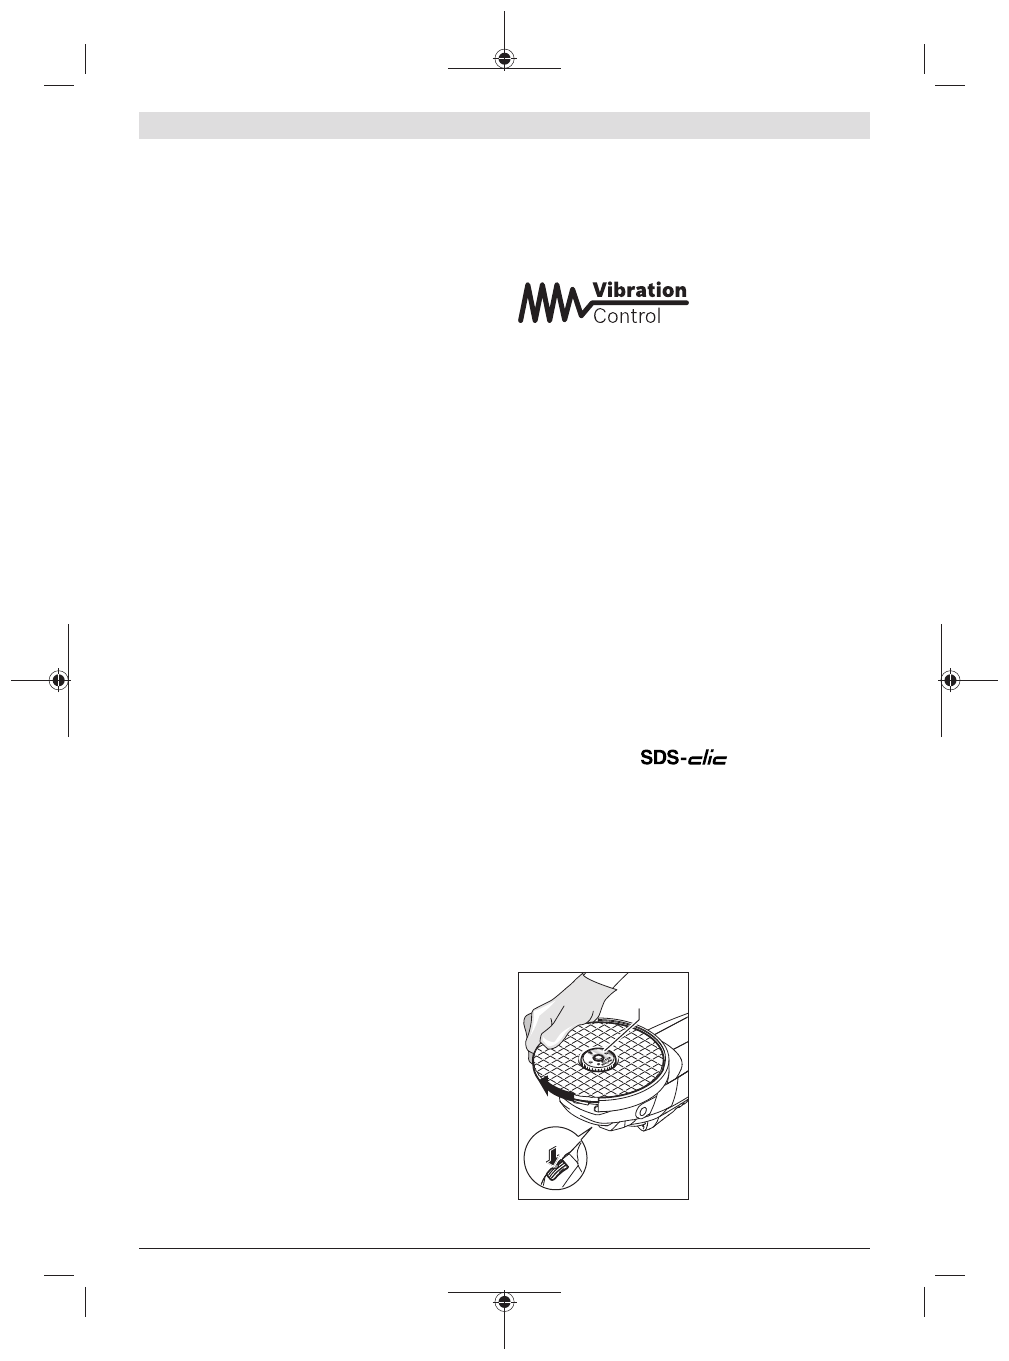
Quick-clamping nut
To change the abrasive tool easily without having to use any
additional tools, you can use the quick-clamping nut
(14)
in-
stead of the clamping nut
(13)
.
u
The quick-clamping nut
(14)
may be used only for
grinding or cutting discs.
Only use quick-clamping nuts (14)
that are in good work-
ing order and not damaged.
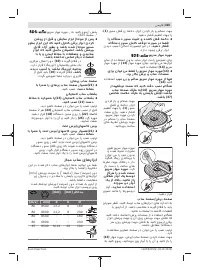
When screwing on, make sure that the printed side of the
quick-clamping nut
(14)
is not facing the grinding disc;
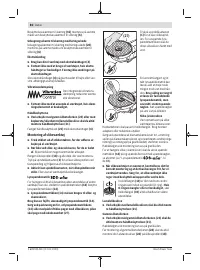
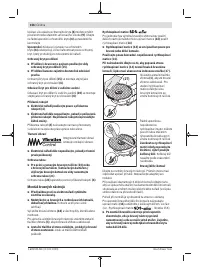
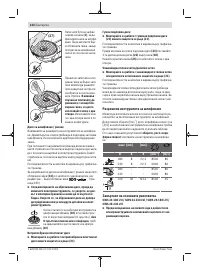
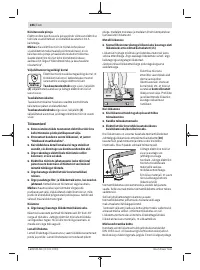
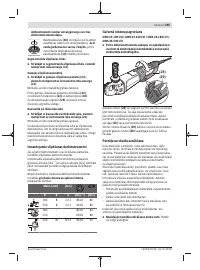
the arrow must be pointing towards the index mark (27).
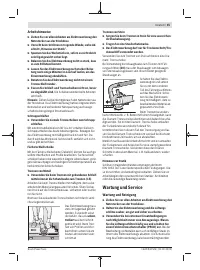
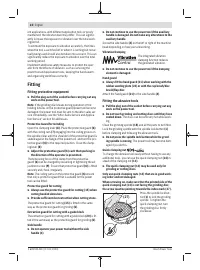
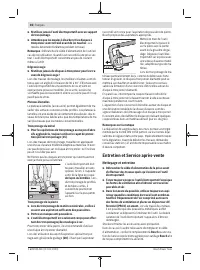
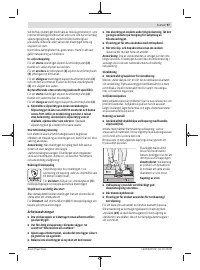
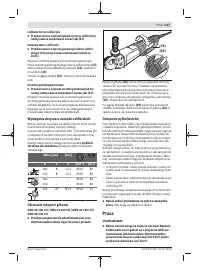
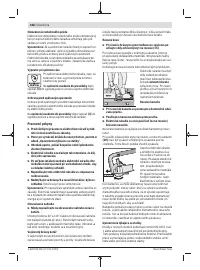
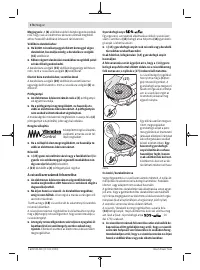
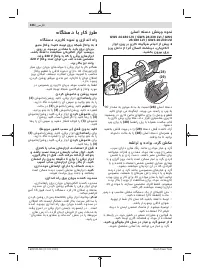
(27)
Press the spindle lock but-
ton
(1)
to lock the grinding
spindle. To tighten the
quick-clamping nut, turn
the grinding disc firmly
clockwise.
1 609 92A 5FE | (12.02.2020)
Bosch Power Tools
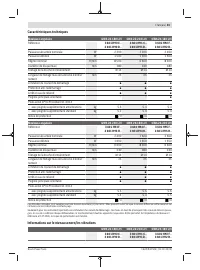
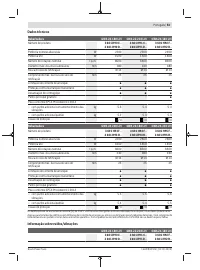
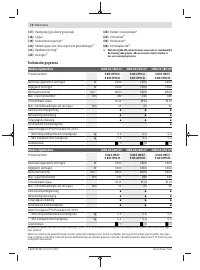
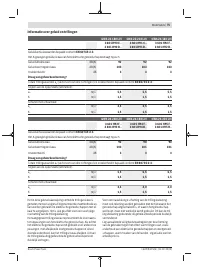
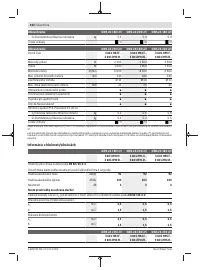
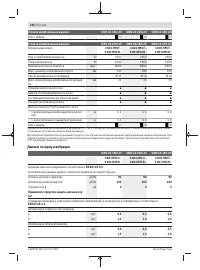
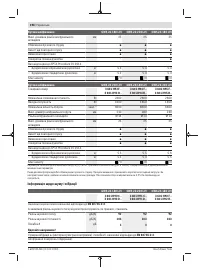
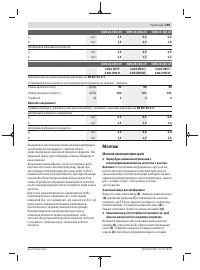
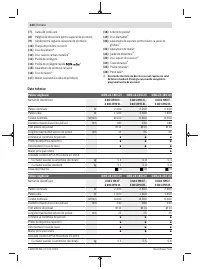
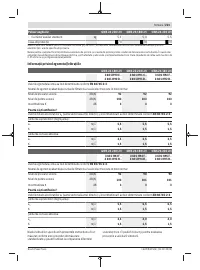
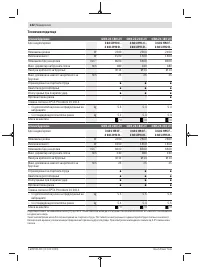
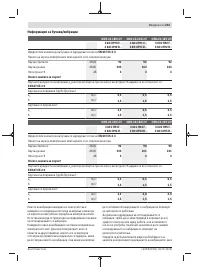
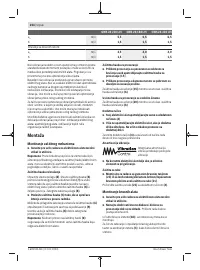
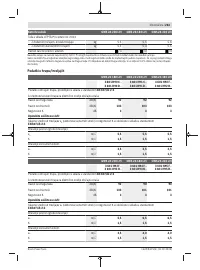
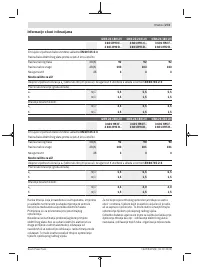
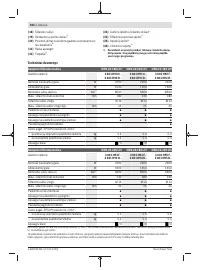
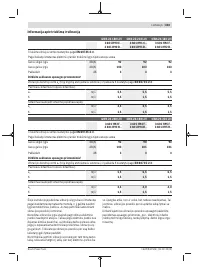
Характеристики

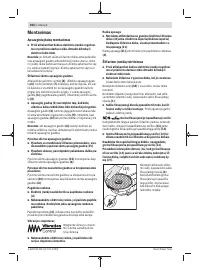
Остались вопросы?Не нашли свой ответ в руководстве или возникли другие проблемы? Задайте свой вопрос в форме ниже с подробным описанием вашей ситуации, чтобы другие люди и специалисты смогли дать на него ответ. Если вы знаете как решить проблему другого человека, пожалуйста, подскажите ему :)


